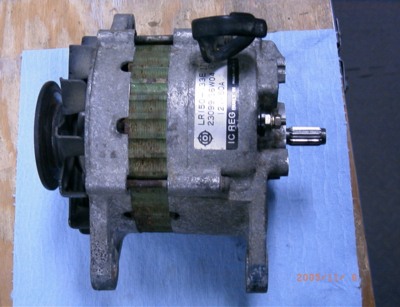
Hitachi LR150 50A alternator
Posted: Sat Jan 06, 2007 10:20 am
Getting around to writing a post I've been meaning to do for nine months . . .
I did not take as many pictures as I should have, nor could I get really good close-ups, and I seem to have misplaced some of my notes on this one (like all the part nos. and prices).
(Click on any picture for larger)
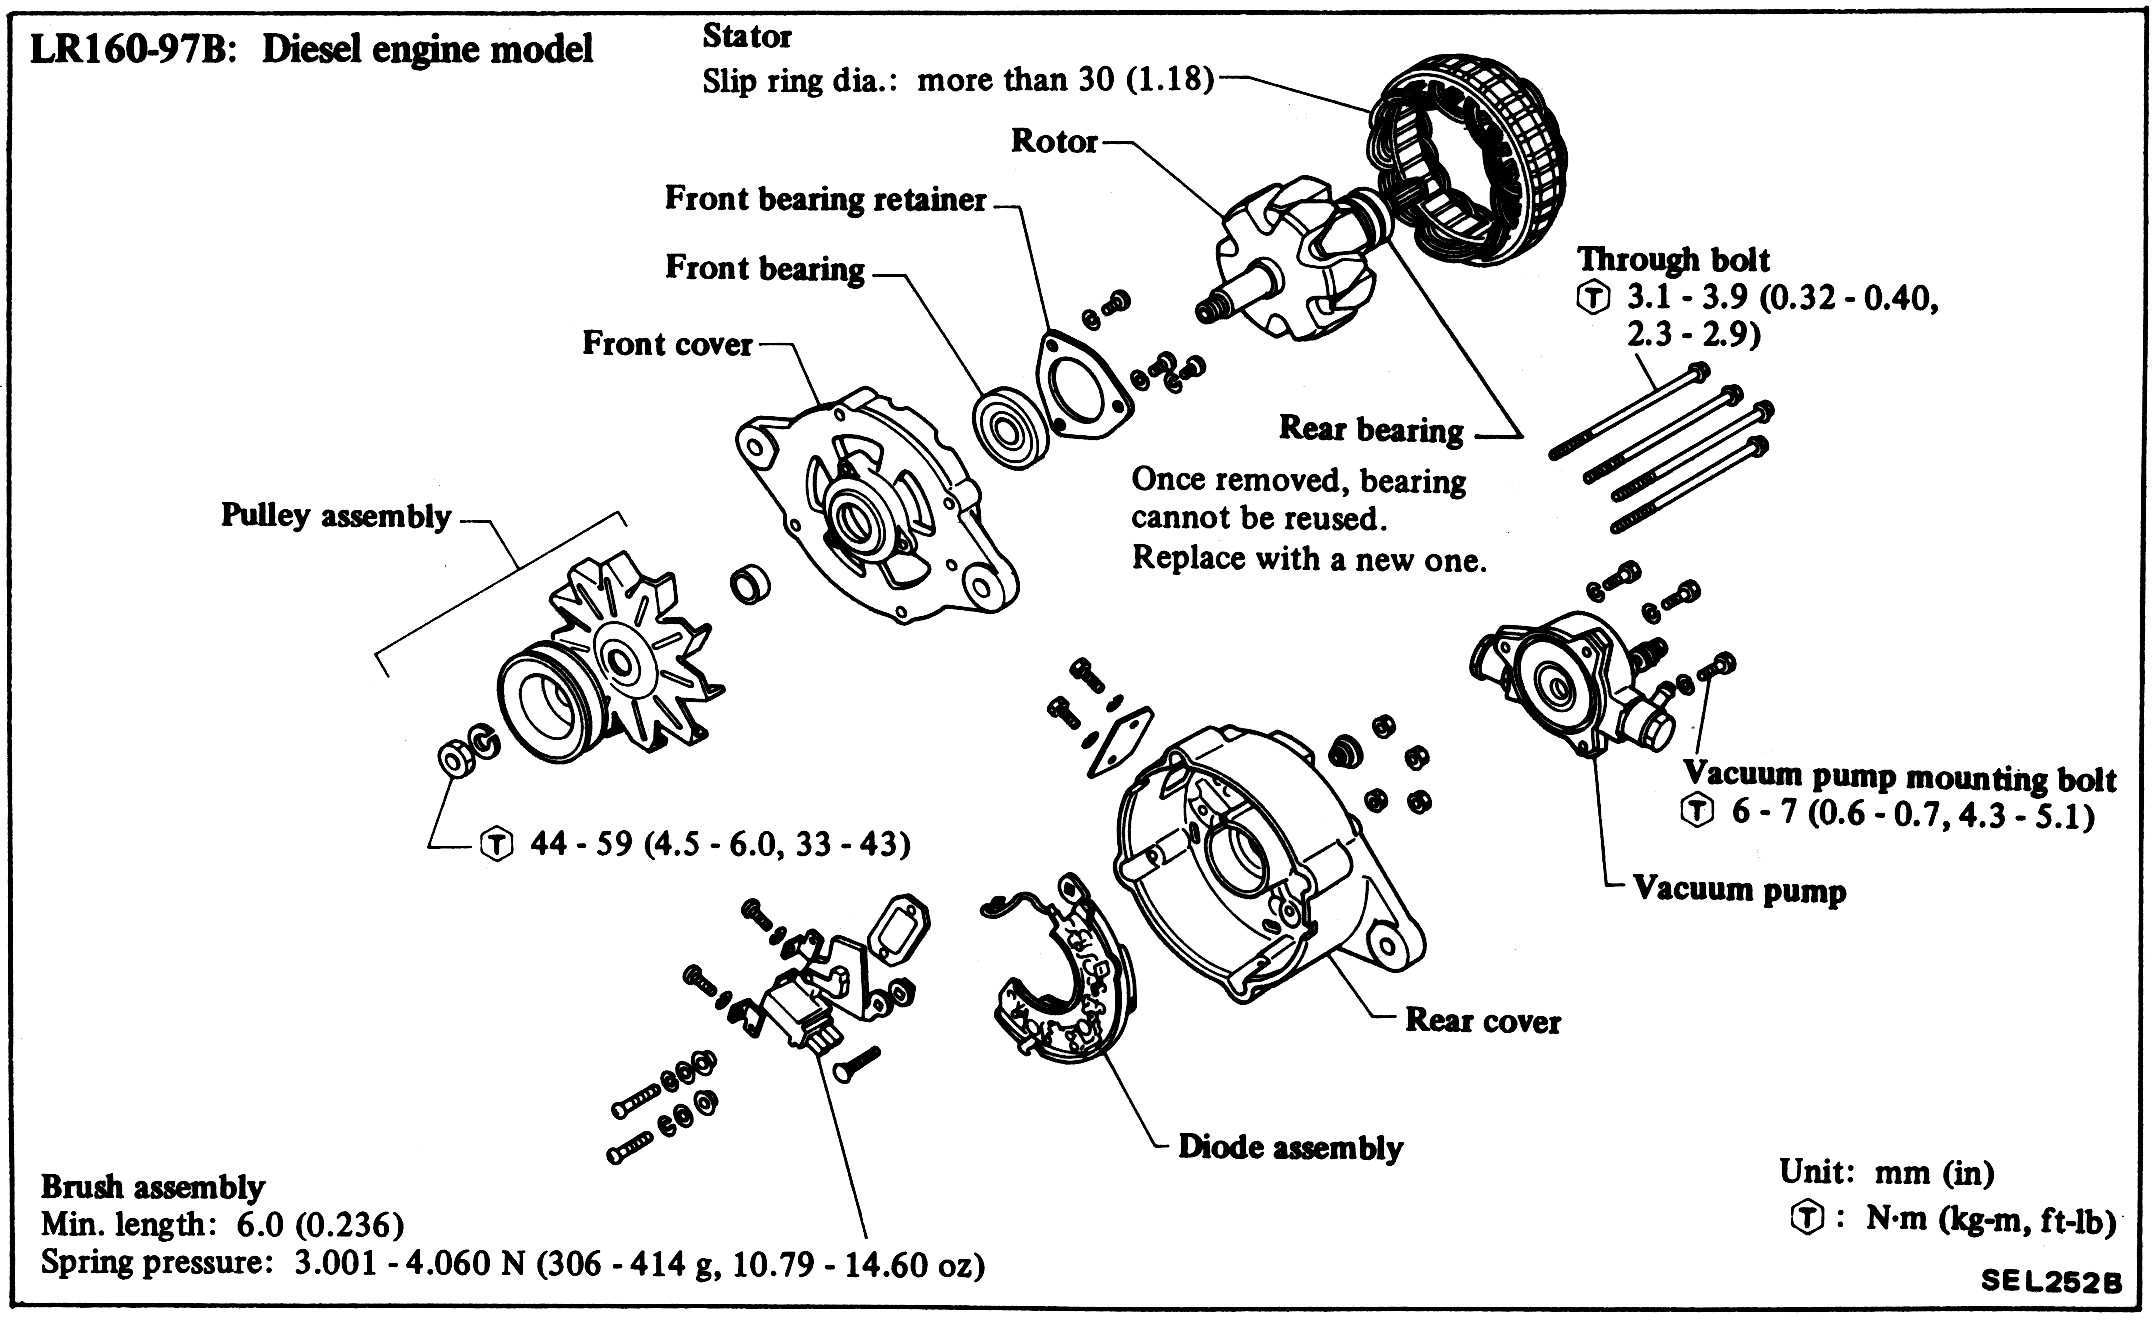
From the 1982 720 FSM, page EL-25:
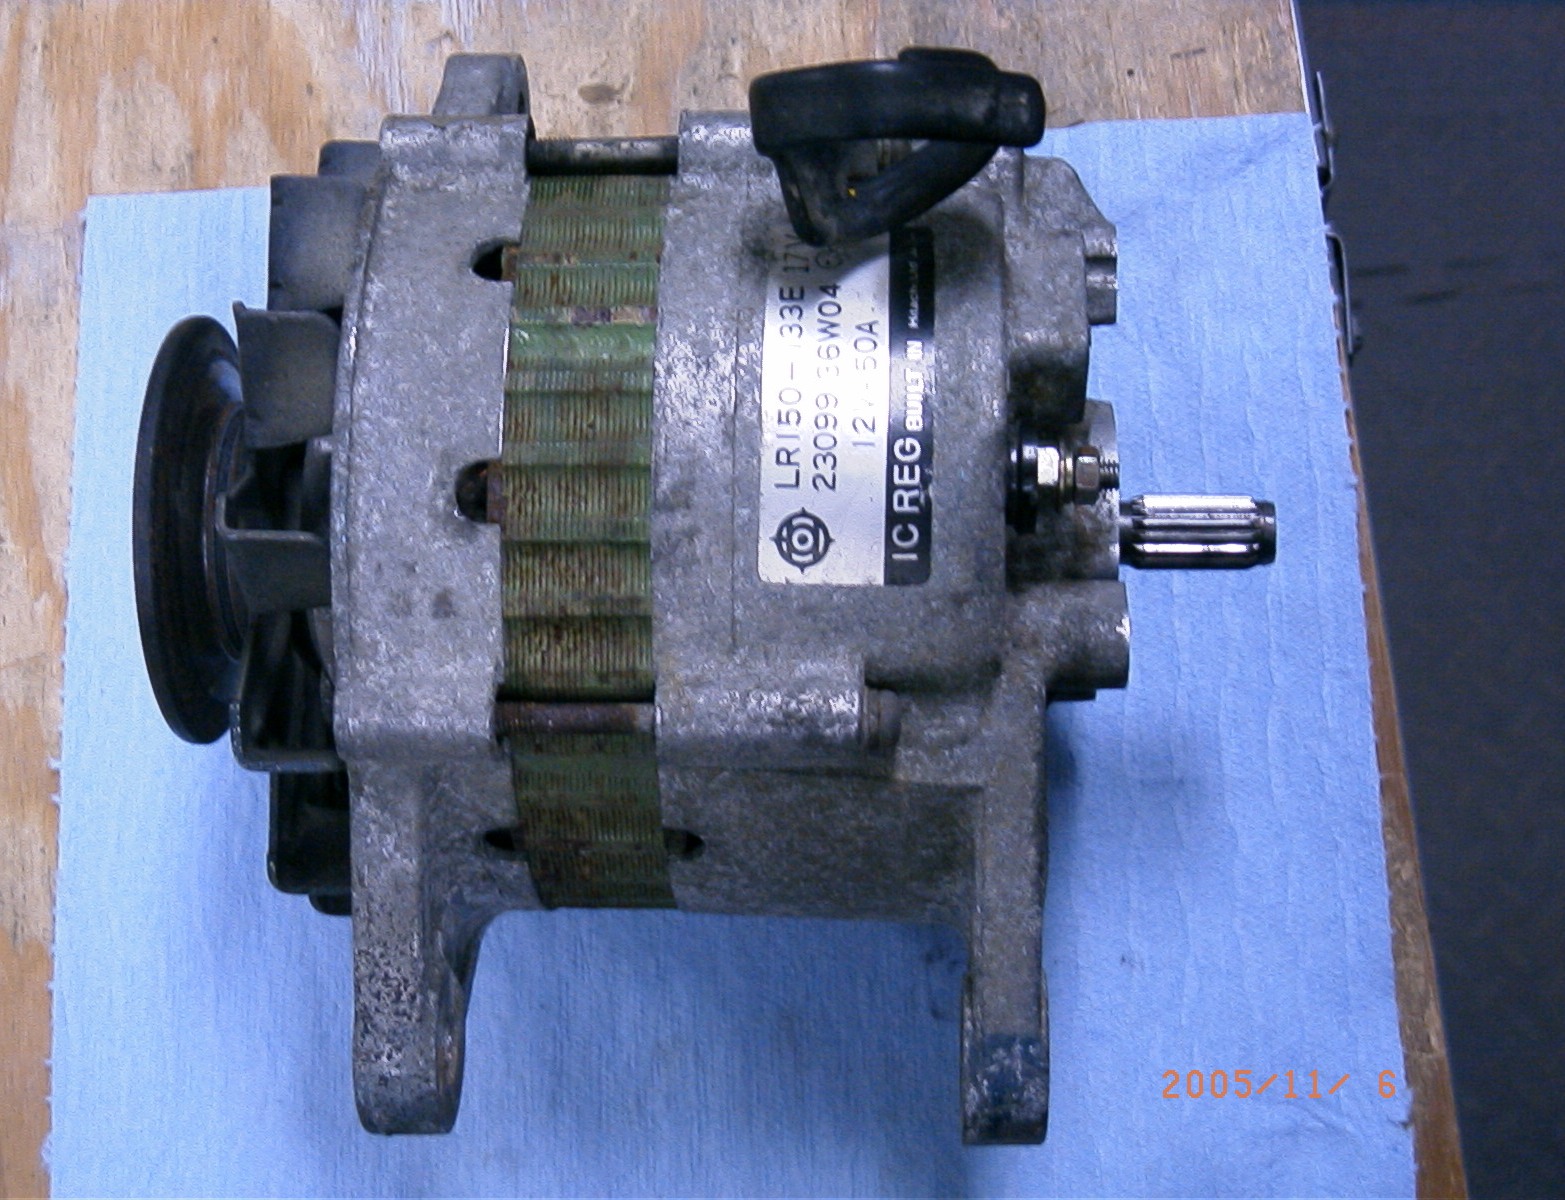
1982 720 SD22
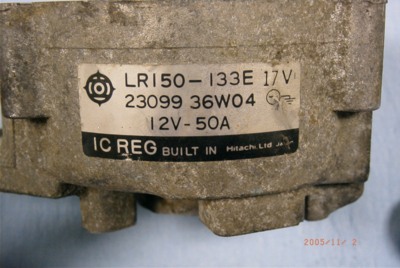
Hitachi LR150-133E 17V
Nissan part No. 23099-36W04
12V - 50A
My symptom was the all-too-common one: low alternator output. Not no output, so the idiot light doesn't come on. Max output of around 10A.
Remove vacuum pump, split the case. When you unbolt the vacuum pump, black oil will run all over, so prepare accordingly.

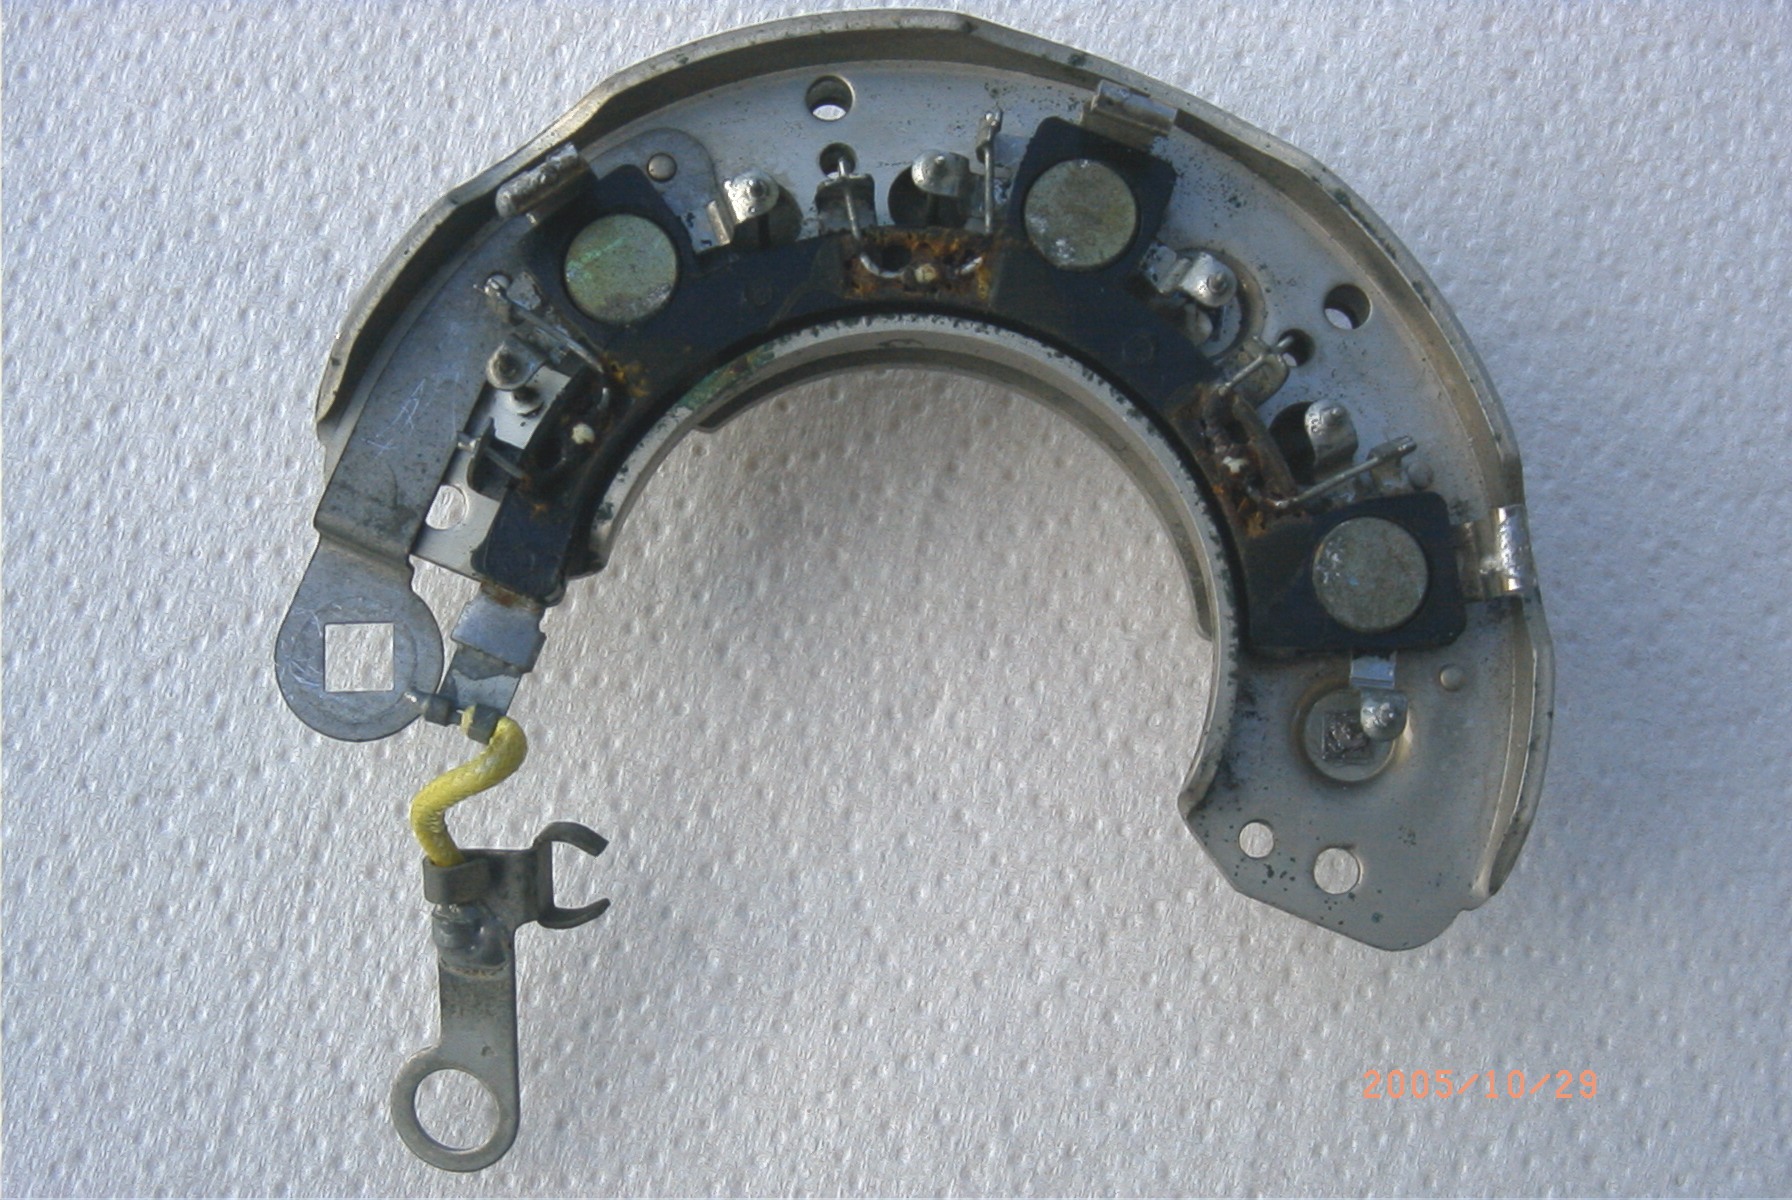
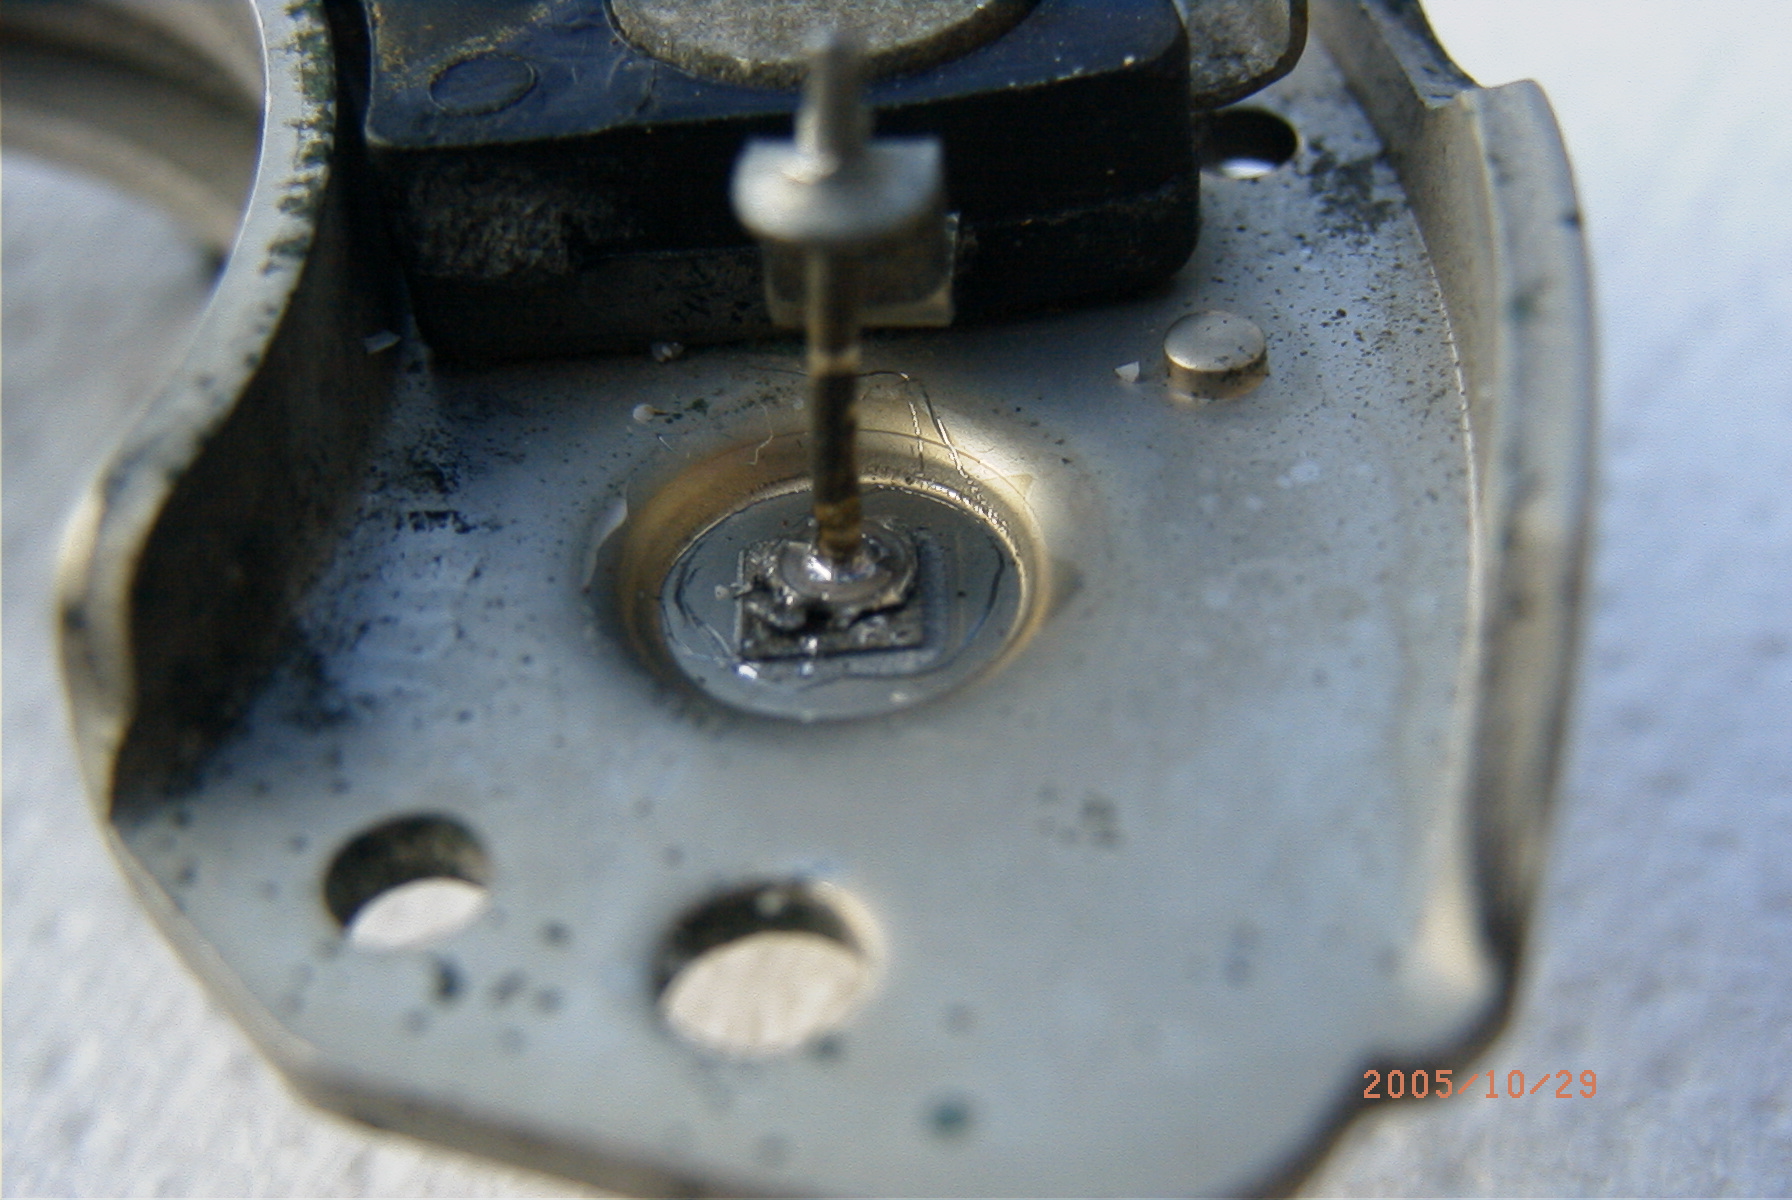
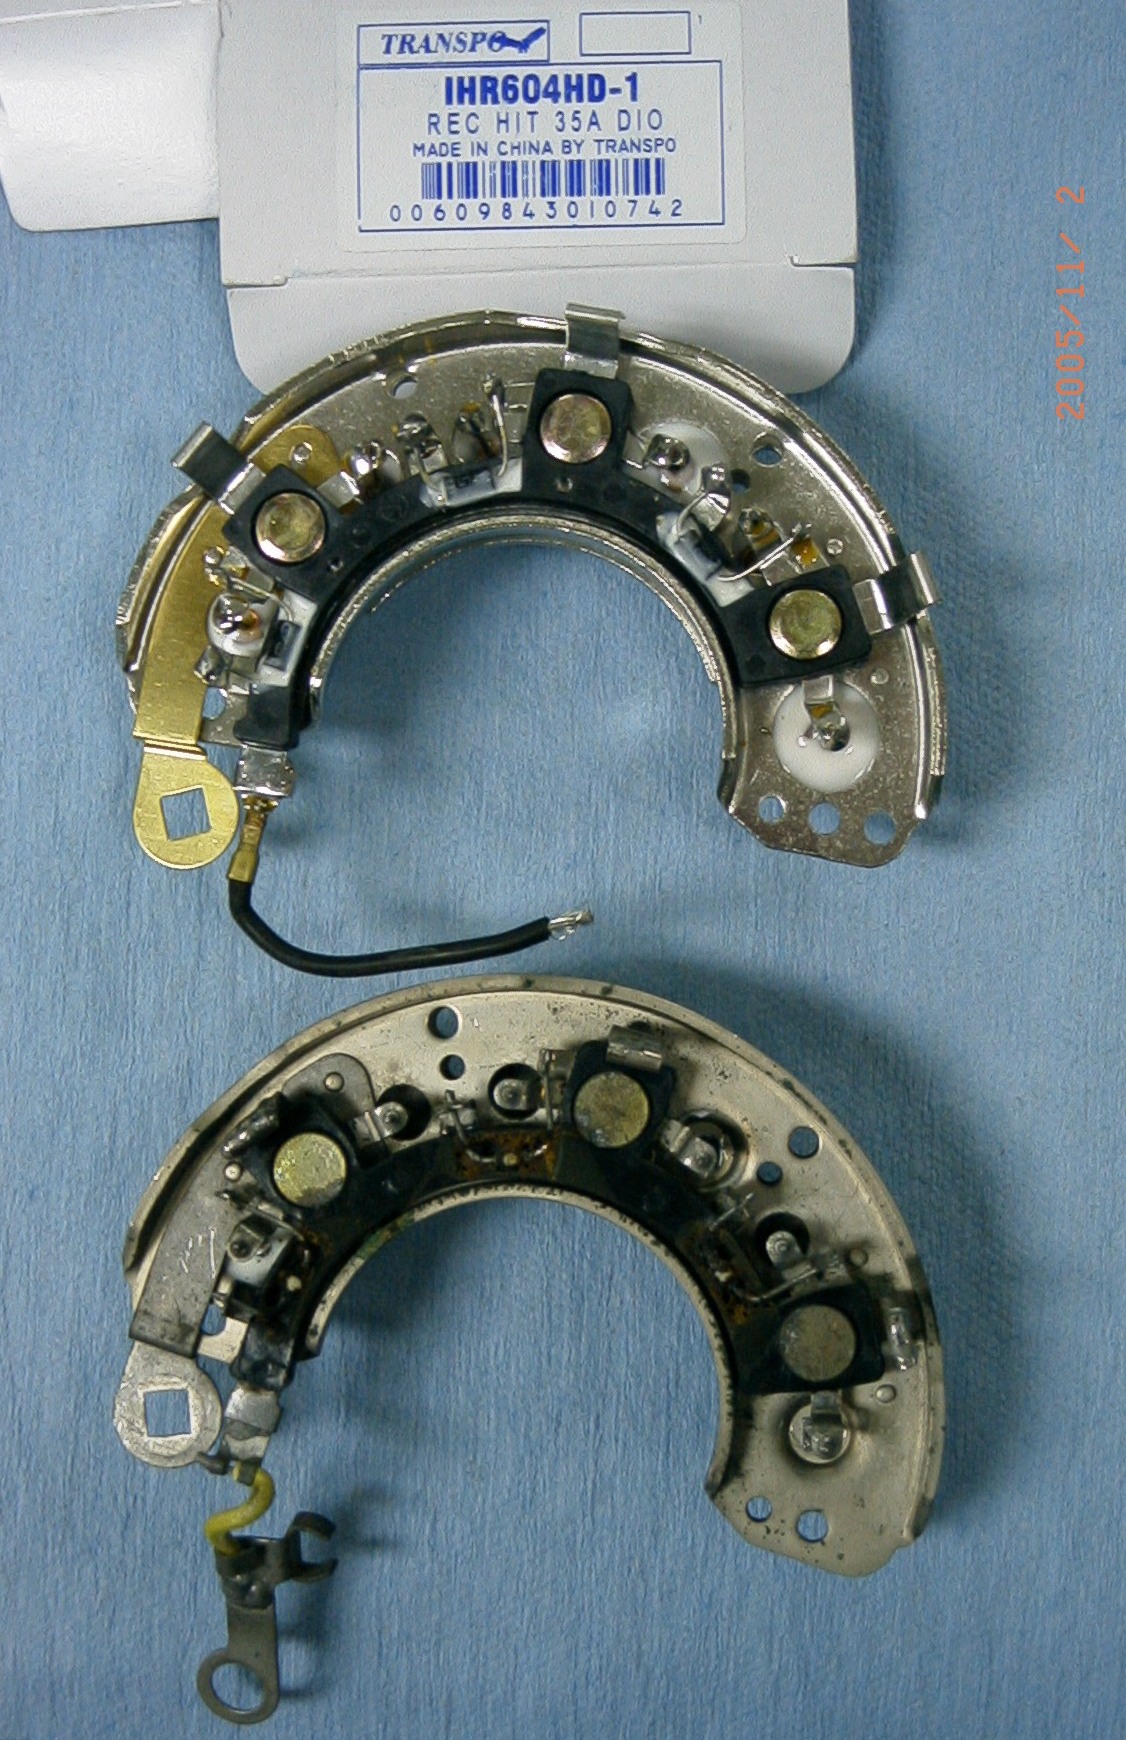
Diode Assy.:
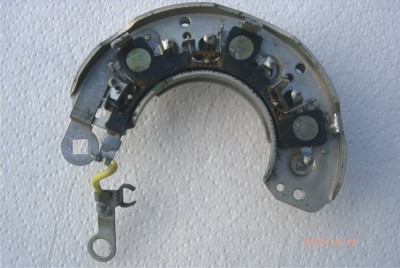
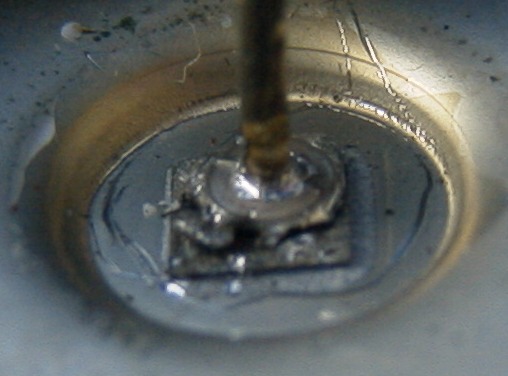
When the OEM diodes break, they physically pull apart, anode from cathode:

With the white silicone potting removed, you can see this better:
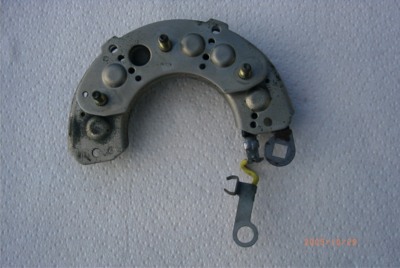
The replacement diode assy I chose is a Transpo IHR604HD-1. This is a "heavy duty" version (35a diodes rather than 25a diodes) of the std Transpo IHR604.
Supposedly, other mfgr's part nos. for this diode assy. are:
Hitachi L150-13204
Isuzu 8-94237-729-0
Nissan 23232-W1700
New Era D-051
Standard D-32
Wai 31-8106
Wells DR307
Renard 11152
Unipoint REC-661
Echlin AC70

As you can see, the diode trio lead is bare, so I had to transfer the ring terminal over. Soldering every connection is imperative, you cannot get away with crimp connections only.
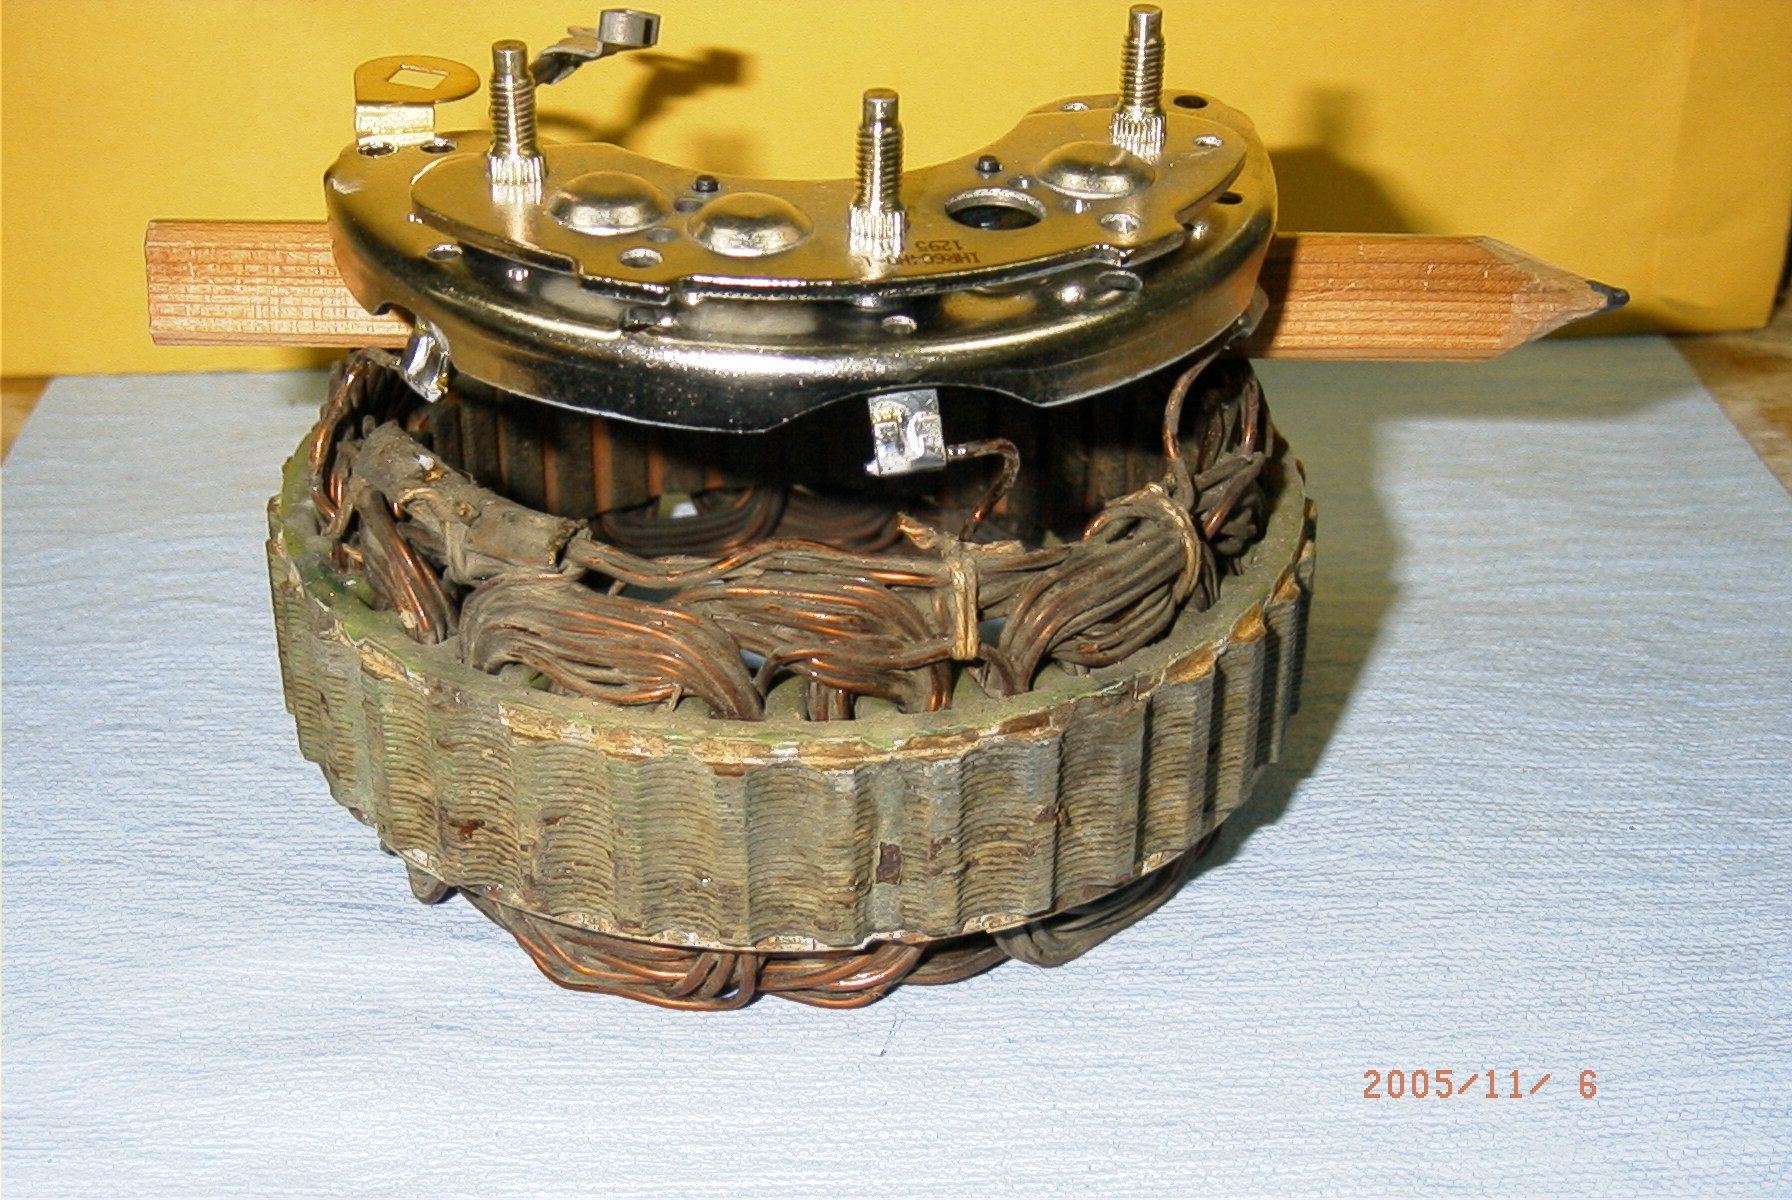
I used a spacer (carpentry pencil, in this case) to support the new diode assy. to the stator whilst I soldered the delta leads to it:

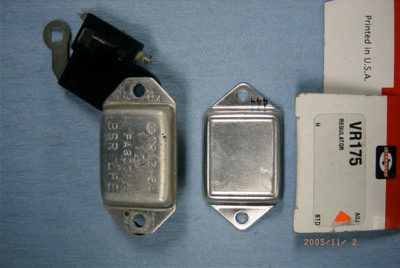
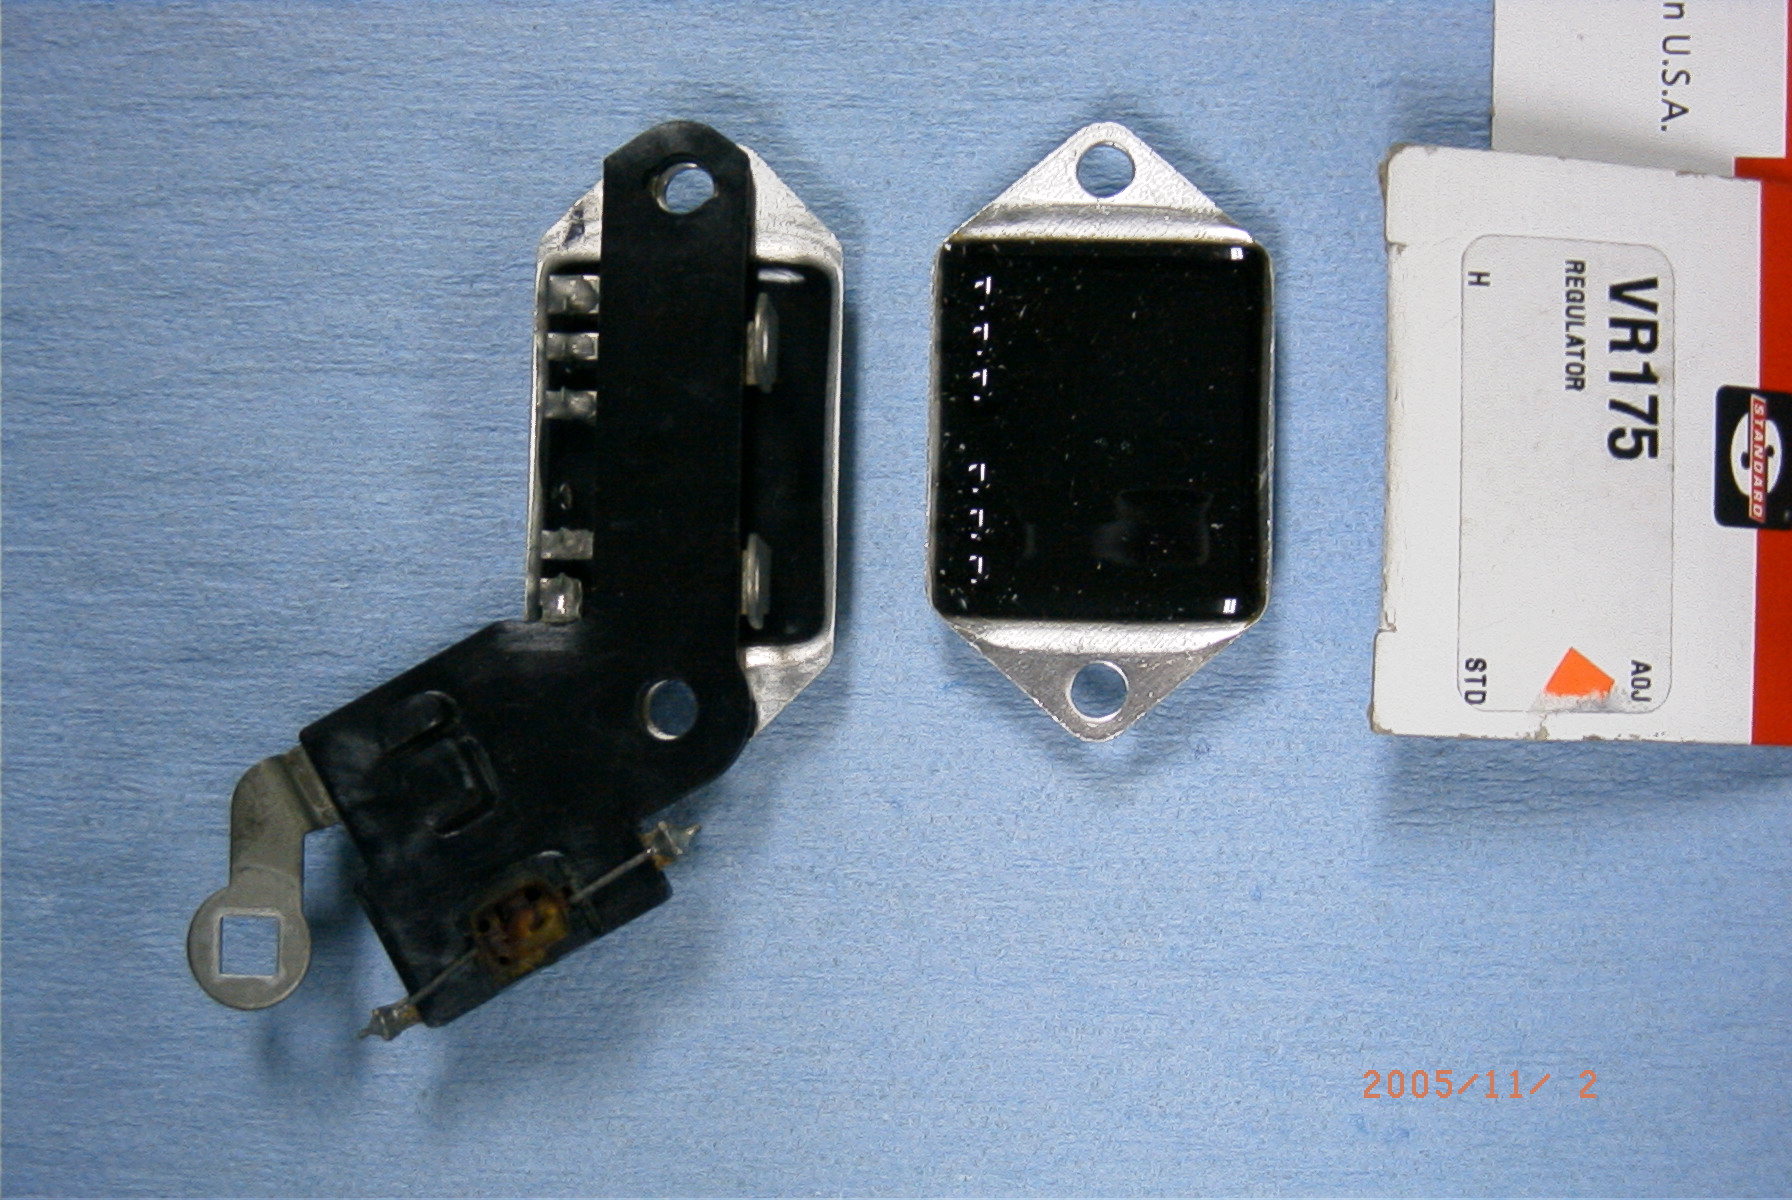
Voltage Regulator:
According to my local guru, the broken diodes' connections cause wild voltage spikes that weaken or destroy the integrated voltage regulator. For that reason, he always replaces the VR.
I chose a Standard VR175, mainly because I could source it in a reasonable timeframe.

In case you missed it, there's six low-heat solder connections to the VR terminals.
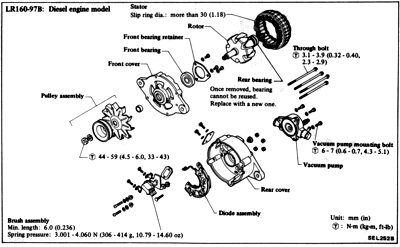
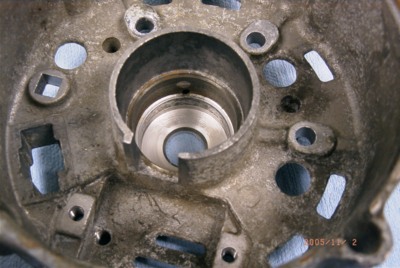
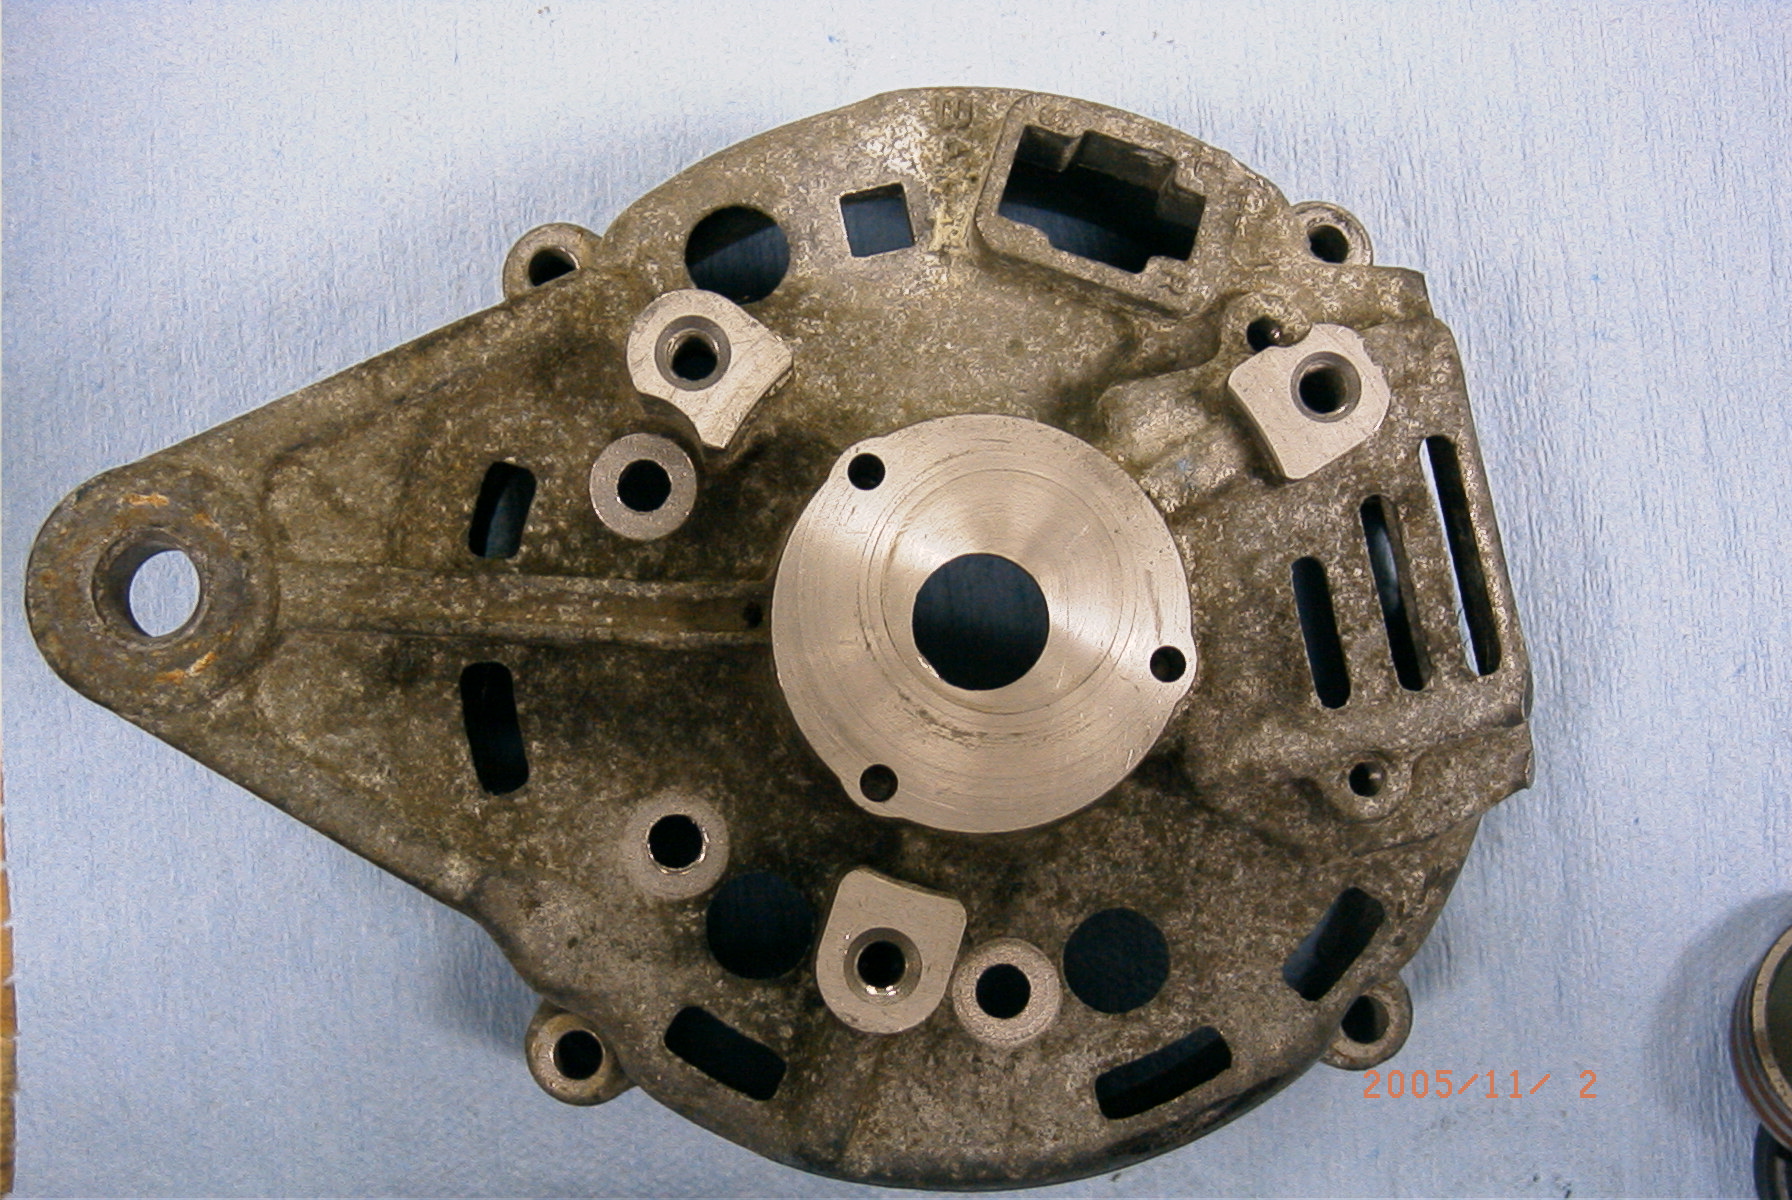
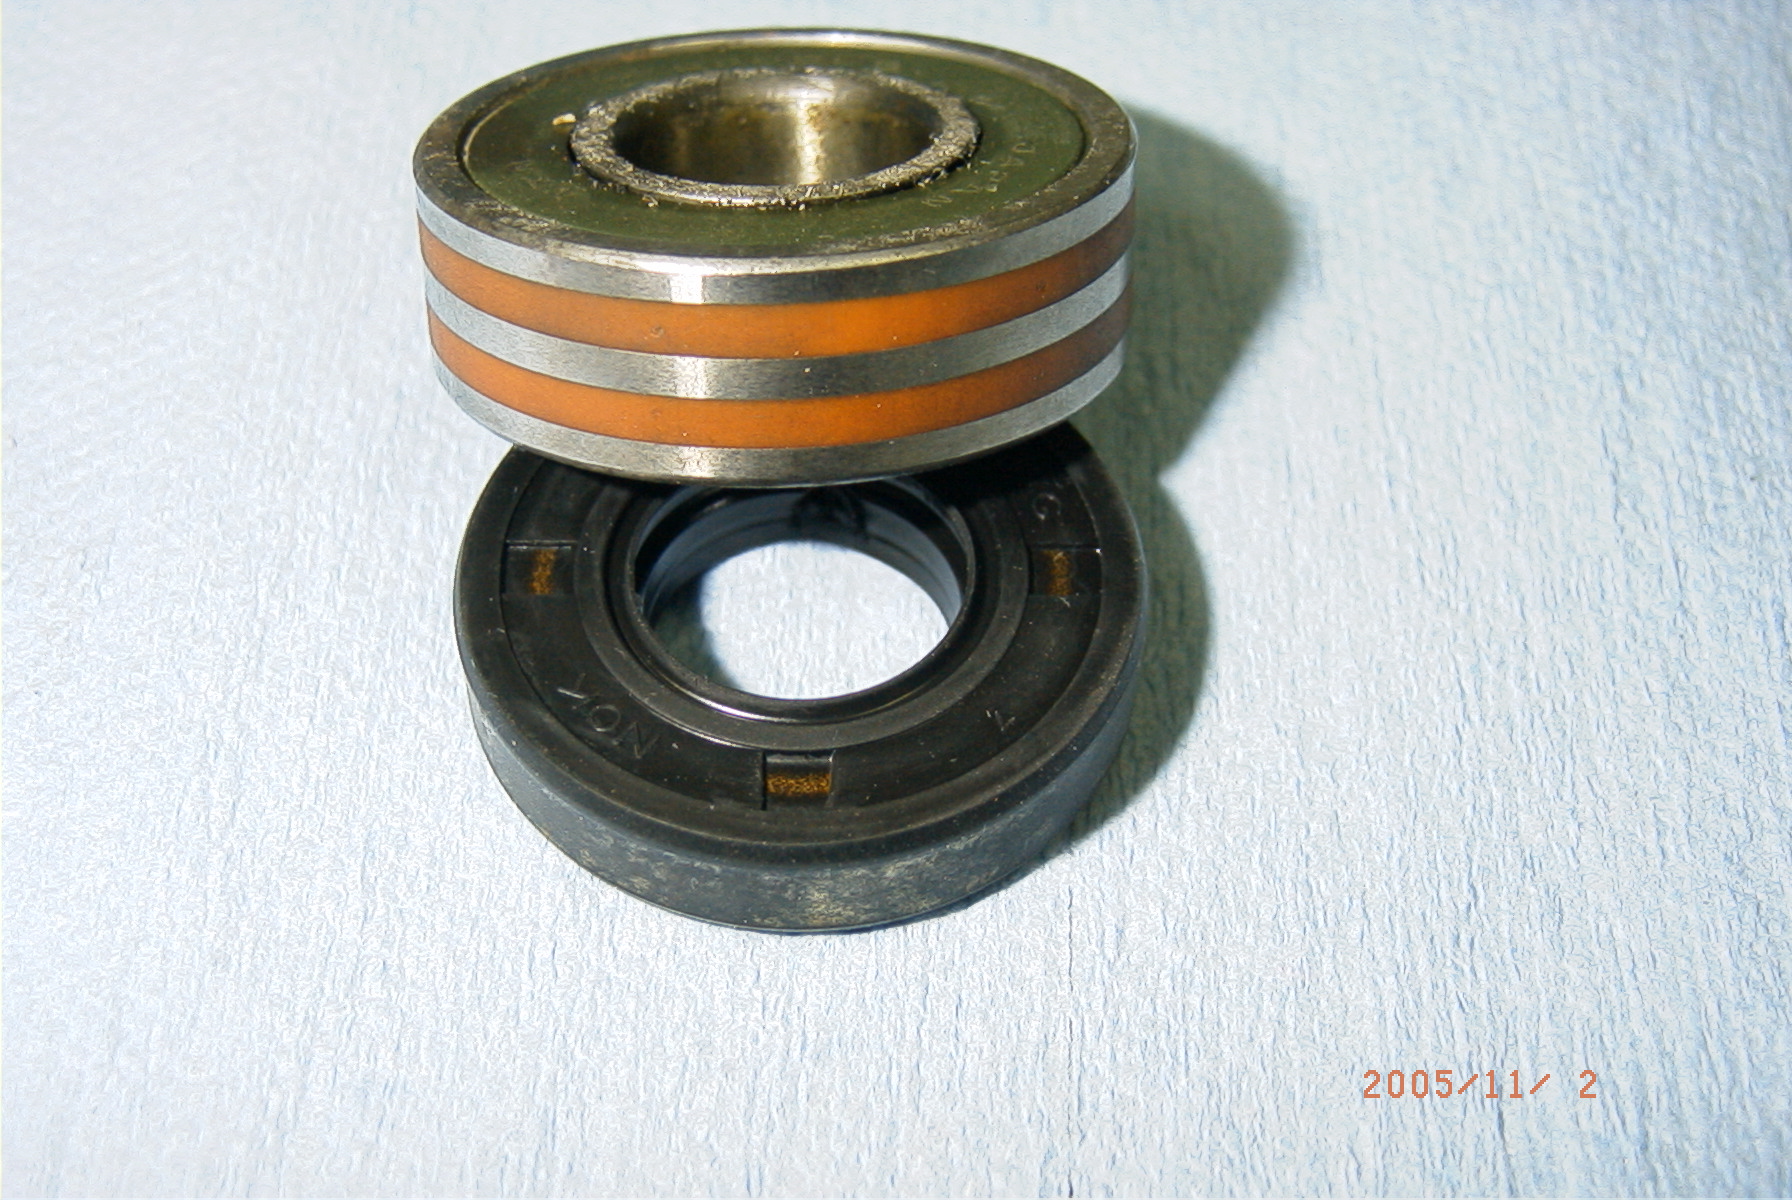
Bearings and seal:
I replaced the bearings:
Rear = NTN 6202LB, I used Federal-Mogul 303-CC
Front = Koyo 6303RD, I used Federal-Mogul 202-FF
They are commonly stocked part nos., no problem buying them "anywhere", but avoid the cheapest ones for long service life. I did not buy this special brg with the outer dual seal silicone strips. Instead, I bought the generic-style brg, and mounted it with silicone/RTV. Its purpose is to direct the majority of oil that might leak past a faulty shaft seal, through a drain hole in the bottom of the housing between the seal and brg, trying to keep the mess outside of the electrics.
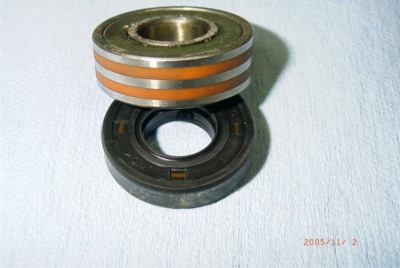
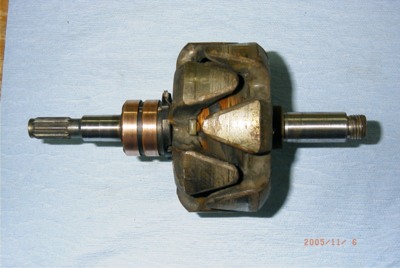
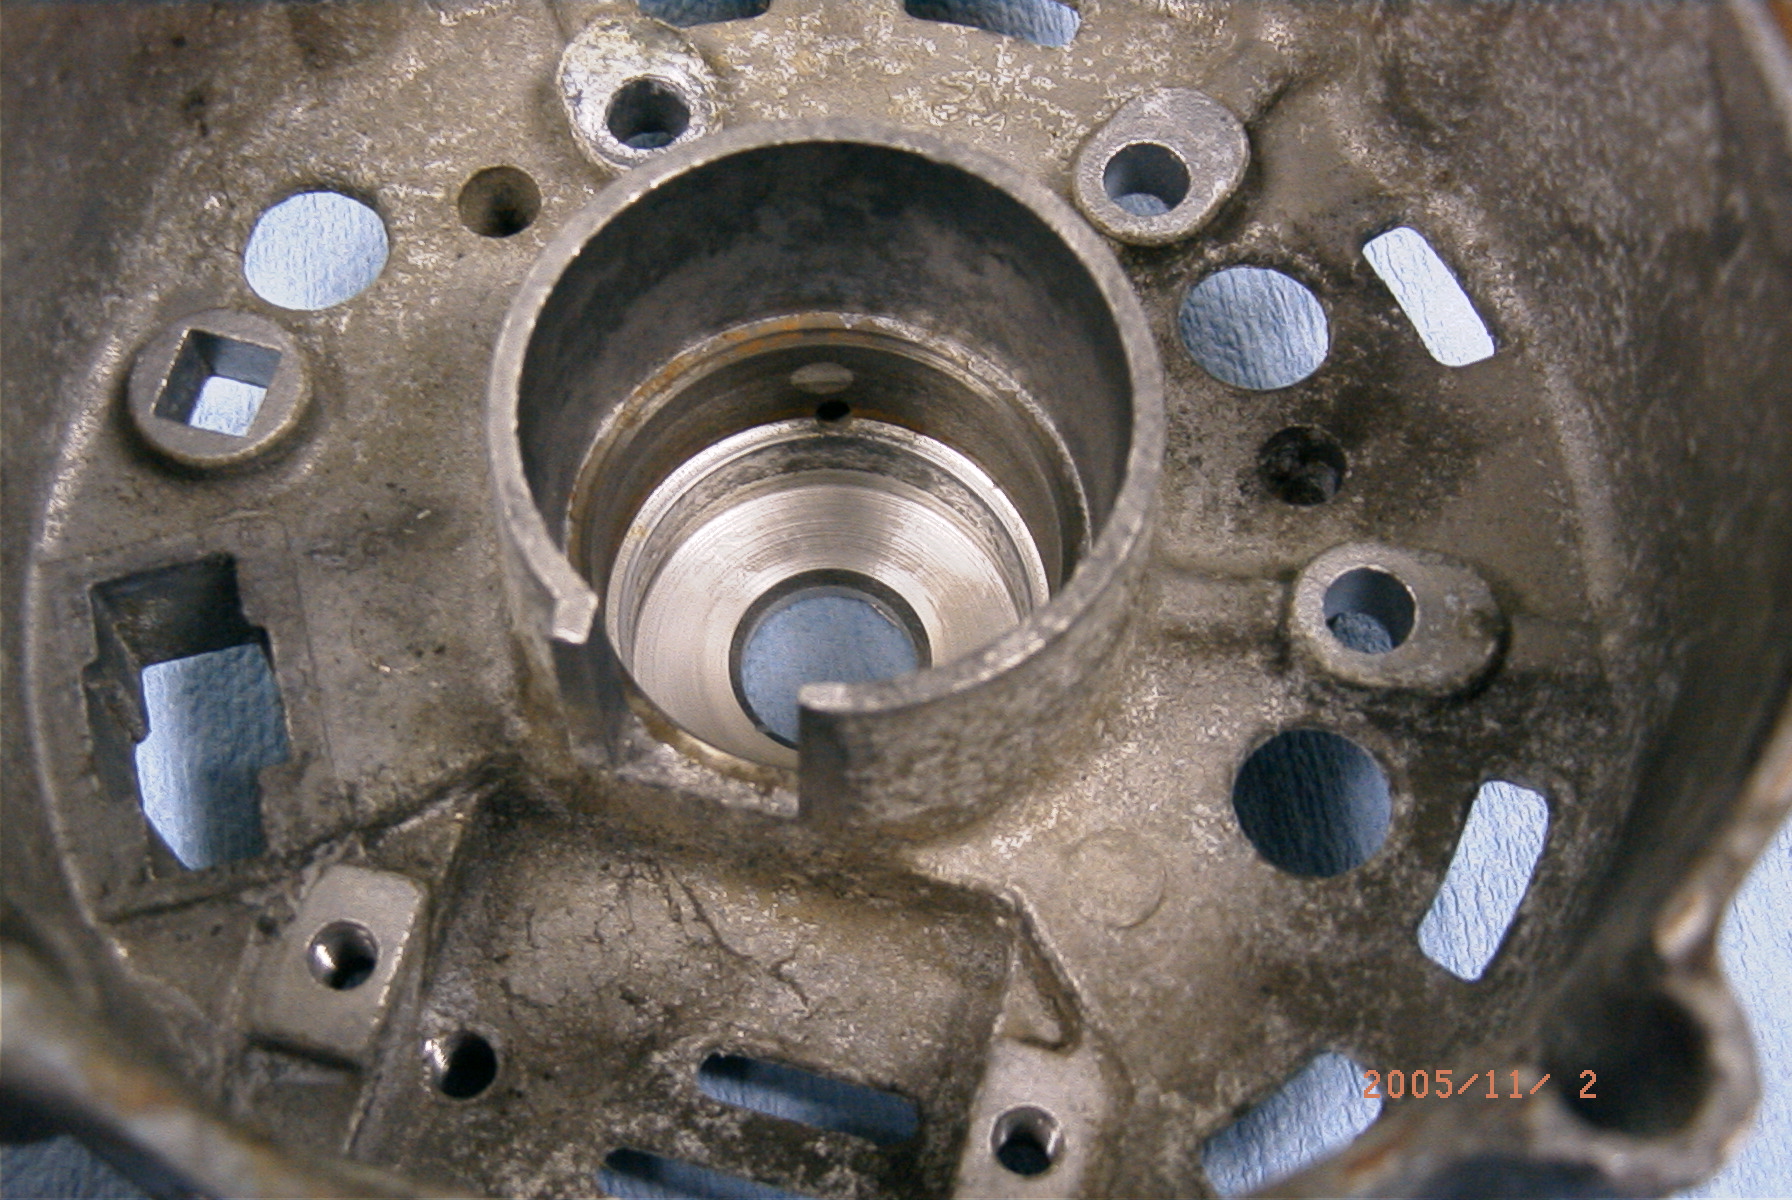
The rotor shaft to vacuum pump seal is a mandatory replacement item, any time you disassemble this kind of alternator that has an integral oil-lubed vacuum pump on the back. It's common for the OEM seal's lip to wear a groove in the rotor, which can make sealing this area problematic. There are three approaches to overcoming this. One is to replace the rotor (expensive!), another is to drop a spacer washer in the rear housing bore that moves the seal in the housing slightly, which places the seal's lip on an unworn location on the shaft. The third approach is to use a double-lip seal (in combination with the spacer washer, if desired), which is what I do. [EDIT 03May2014: See further in thread about SKF Speedi-Sleeve repair of grooved rotors.]

Those slip rings shown are in exceptionally good condition: they've been replaced, sometime before I got to it. Don't expect yours to look this good.
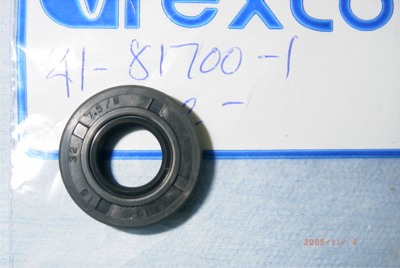
The seal that I removed was an NOK AE8407G, which IIRC didn't interchange to nuthin'.:
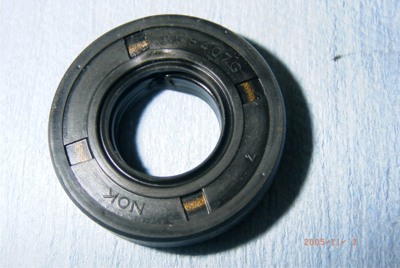
I have not found a wide source for this seal. I get mine from my local guru: PHLE 15x32x7.5/8mm, 41-81700-1, about $6 [edit 03May2014: member Corky reports he was sold a 15 x 32 x 7 TC double-lip seal. They seem to be fairly common, armed with that info]:
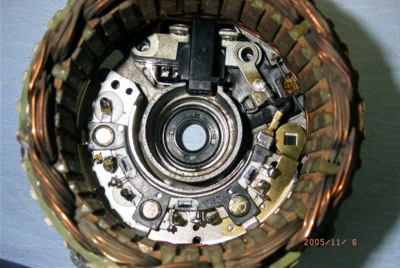
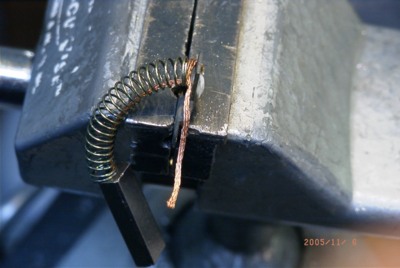
Brushes:
They wear out.
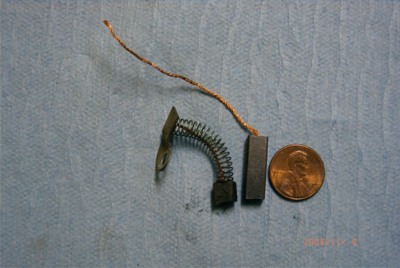
But they're easy to replace, even without removing the alternator (unless you have A/C, which hides the brushes' access cover). Some soldering is required.
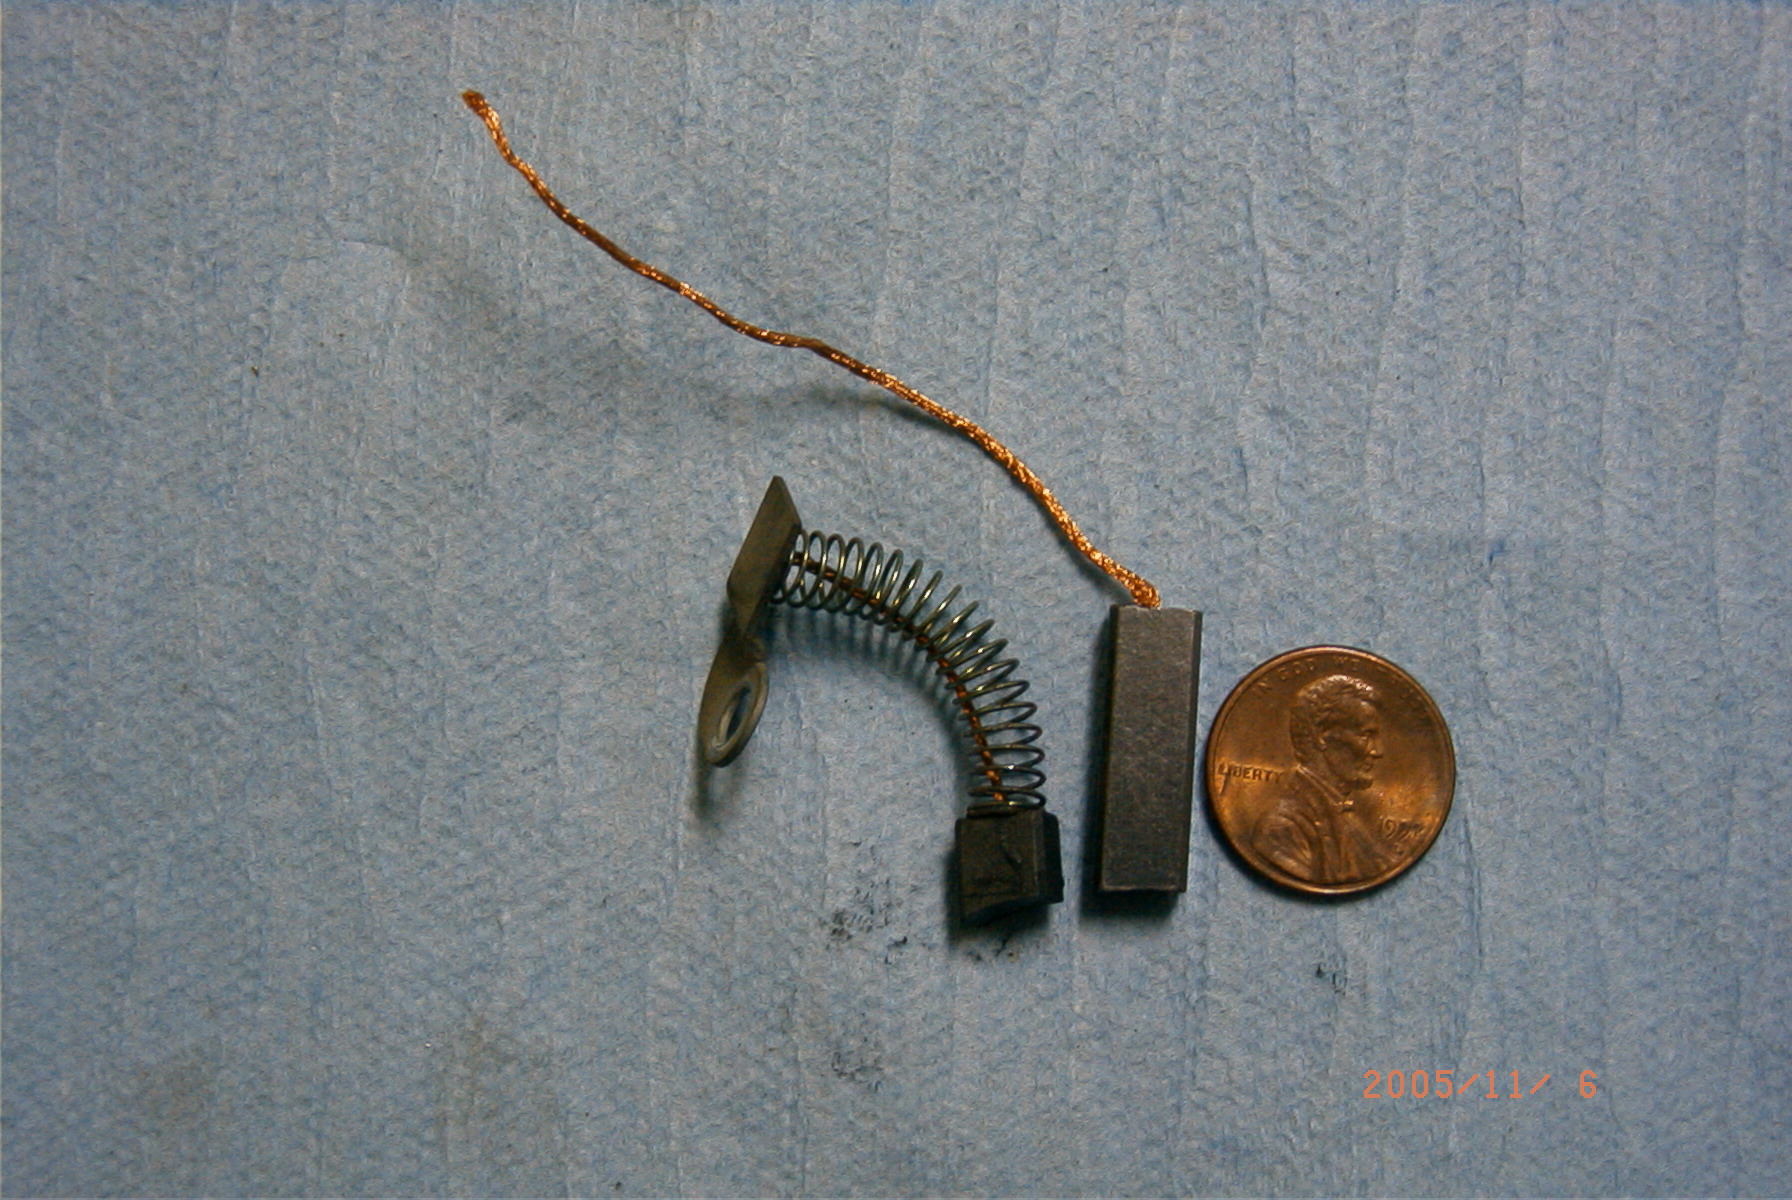
I think I used Standard JX118 brushes. They are 1.125" long when new.
The end of the brushes (in the Hitachi design) are angled. It matters which way they insert into the holder. I found that if installed backward, there is not enough surface area touching the rotor's slip rings for the VR to be able to put enough current in the field to start the alternator, so pay attention to the way the brushes are installed into the brush holder.
The slip rings get grooves worn into them from the brushes. Anecdotally, this wear is worst when the brushes reach their end-of-life: the spring tension is reduced and arcing can remove material. So far (as in brake rotors and drums), I've been able to get away with merely replacing the brushes in almost all cases. The new brushes take some time to wear in (grind in) to the old slip ring grooves but will eventually work fairly well, if at reduced output. Most slip rings have little material available for lathe work. Rotor rebuilders can install new slip rings, and I've had that done too in one case. Now you know why I never throw out the old alternator: core parts are valuable.
Testing:
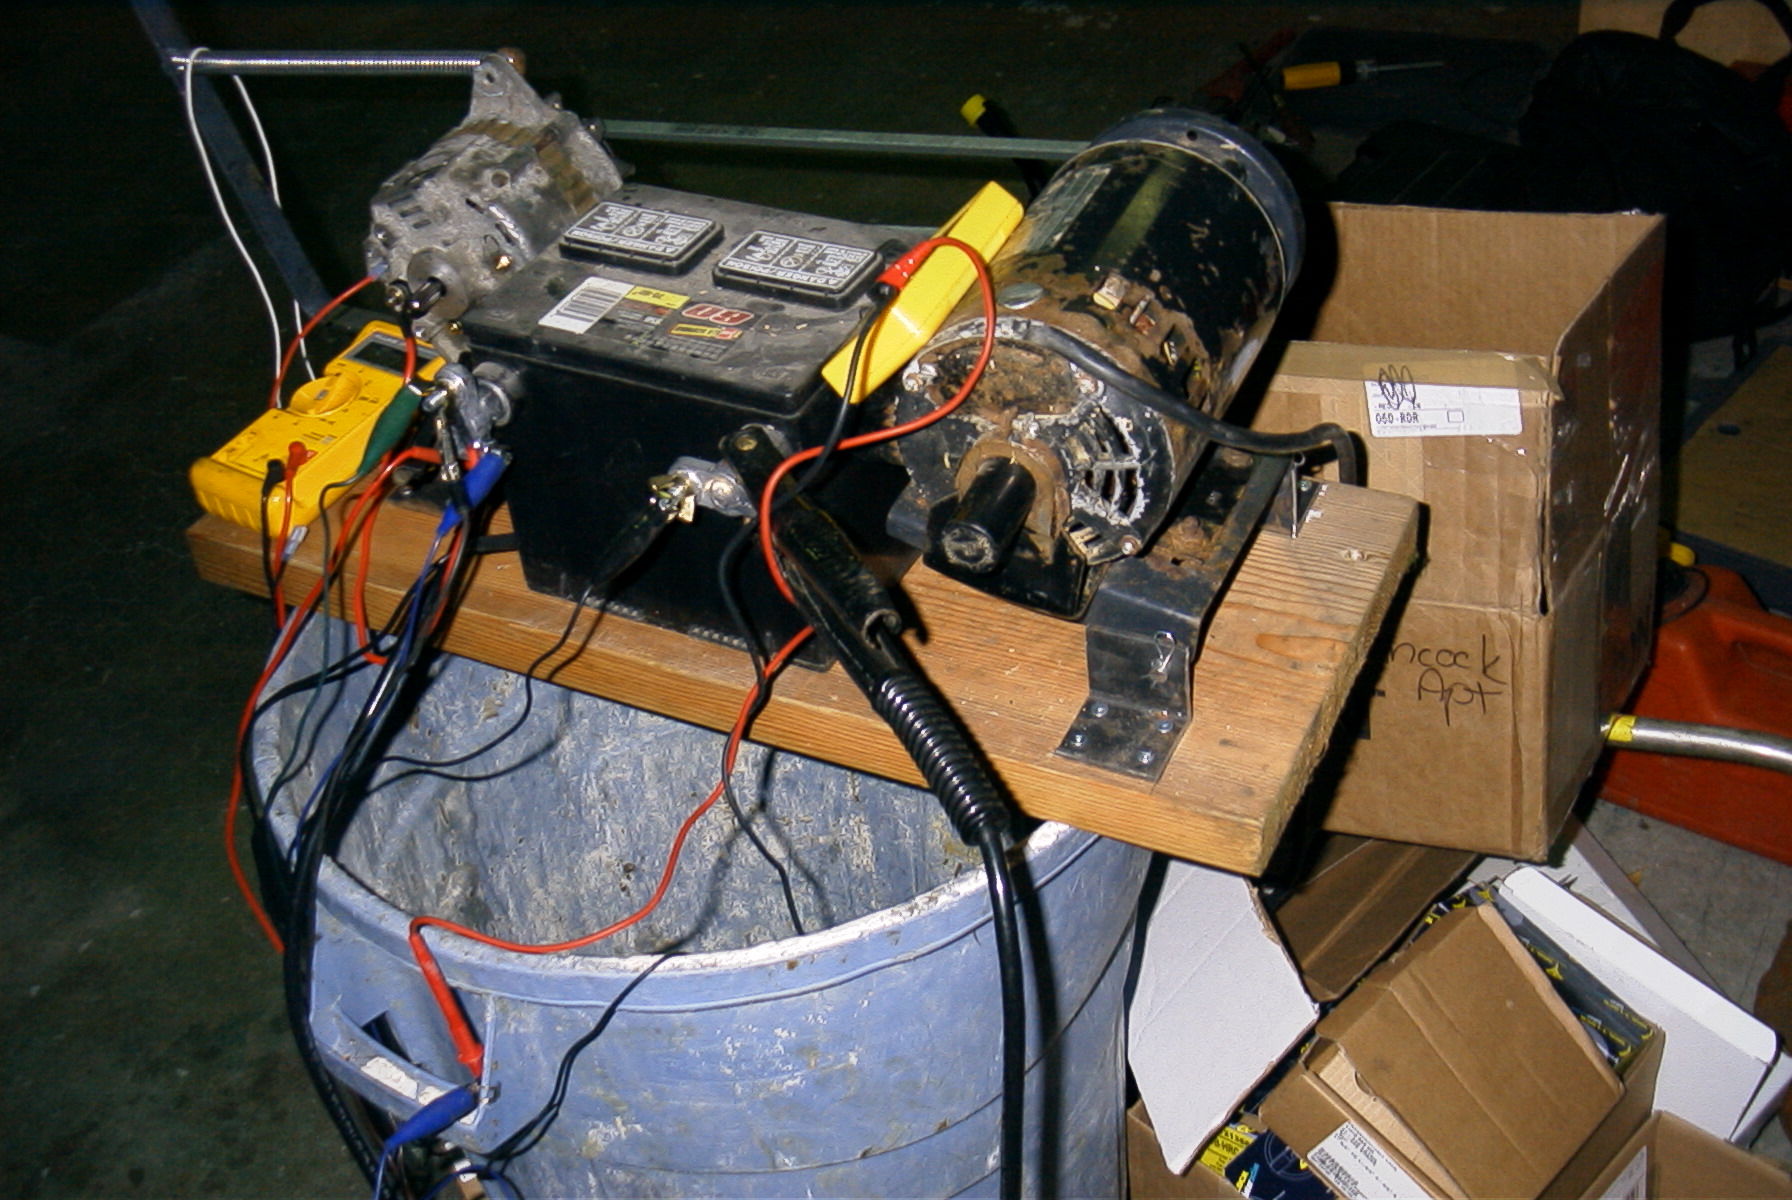
With most alternators, I don't bench test, because well, I didn't have a setup. However, the alternator whose parts are pictured above gave me a great deal of trouble, so I spend a little time and built a crude alternator test bench -- sorta. I spent all of about two hours for this monstrosity:
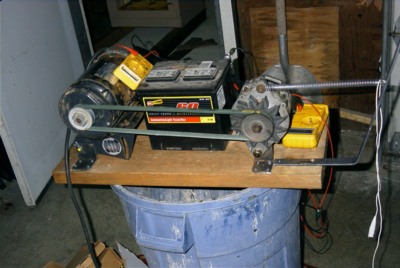
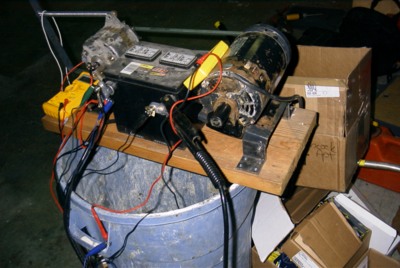
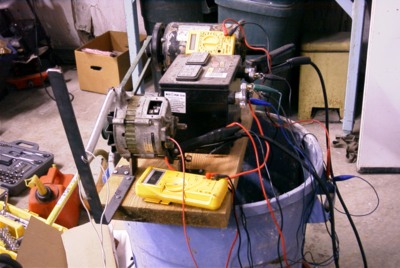
The motor is off my antique Craftsman 10" table saw (the old ones have the motor swinging off one end, which makes for one-bolt + one e-clip removal.). So is the belt . Two pieces of angle iron and a long bolt form the motor's pivot, as does the alternator's. A bit of flatbar for the for the belt tension spring anchor, and the rest is merely clip leads and wood screws. The base is a bit of 2x12 salvage. The battery is from the scrap pile: a "good" battery isn't needed, all you need is about 6v to start the VR regulating, and to provide a big enough load to "charge into"; I never advocate buying this brand of battery, but it was laying around, so I used it.
Not shown is the "idiot light" I plumbed in later. Faster indication of when the alternator comes on-line than watching the voltmeters.
A 1HP motor is nowhere near large enough to adequately load-test a 50a alternator, but it was good enough for what I wanted to do.
Don't run the alternator with the vacuum pump installed, unless you provide lubrication for it.
I don't recall what I did about the o-ring between the vacuum pump and the rear housing; probably re-used it. If someone finds a part number or size for it, let me know and I'll amend this post.
I did not take as many pictures as I should have, nor could I get really good close-ups, and I seem to have misplaced some of my notes on this one (like all the part nos. and prices).
(Click on any picture for larger)
From the 1982 720 FSM, page EL-25:
1982 720 SD22
Hitachi LR150-133E 17V
Nissan part No. 23099-36W04
12V - 50A

My symptom was the all-too-common one: low alternator output. Not no output, so the idiot light doesn't come on. Max output of around 10A.
Remove vacuum pump, split the case. When you unbolt the vacuum pump, black oil will run all over, so prepare accordingly.


Diode Assy.:

When the OEM diodes break, they physically pull apart, anode from cathode:

With the white silicone potting removed, you can see this better:
The replacement diode assy I chose is a Transpo IHR604HD-1. This is a "heavy duty" version (35a diodes rather than 25a diodes) of the std Transpo IHR604.
Supposedly, other mfgr's part nos. for this diode assy. are:
Hitachi L150-13204
Isuzu 8-94237-729-0
Nissan 23232-W1700
New Era D-051
Standard D-32
Wai 31-8106
Wells DR307
Renard 11152
Unipoint REC-661
Echlin AC70
As you can see, the diode trio lead is bare, so I had to transfer the ring terminal over. Soldering every connection is imperative, you cannot get away with crimp connections only.
I used a spacer (carpentry pencil, in this case) to support the new diode assy. to the stator whilst I soldered the delta leads to it:
Voltage Regulator:
According to my local guru, the broken diodes' connections cause wild voltage spikes that weaken or destroy the integrated voltage regulator. For that reason, he always replaces the VR.
I chose a Standard VR175, mainly because I could source it in a reasonable timeframe.

In case you missed it, there's six low-heat solder connections to the VR terminals.
Bearings and seal:
I replaced the bearings:
Rear = NTN 6202LB, I used Federal-Mogul 303-CC
Front = Koyo 6303RD, I used Federal-Mogul 202-FF
They are commonly stocked part nos., no problem buying them "anywhere", but avoid the cheapest ones for long service life. I did not buy this special brg with the outer dual seal silicone strips. Instead, I bought the generic-style brg, and mounted it with silicone/RTV. Its purpose is to direct the majority of oil that might leak past a faulty shaft seal, through a drain hole in the bottom of the housing between the seal and brg, trying to keep the mess outside of the electrics.
The rotor shaft to vacuum pump seal is a mandatory replacement item, any time you disassemble this kind of alternator that has an integral oil-lubed vacuum pump on the back. It's common for the OEM seal's lip to wear a groove in the rotor, which can make sealing this area problematic. There are three approaches to overcoming this. One is to replace the rotor (expensive!), another is to drop a spacer washer in the rear housing bore that moves the seal in the housing slightly, which places the seal's lip on an unworn location on the shaft. The third approach is to use a double-lip seal (in combination with the spacer washer, if desired), which is what I do. [EDIT 03May2014: See further in thread about SKF Speedi-Sleeve repair of grooved rotors.]
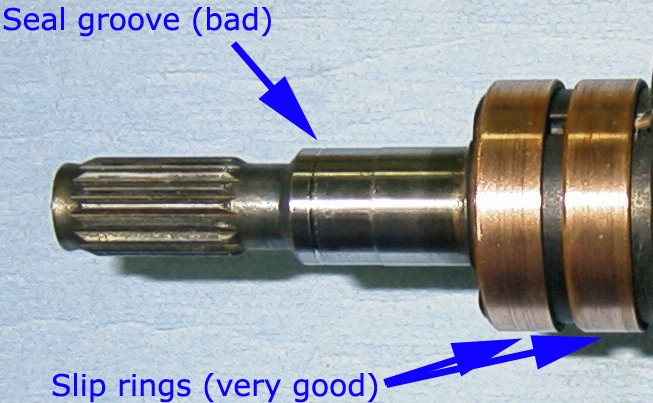
Those slip rings shown are in exceptionally good condition: they've been replaced, sometime before I got to it. Don't expect yours to look this good.
The seal that I removed was an NOK AE8407G, which IIRC didn't interchange to nuthin'.:
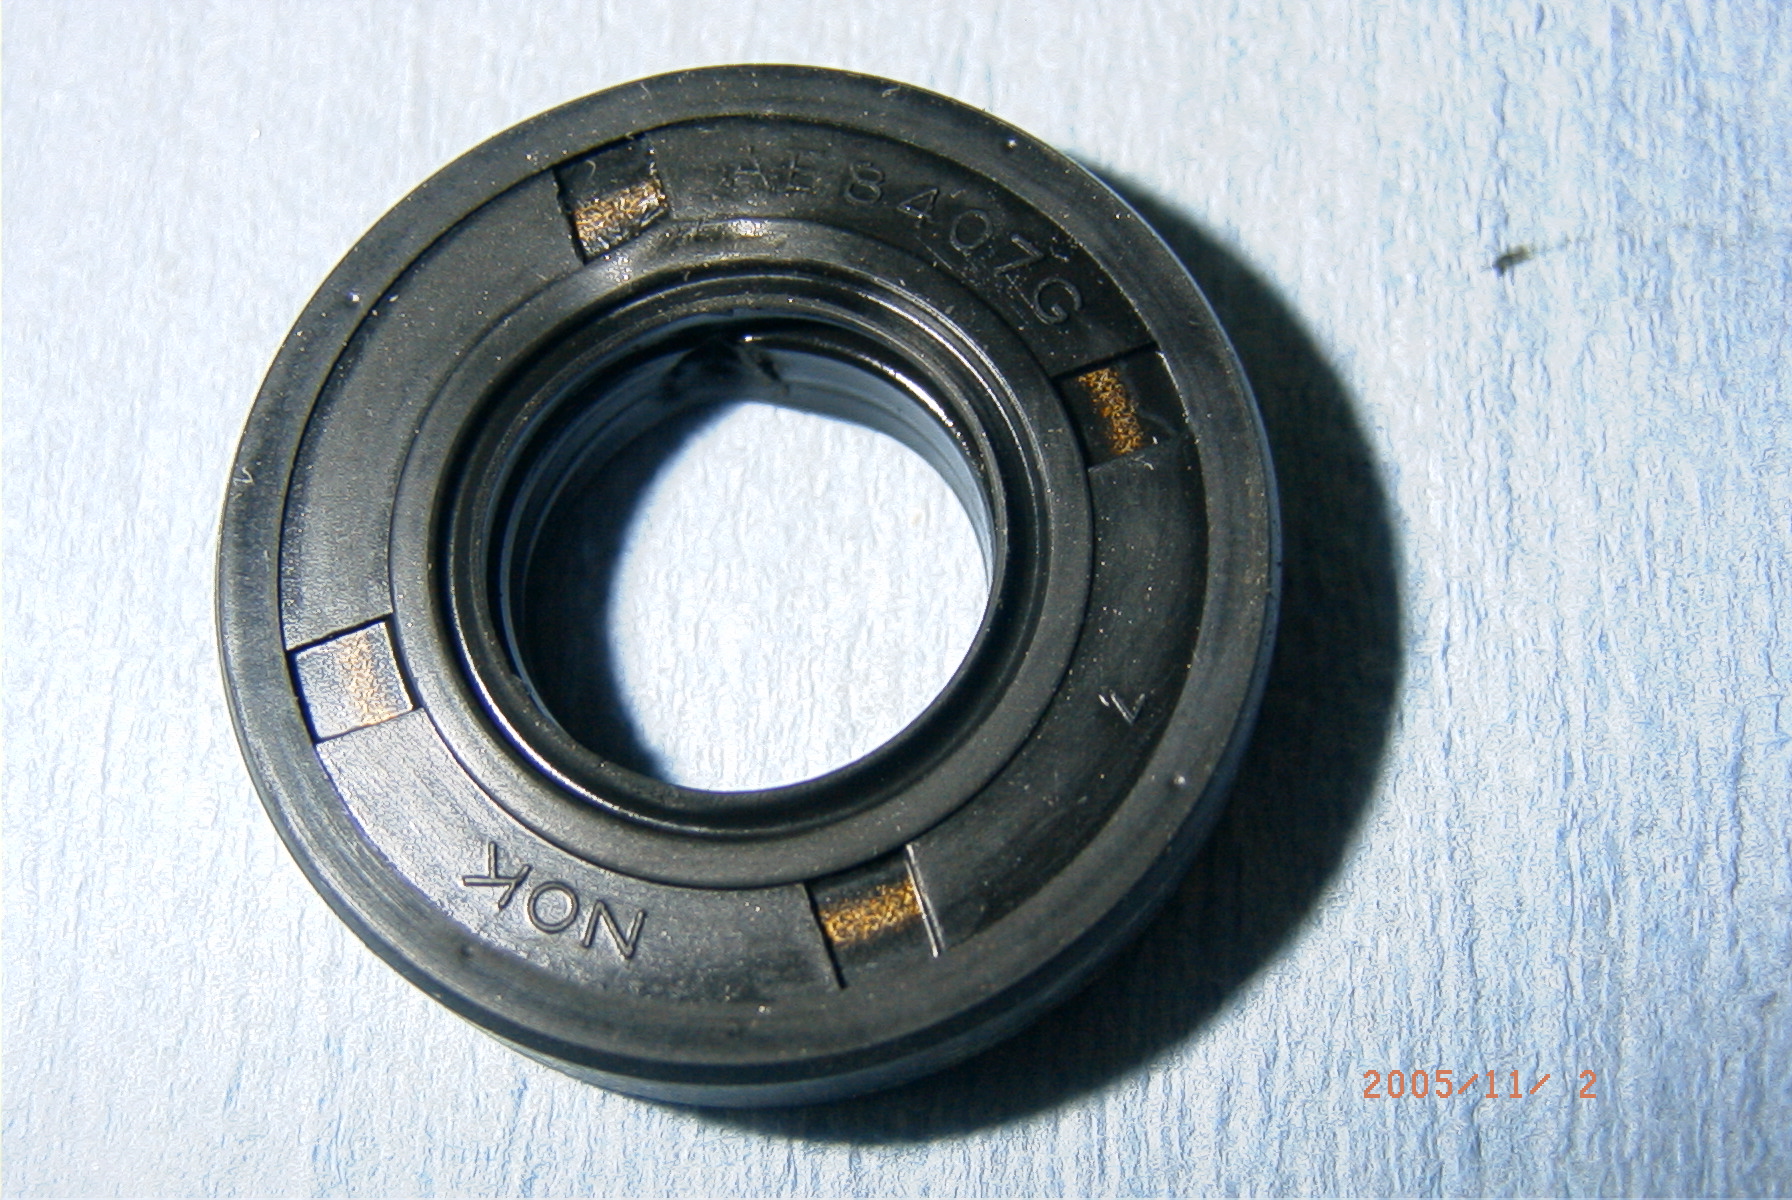
I have not found a wide source for this seal. I get mine from my local guru: PHLE 15x32x7.5/8mm, 41-81700-1, about $6 [edit 03May2014: member Corky reports he was sold a 15 x 32 x 7 TC double-lip seal. They seem to be fairly common, armed with that info]:

Brushes:
They wear out.
But they're easy to replace, even without removing the alternator (unless you have A/C, which hides the brushes' access cover). Some soldering is required.

I think I used Standard JX118 brushes. They are 1.125" long when new.
The end of the brushes (in the Hitachi design) are angled. It matters which way they insert into the holder. I found that if installed backward, there is not enough surface area touching the rotor's slip rings for the VR to be able to put enough current in the field to start the alternator, so pay attention to the way the brushes are installed into the brush holder.
The slip rings get grooves worn into them from the brushes. Anecdotally, this wear is worst when the brushes reach their end-of-life: the spring tension is reduced and arcing can remove material. So far (as in brake rotors and drums), I've been able to get away with merely replacing the brushes in almost all cases. The new brushes take some time to wear in (grind in) to the old slip ring grooves but will eventually work fairly well, if at reduced output. Most slip rings have little material available for lathe work. Rotor rebuilders can install new slip rings, and I've had that done too in one case. Now you know why I never throw out the old alternator: core parts are valuable.
Testing:
With most alternators, I don't bench test, because well, I didn't have a setup. However, the alternator whose parts are pictured above gave me a great deal of trouble, so I spend a little time and built a crude alternator test bench -- sorta. I spent all of about two hours for this monstrosity:
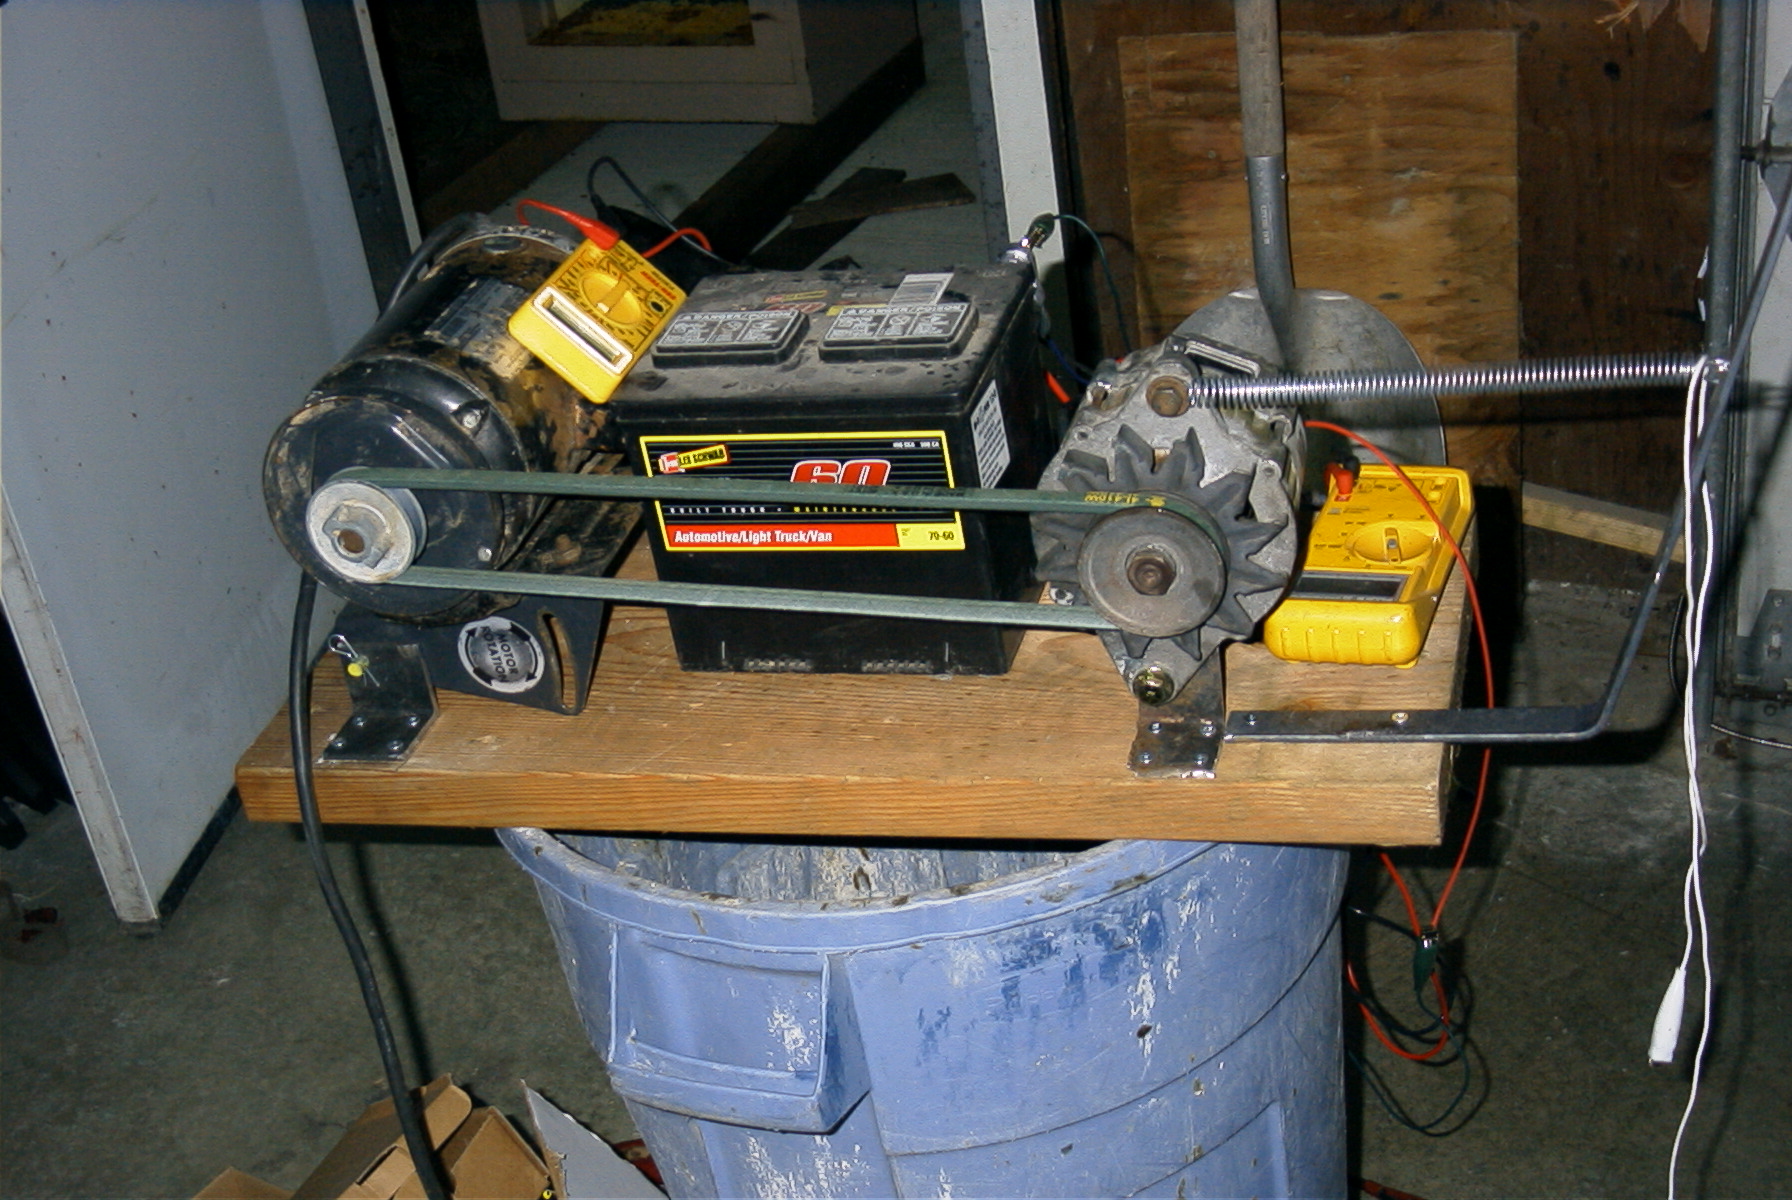

The motor is off my antique Craftsman 10" table saw (the old ones have the motor swinging off one end, which makes for one-bolt + one e-clip removal.). So is the belt
Not shown is the "idiot light" I plumbed in later. Faster indication of when the alternator comes on-line than watching the voltmeters.
A 1HP motor is nowhere near large enough to adequately load-test a 50a alternator, but it was good enough for what I wanted to do.
Don't run the alternator with the vacuum pump installed, unless you provide lubrication for it.
I don't recall what I did about the o-ring between the vacuum pump and the rear housing; probably re-used it. If someone finds a part number or size for it, let me know and I'll amend this post.

