For about a year, I would occasionally get a overheated-plastic type of smell when I'd drive a long time. I assumed from the stink (a smell I've encountered in other vehicles) that wiring was overheating.
Given the propensity of Fords of a certain vintage to melt their headlight switch connector down, I assumed that that was what I was smelling.
Well, last week the taillights failed my lights check (I do a walk-around and check all the exterior lights while filling the petrol tank). Fuse good.
So, here's the quick rundown on how to fix this on a 1993 Aerostar XL without automatic headlights (the auto-HL version has a different switch). AFAIK, this should be the same procedure on any Aerostar 1992 and newer.
(click on any image for larger)
All all of the screws to be removed were 7mm head on my rig.
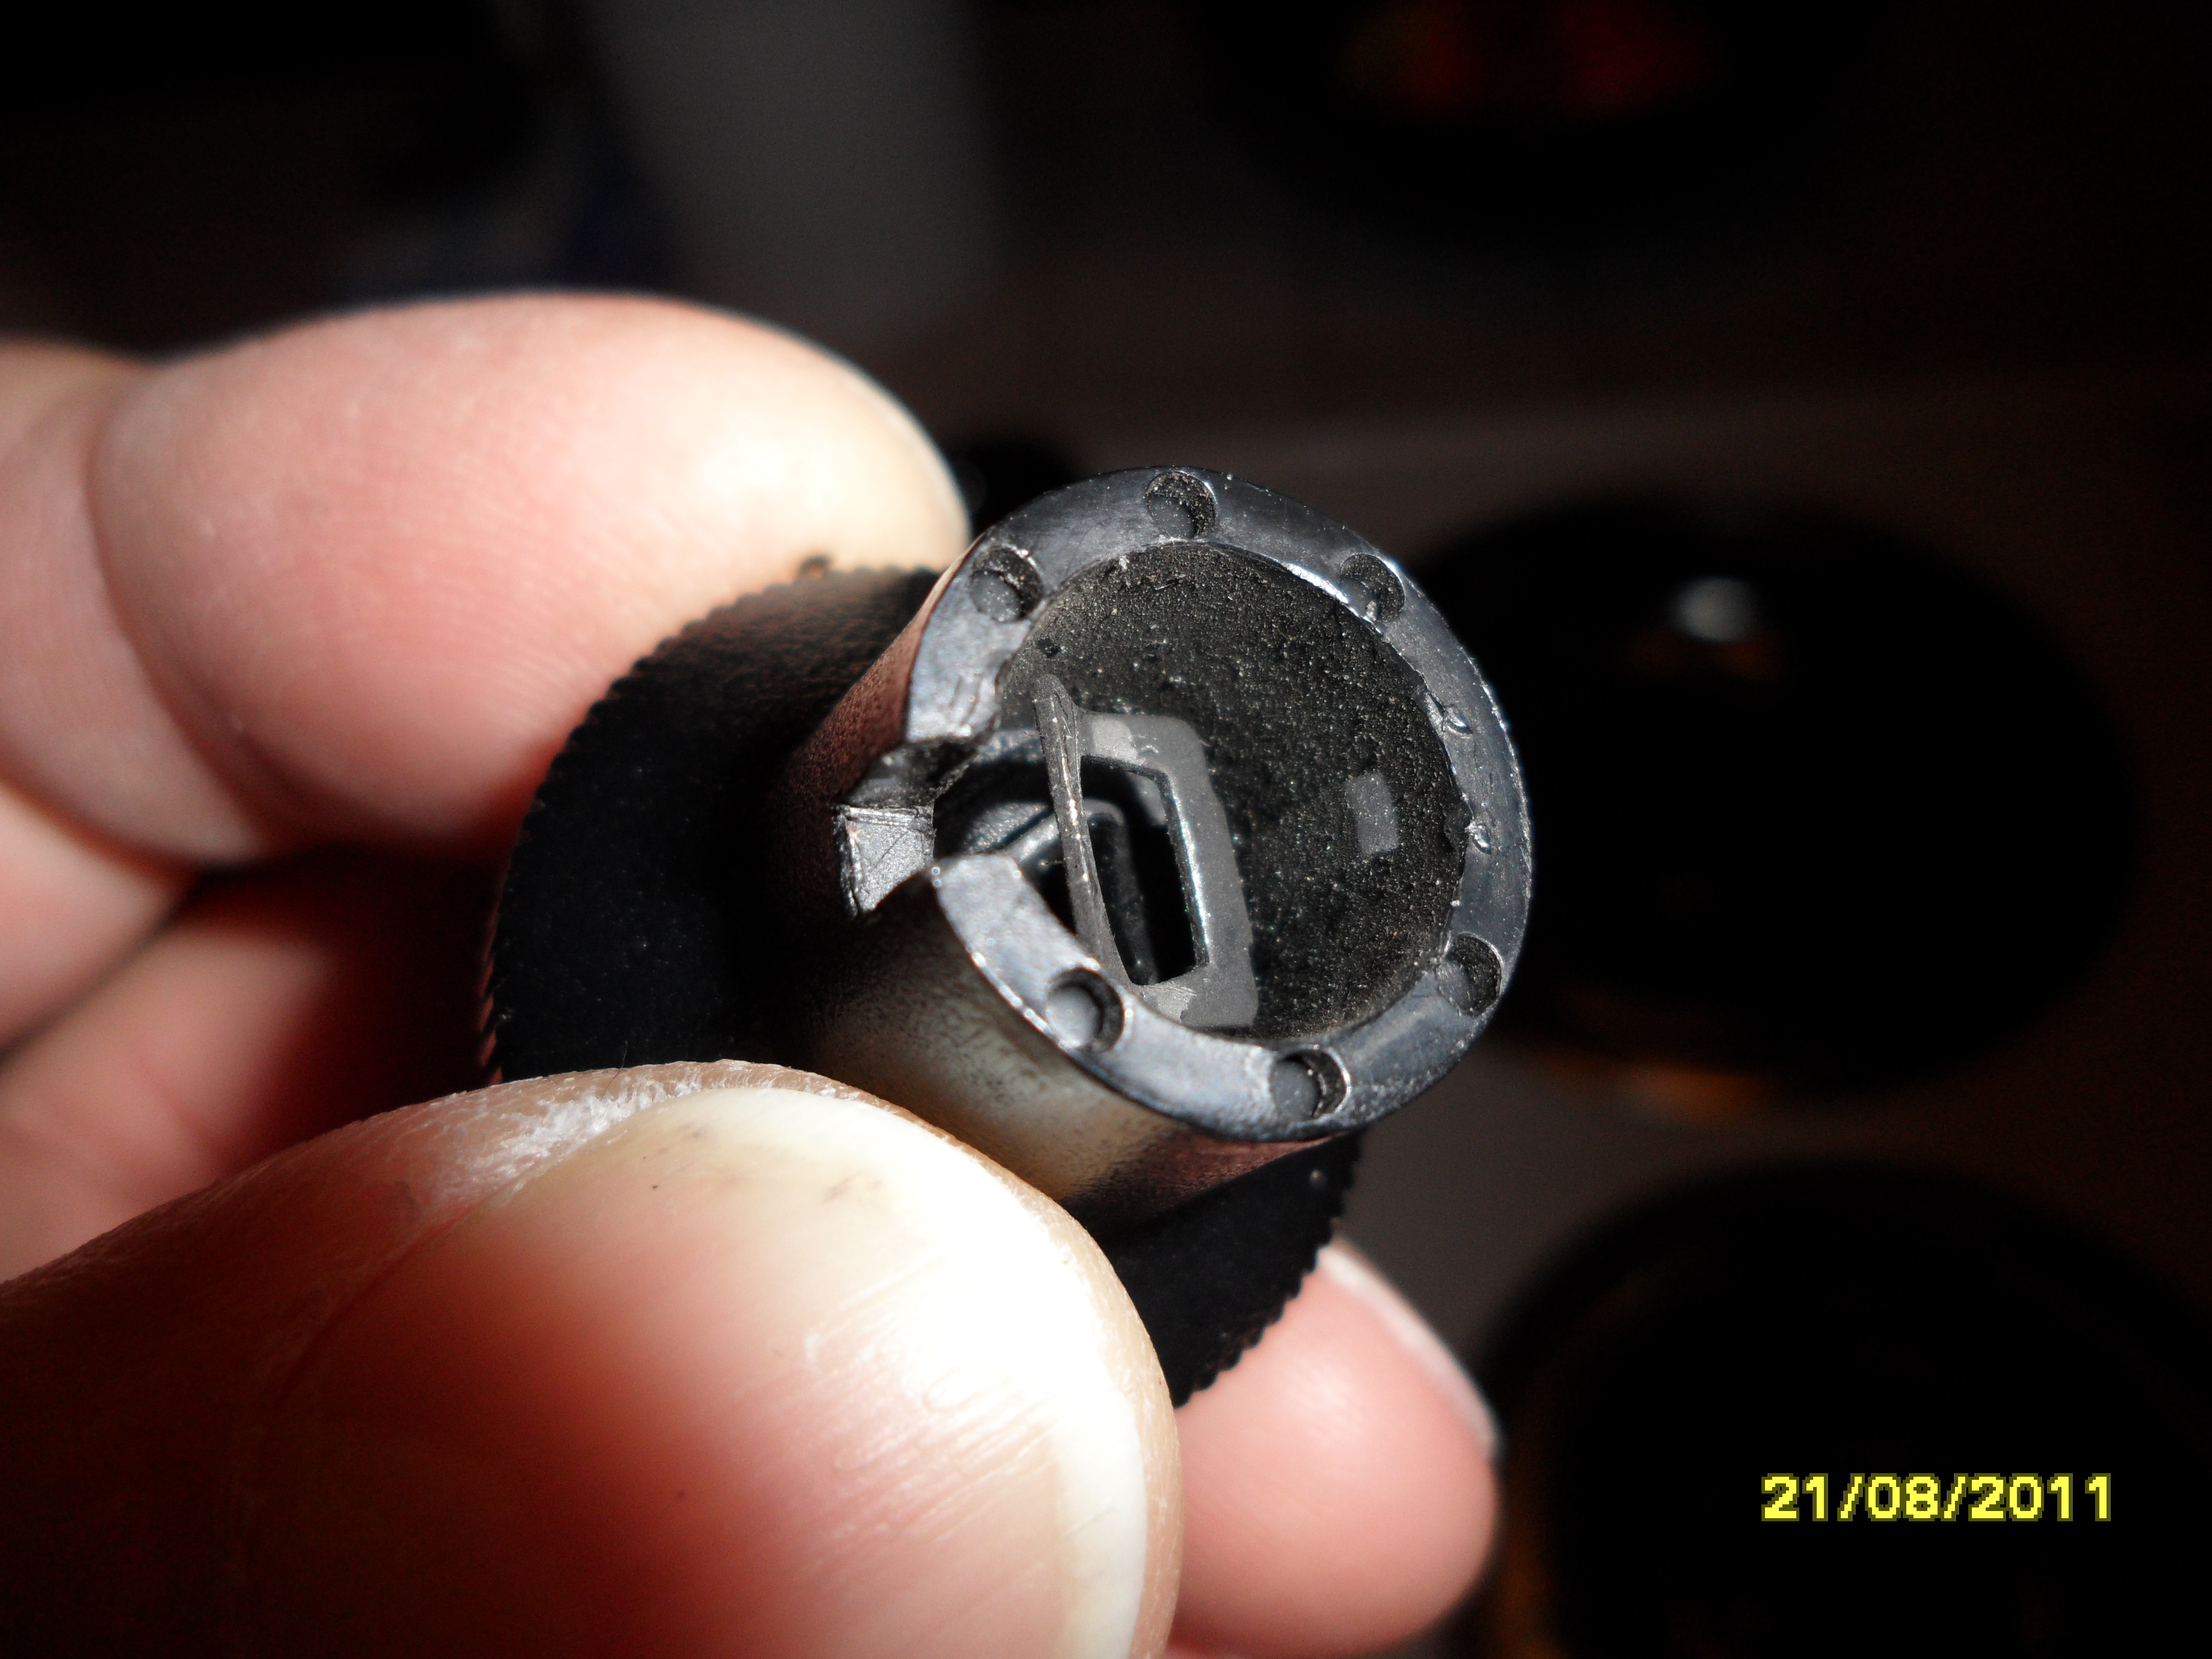
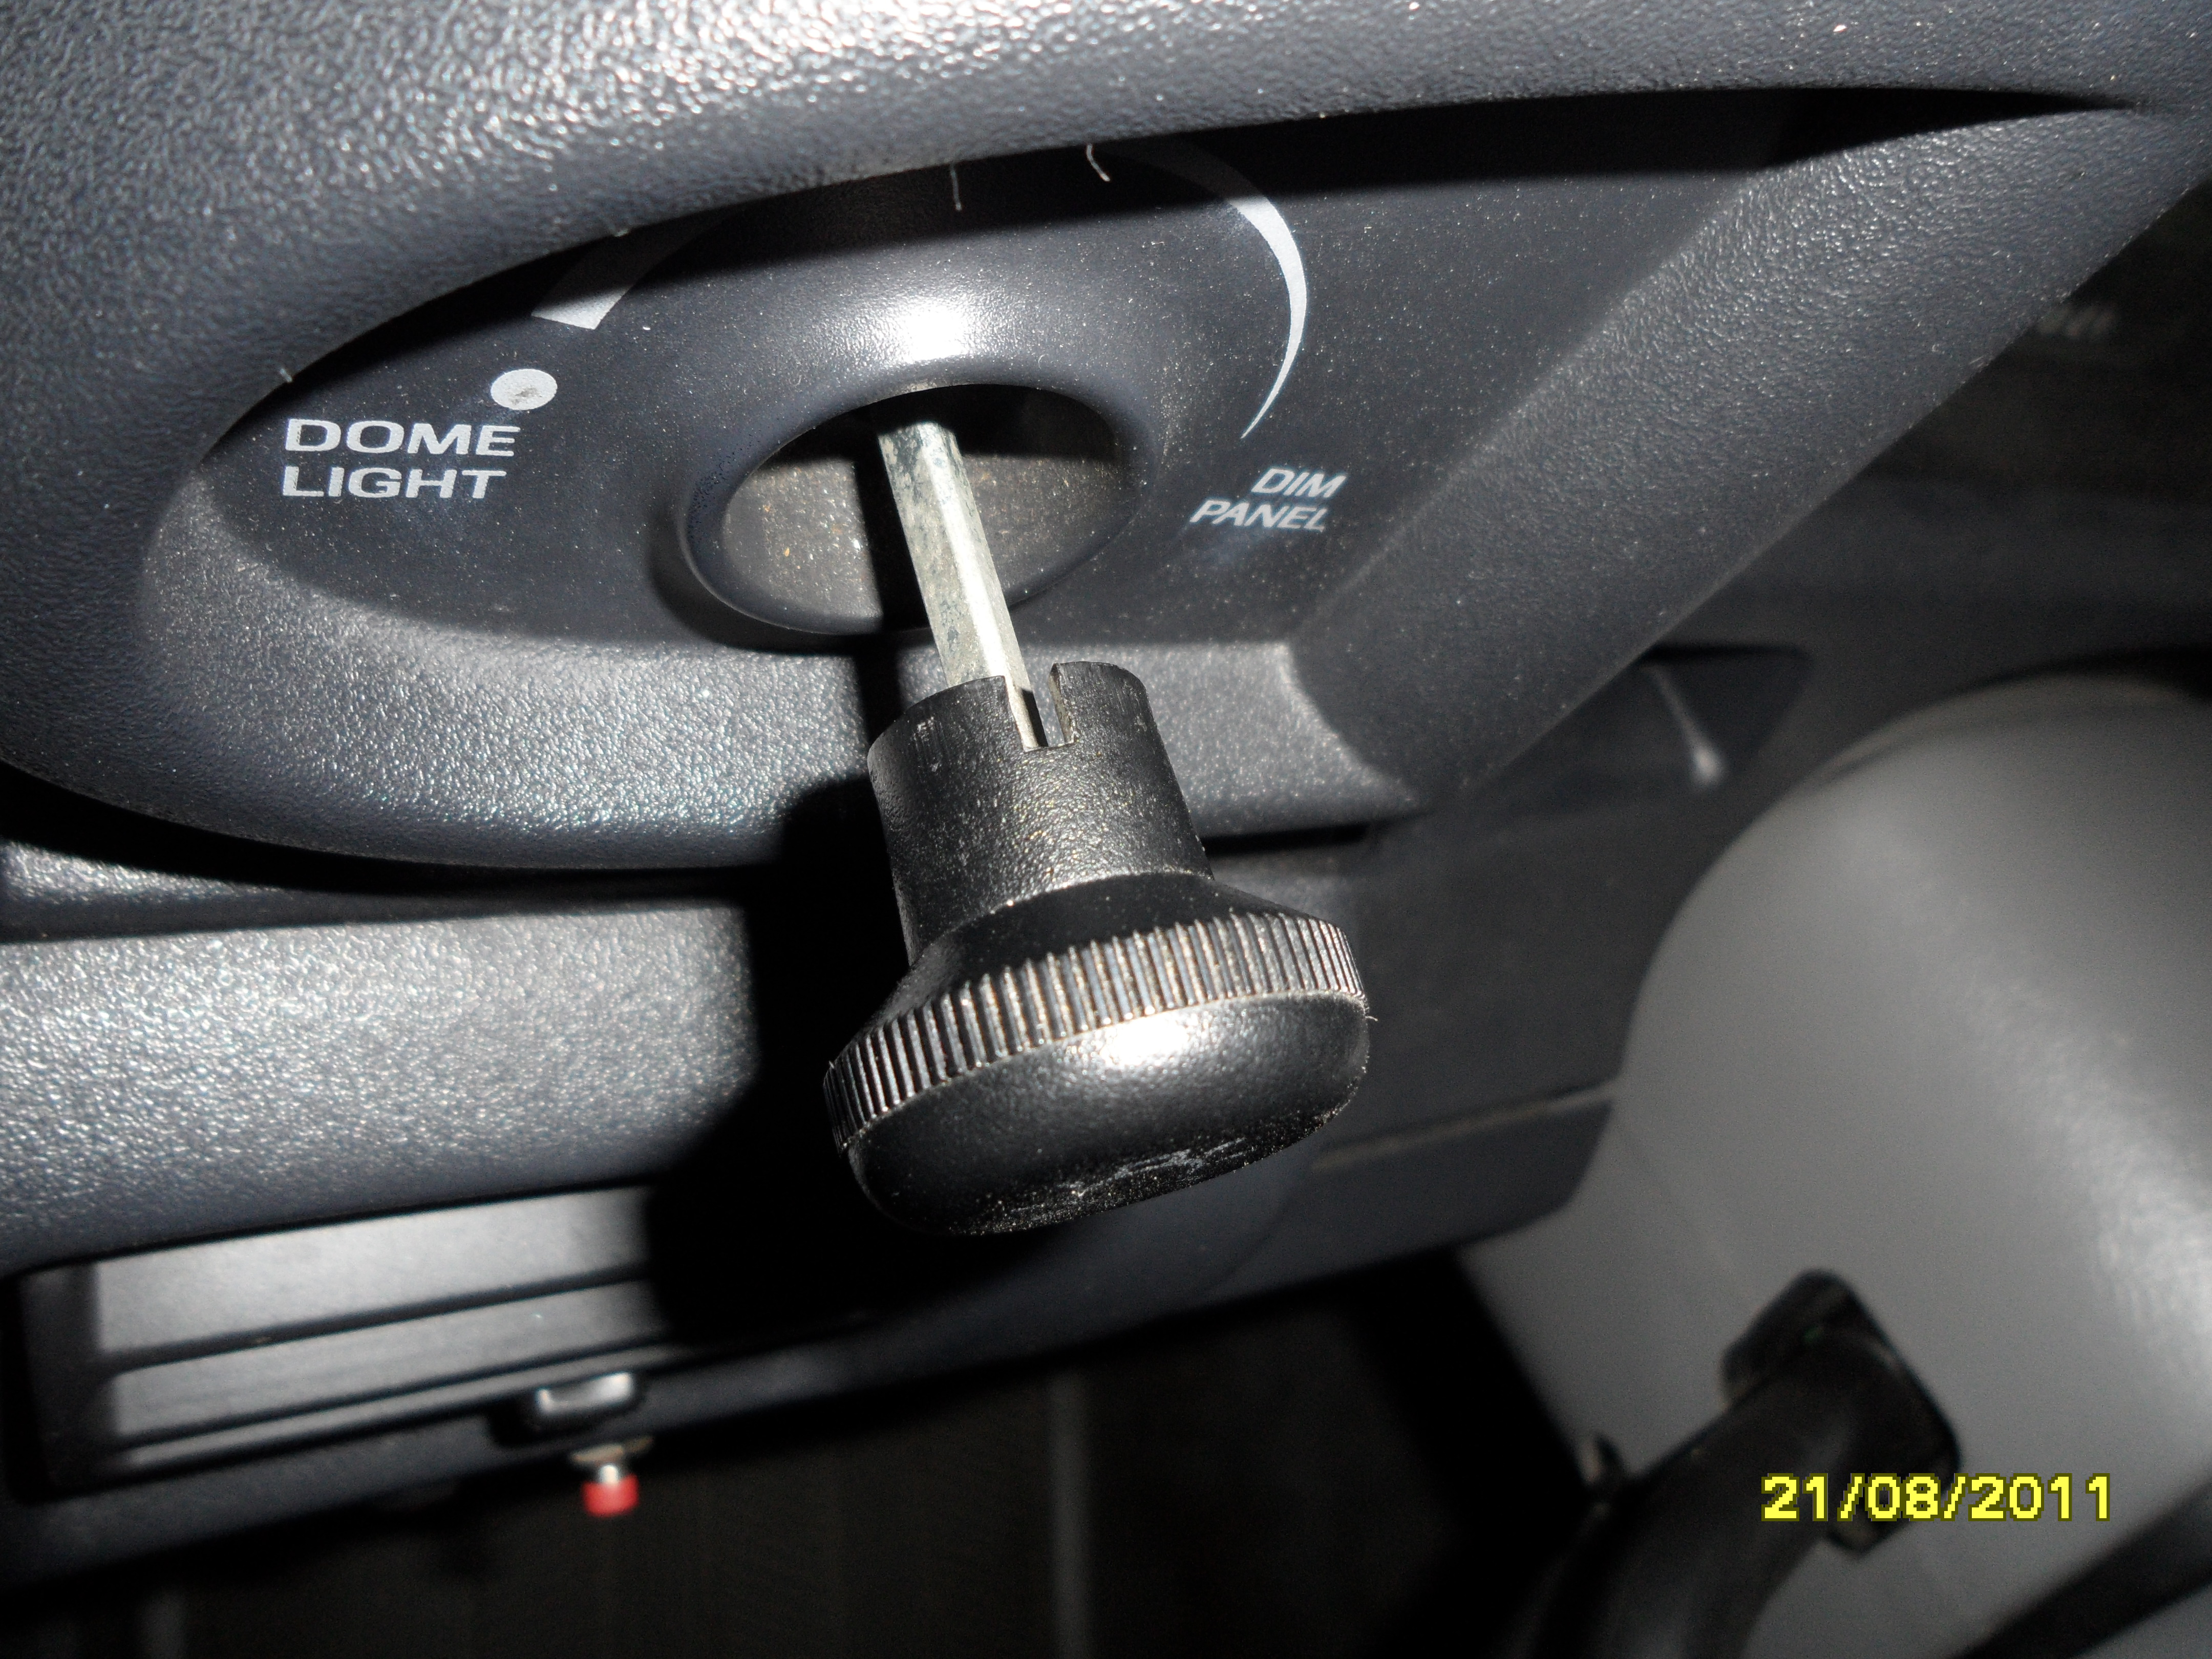
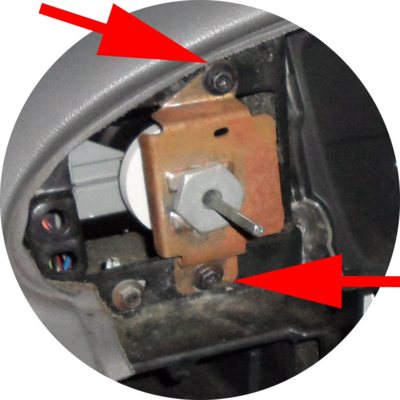
The first hurdle is to remove the headlight switch knob. It's not obvious how that's done.
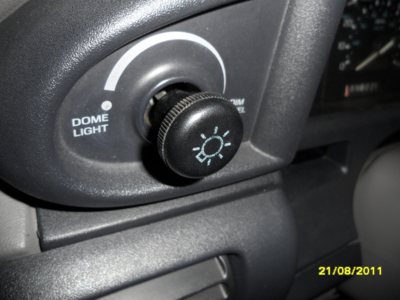
Here's what you're fighting: a spring clip.

Turn the dimmer knob to reveal the notch on the side.

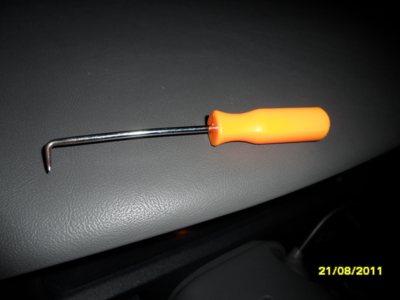
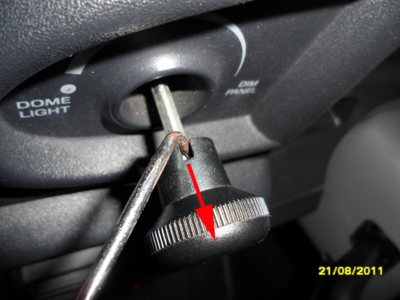
You'll need a steel tool of some sort to push that spring clip towards the back of the vehicle. I used this, but I've done it before with a No. 1 (or smaller) flathead screwdriver.
Pull (or push) the clip toward the head of the knob. When you do it right, the knob will fall off the end of the shaft.
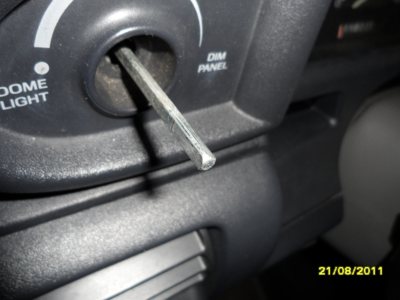
The plain shaft. This will get transferred to the new switch.
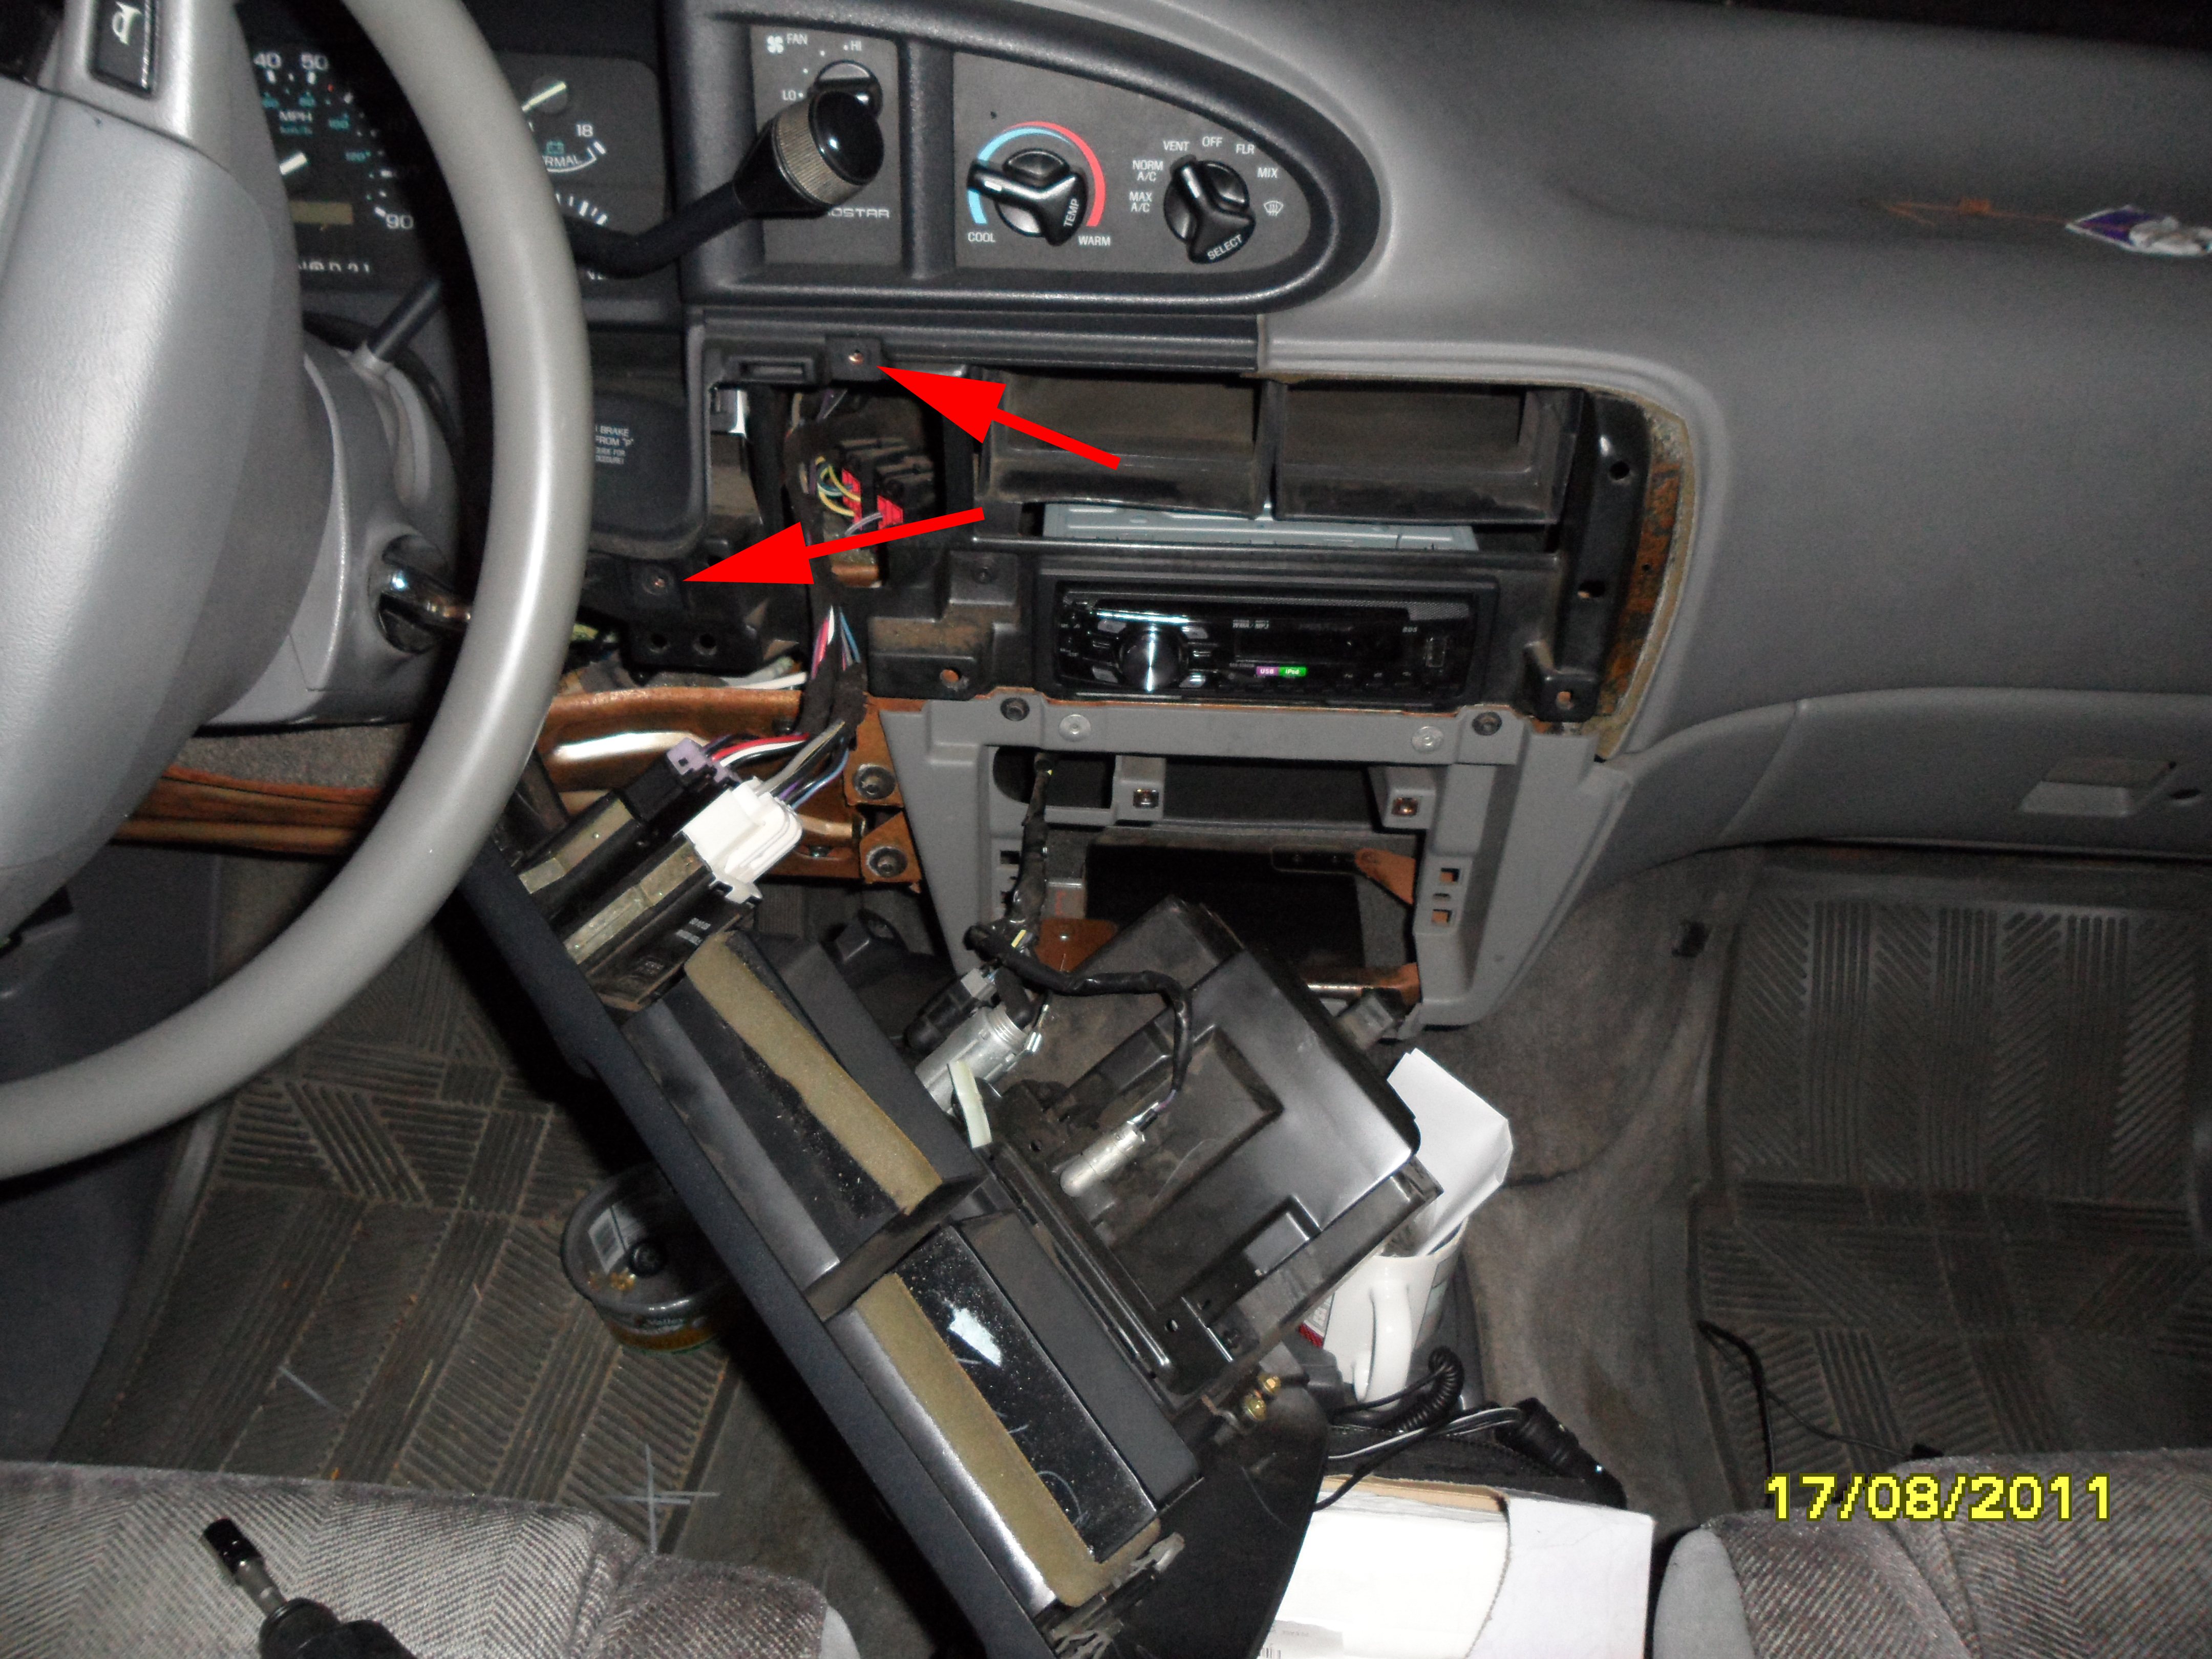
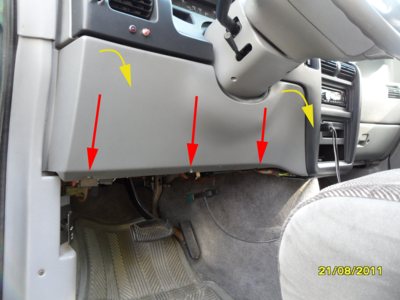
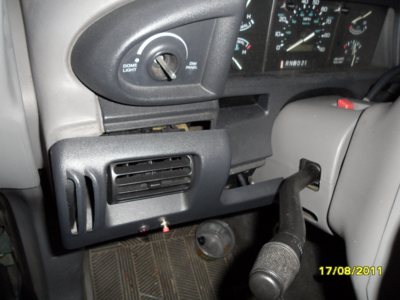
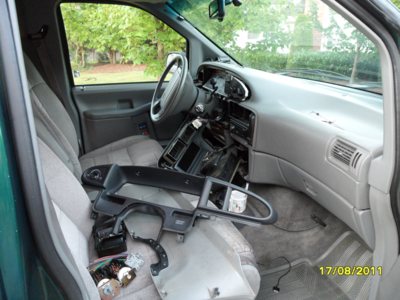
Remove the three screws under the knee trim panel (red arrows), then use your fingers to work around the right side and unpop the panel from the right side first. When the right side is free, work on the left side. The left end is nested behind the left kick panel, and has to be finessed a bit.
Next, the radio surround must be removed. Remove the ashtray, then remove the two screws behind the ashtray. Carefully work your fingers around the entire surround, popping it loose one clip at a time.
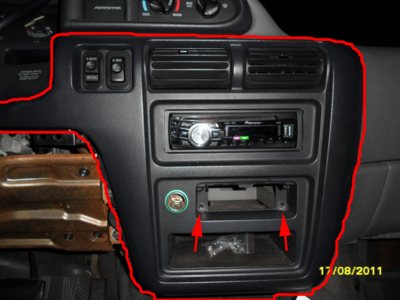
Leave all the wiring (cigar lighter, rear wiper switch, rear defrost) connected, you don't need to move the radio surround too far.
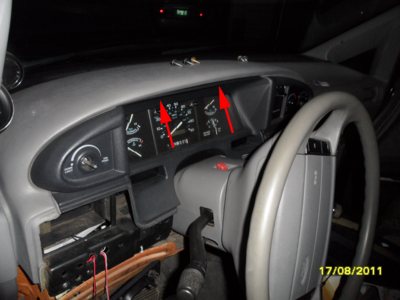
You now have access to the two right-side lower screws for the instrument cluster surround. Remove them.

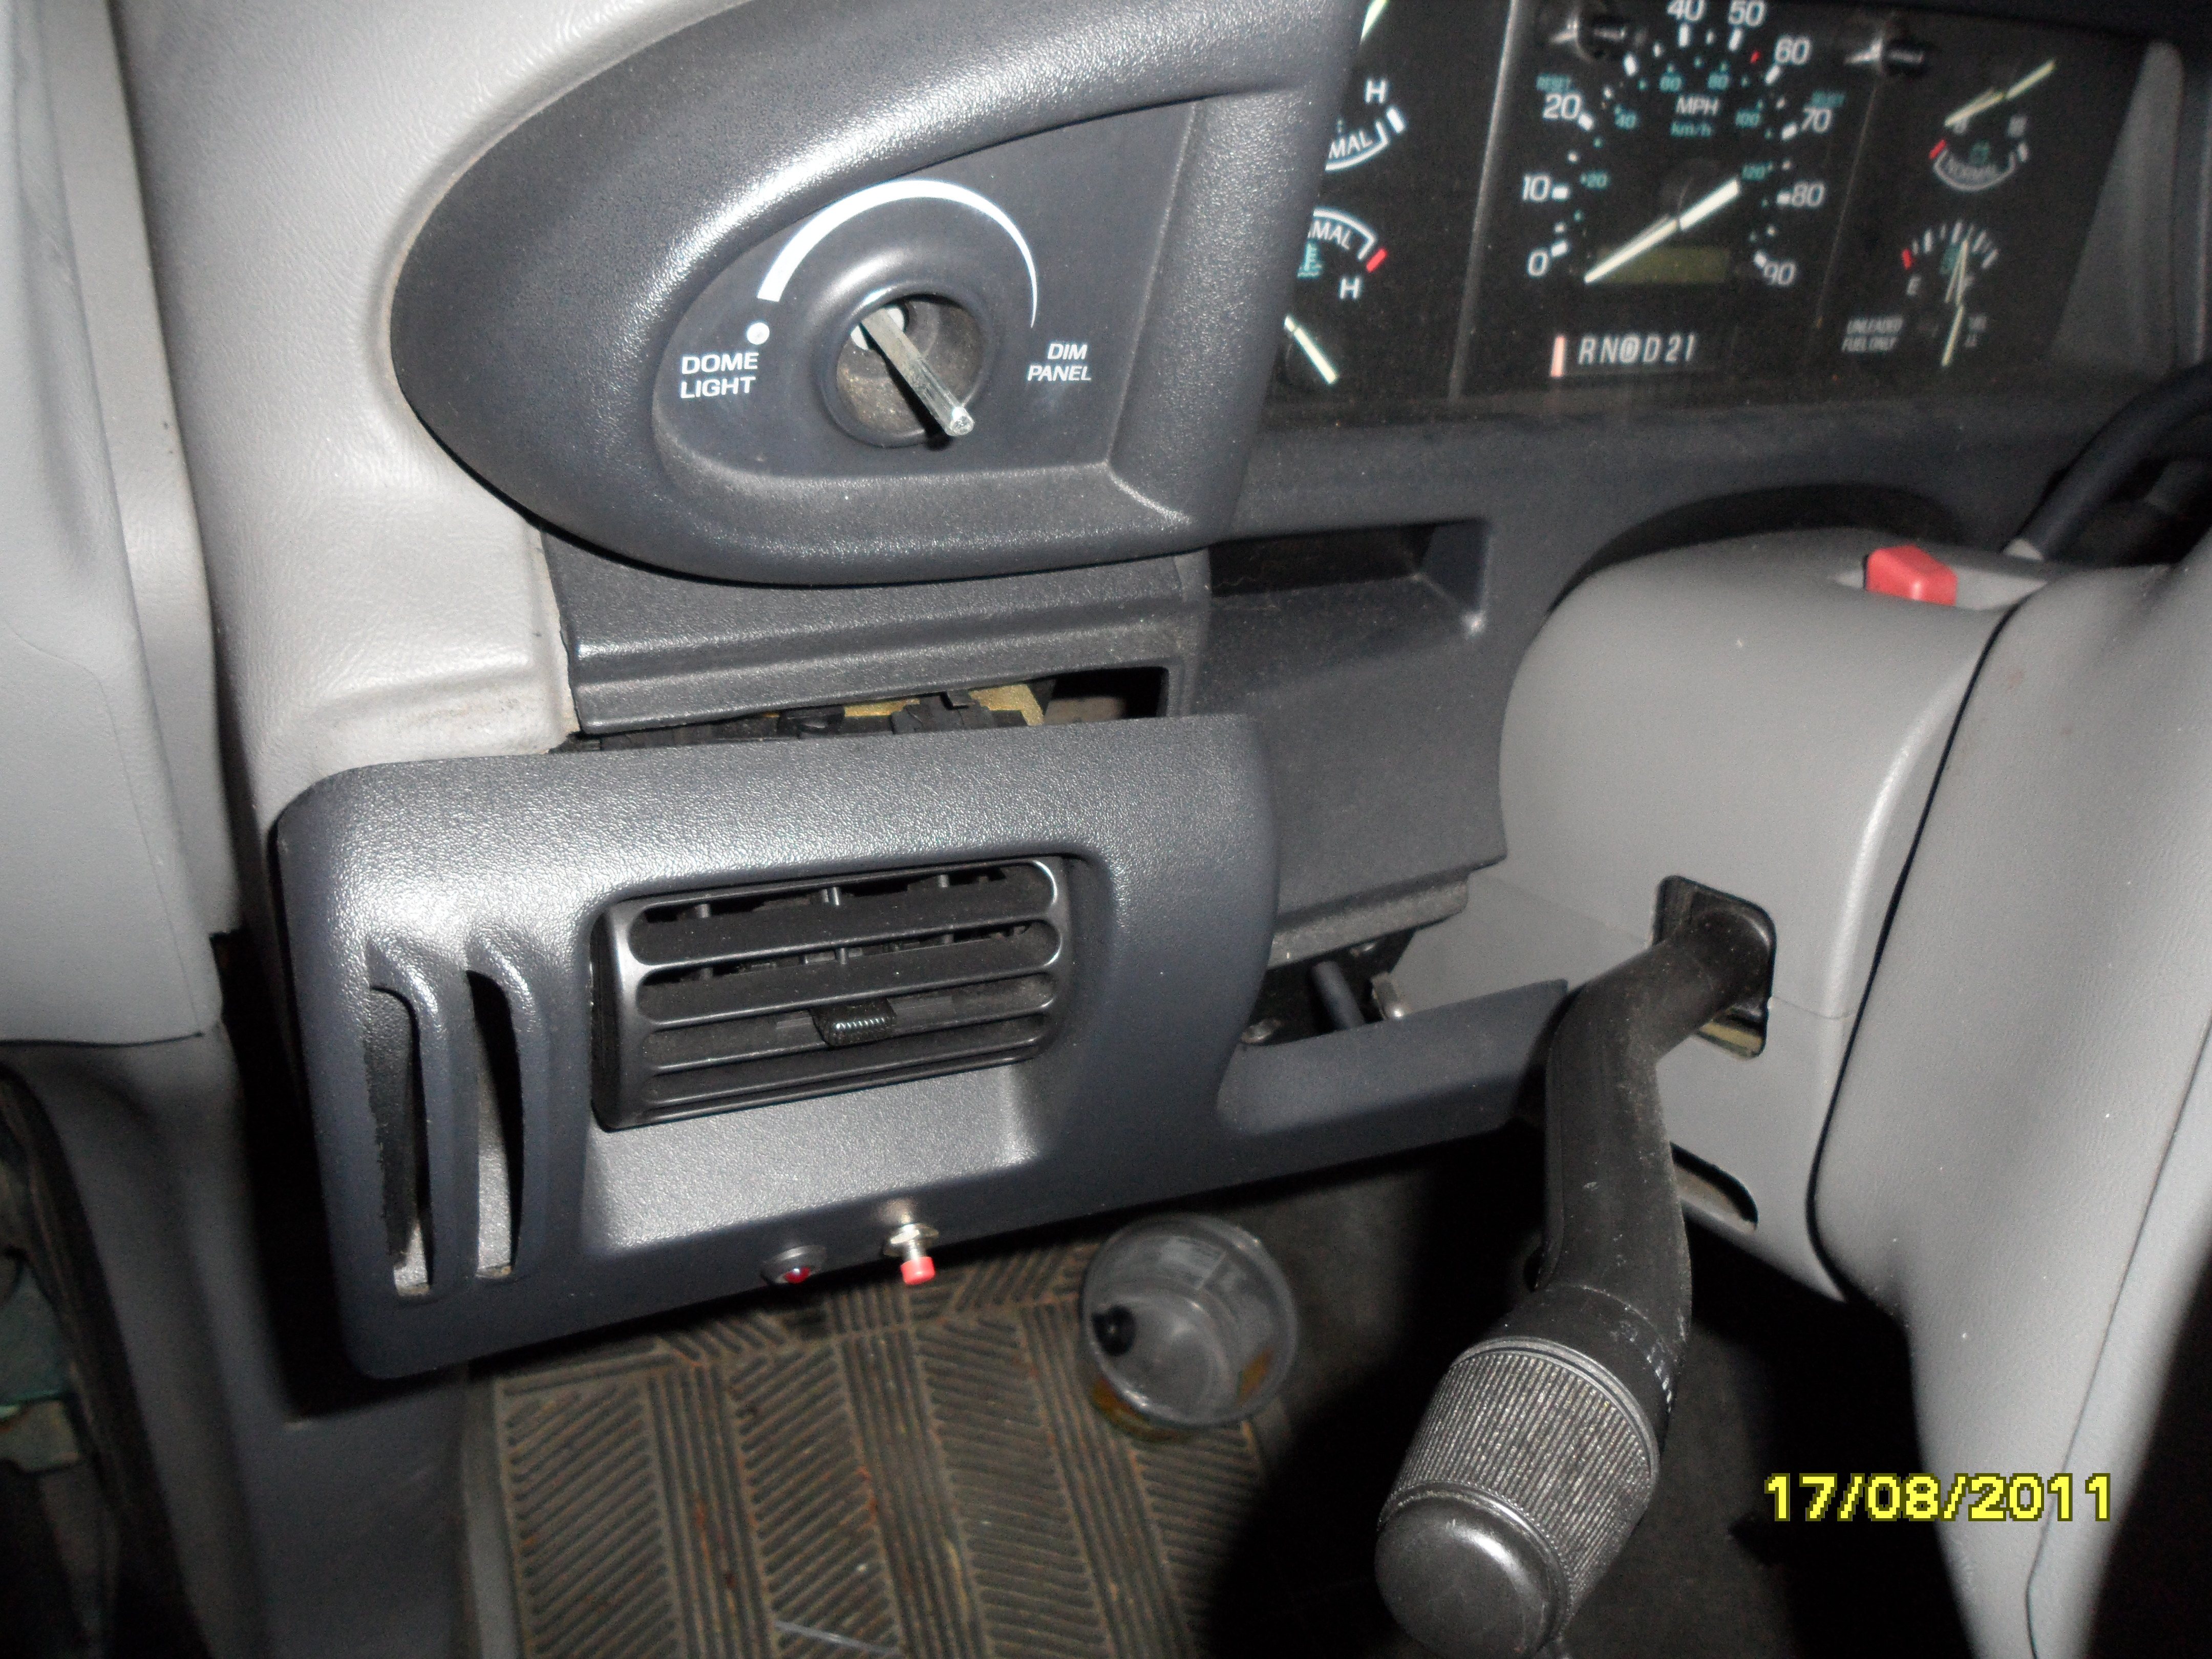
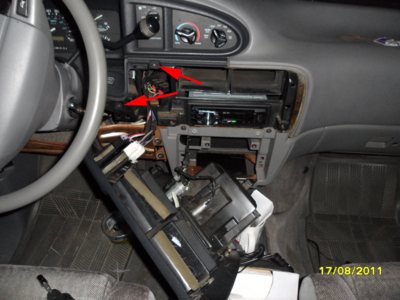
On the left of the column, carefully unpop the left vent assy. No screws hold it in place.
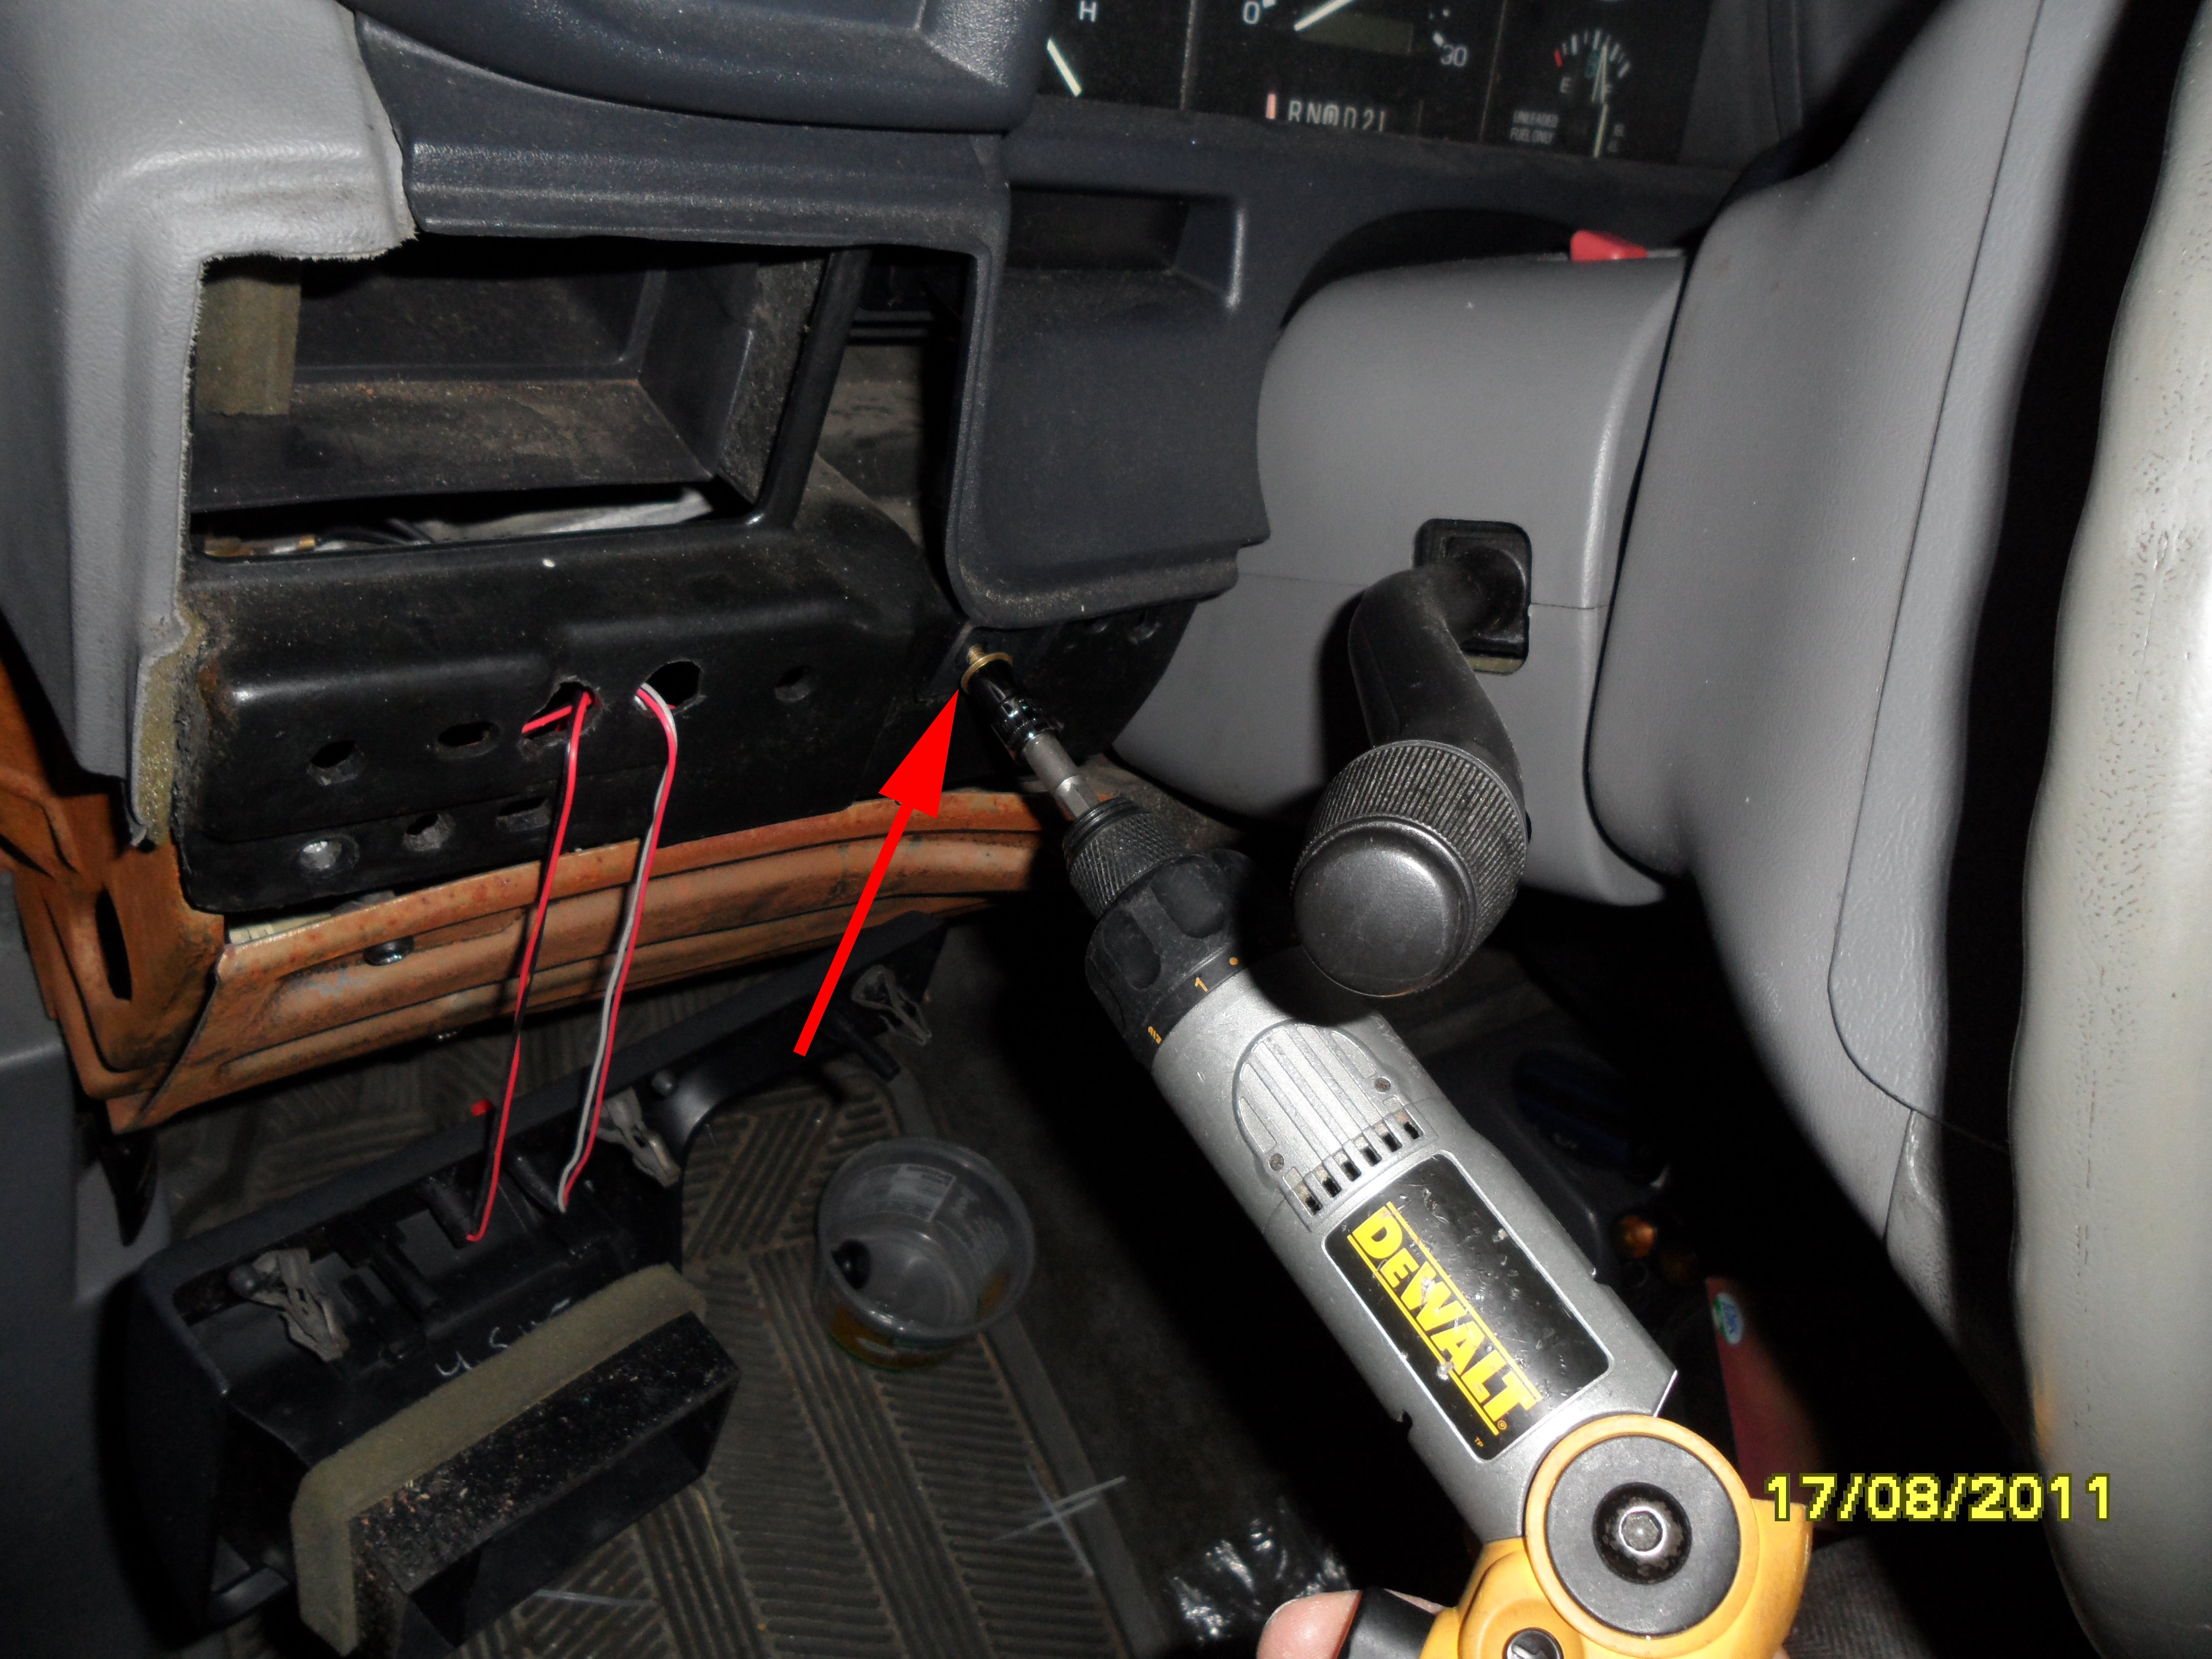
You now have access to the single left-side lower screw for the instrument cluster surround. Remove it.

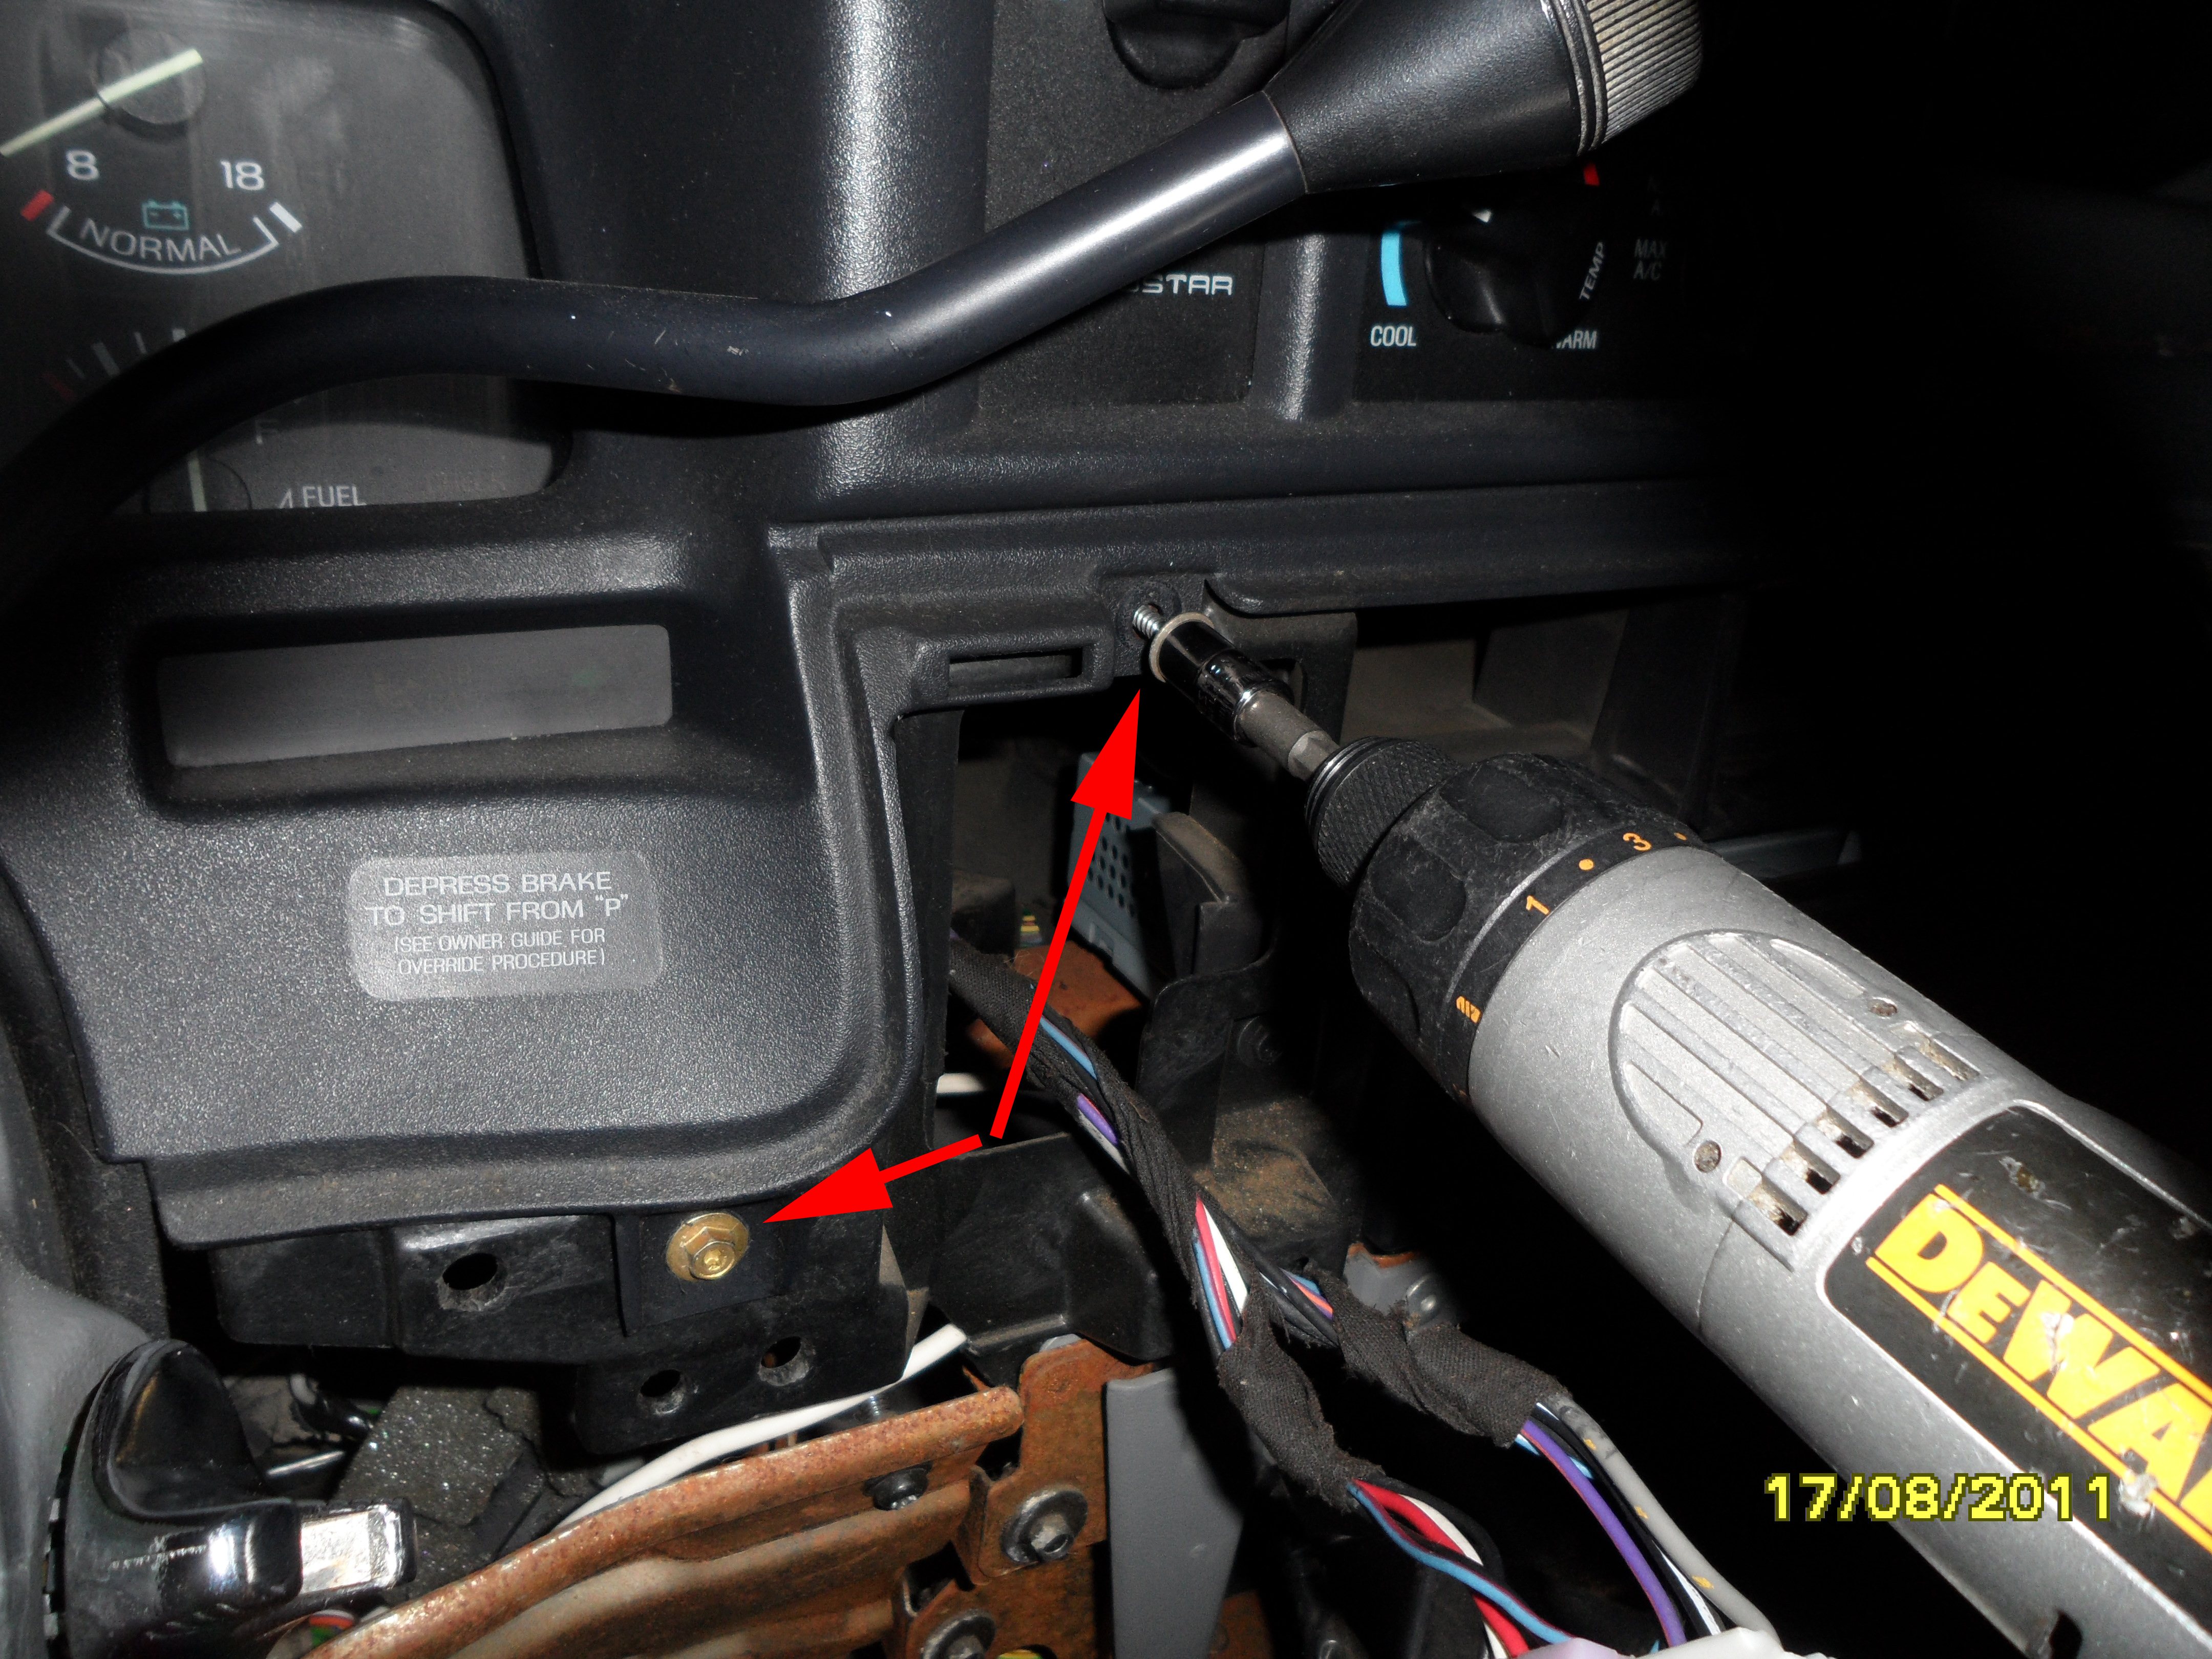
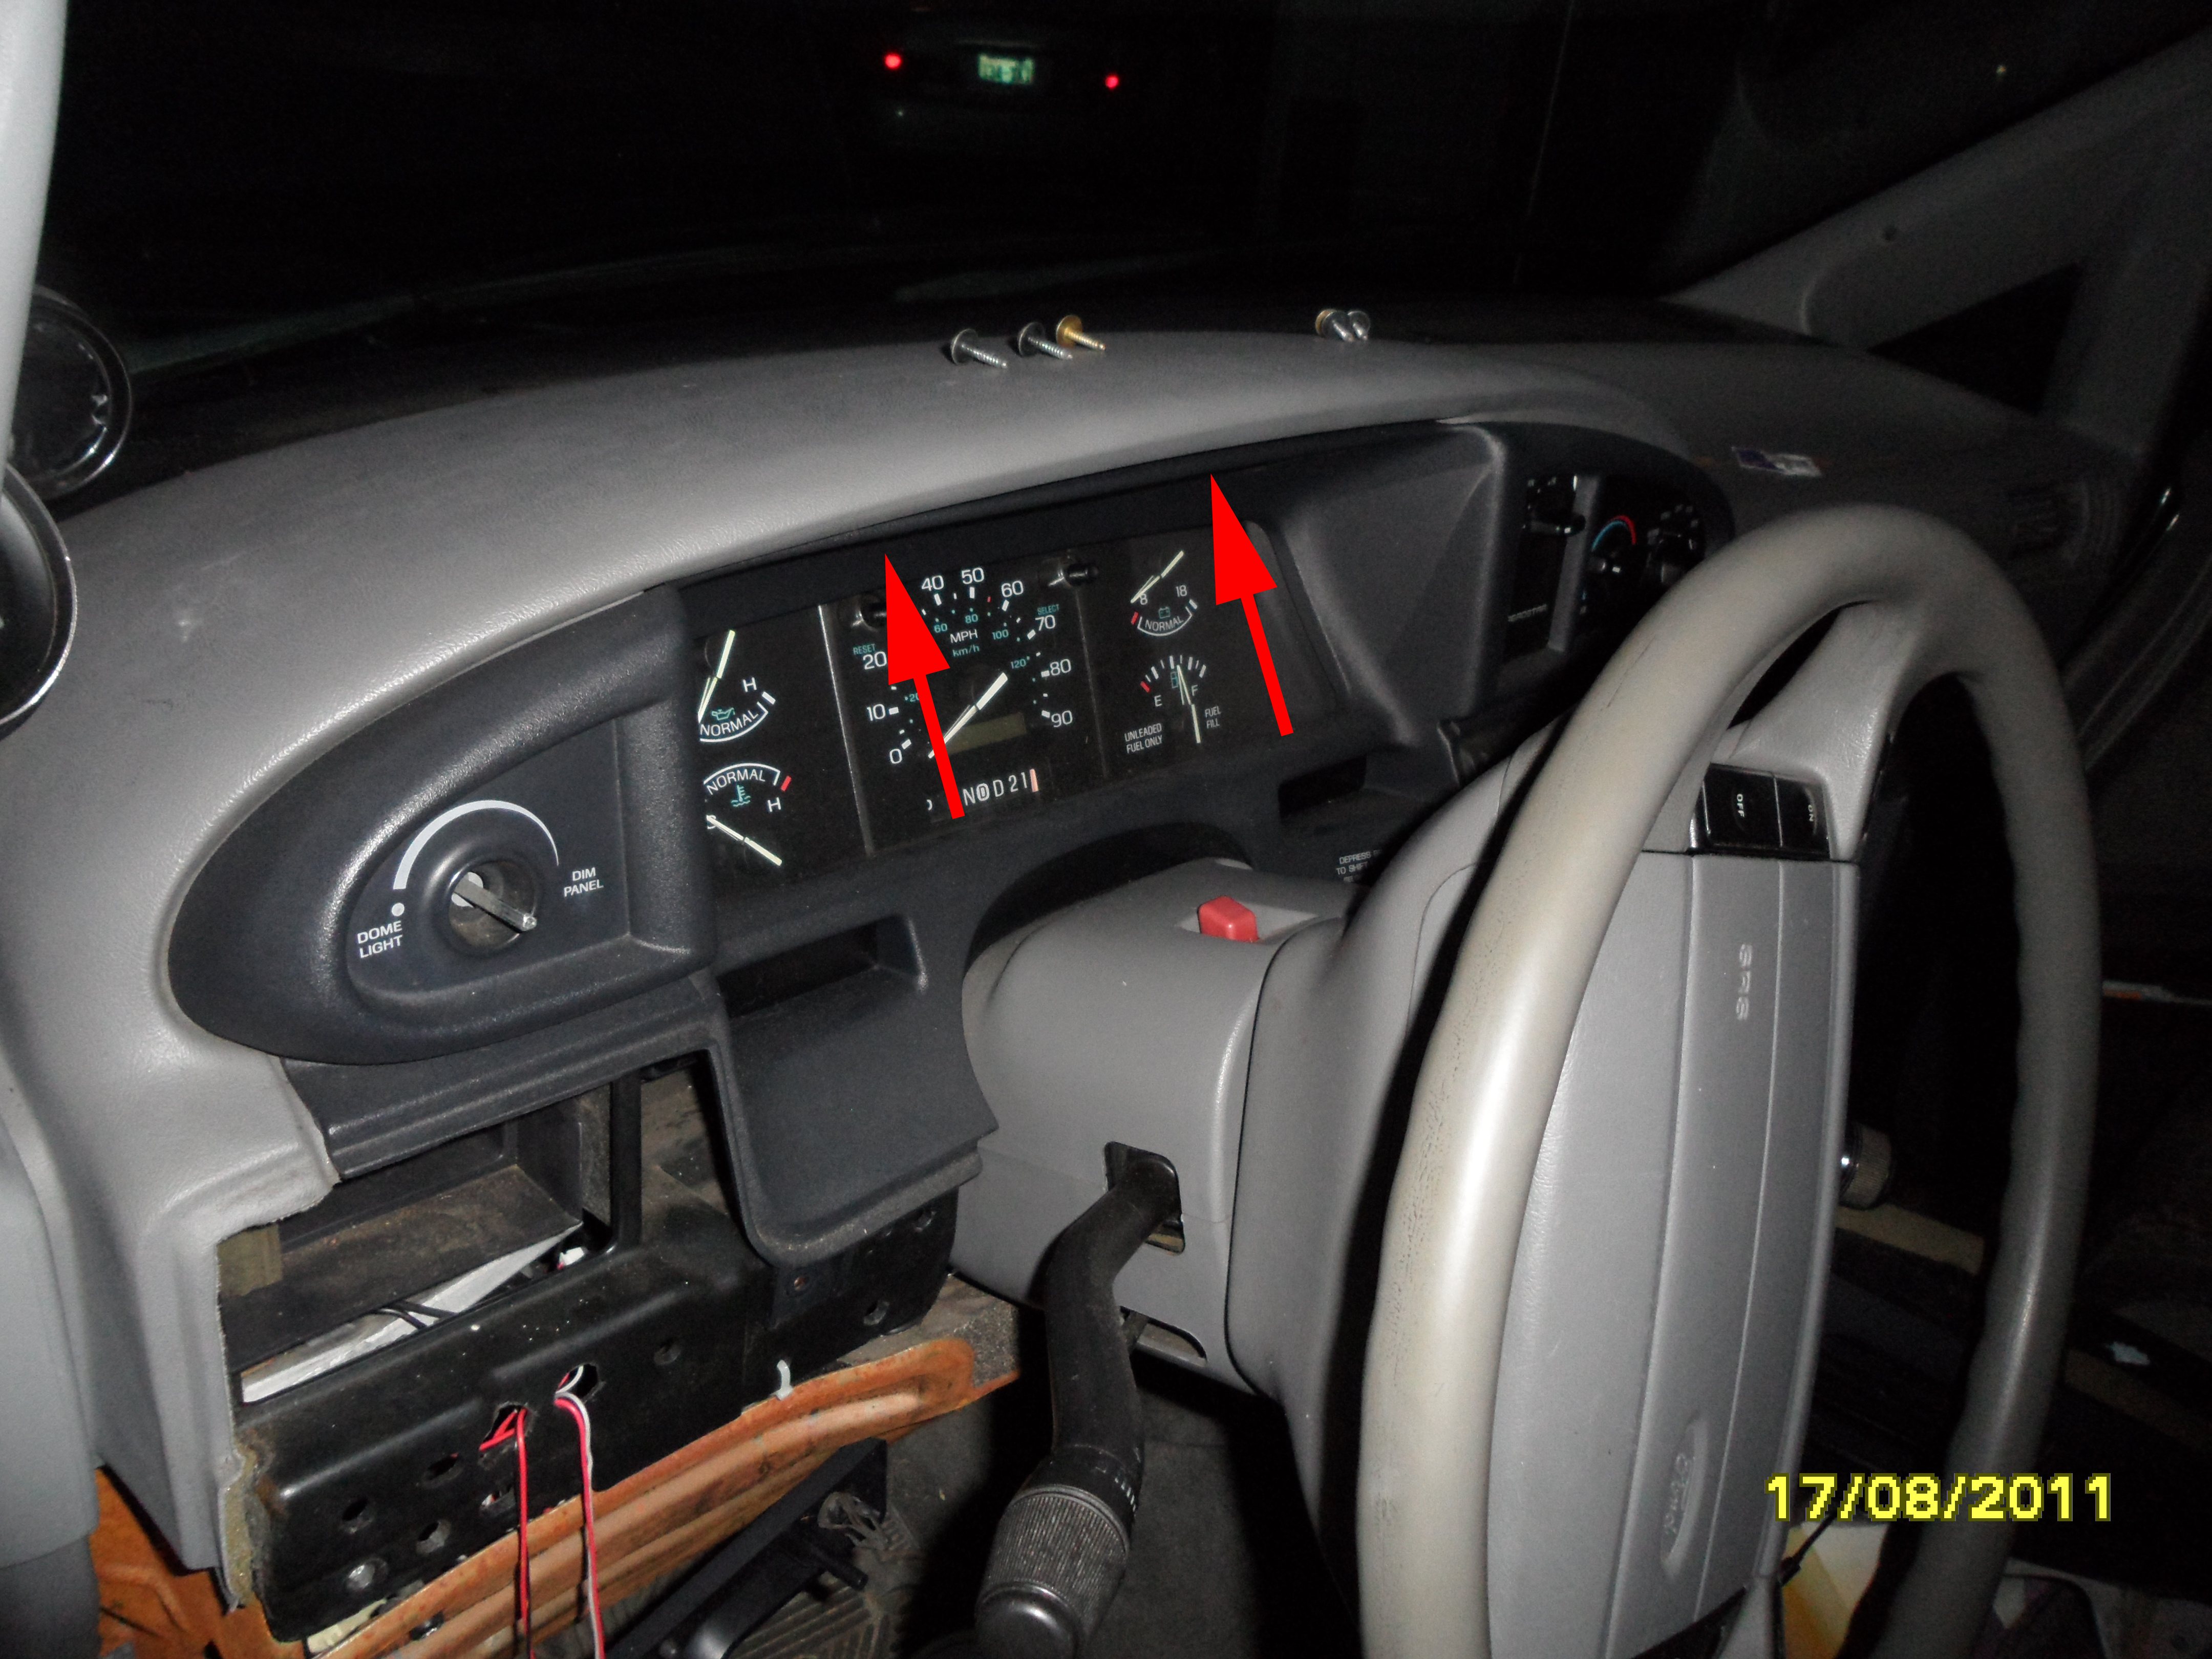
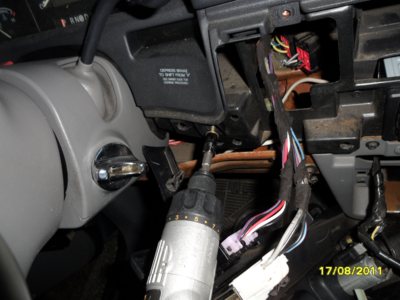
Remove the two upper instrument cluster surround screws. A 1/4" socket and ratchet works well here. Tilt the steering wheel down, turn the key to ON, shift to Low, then the surround can be removed. Put the shifter back in Park, turn key off.
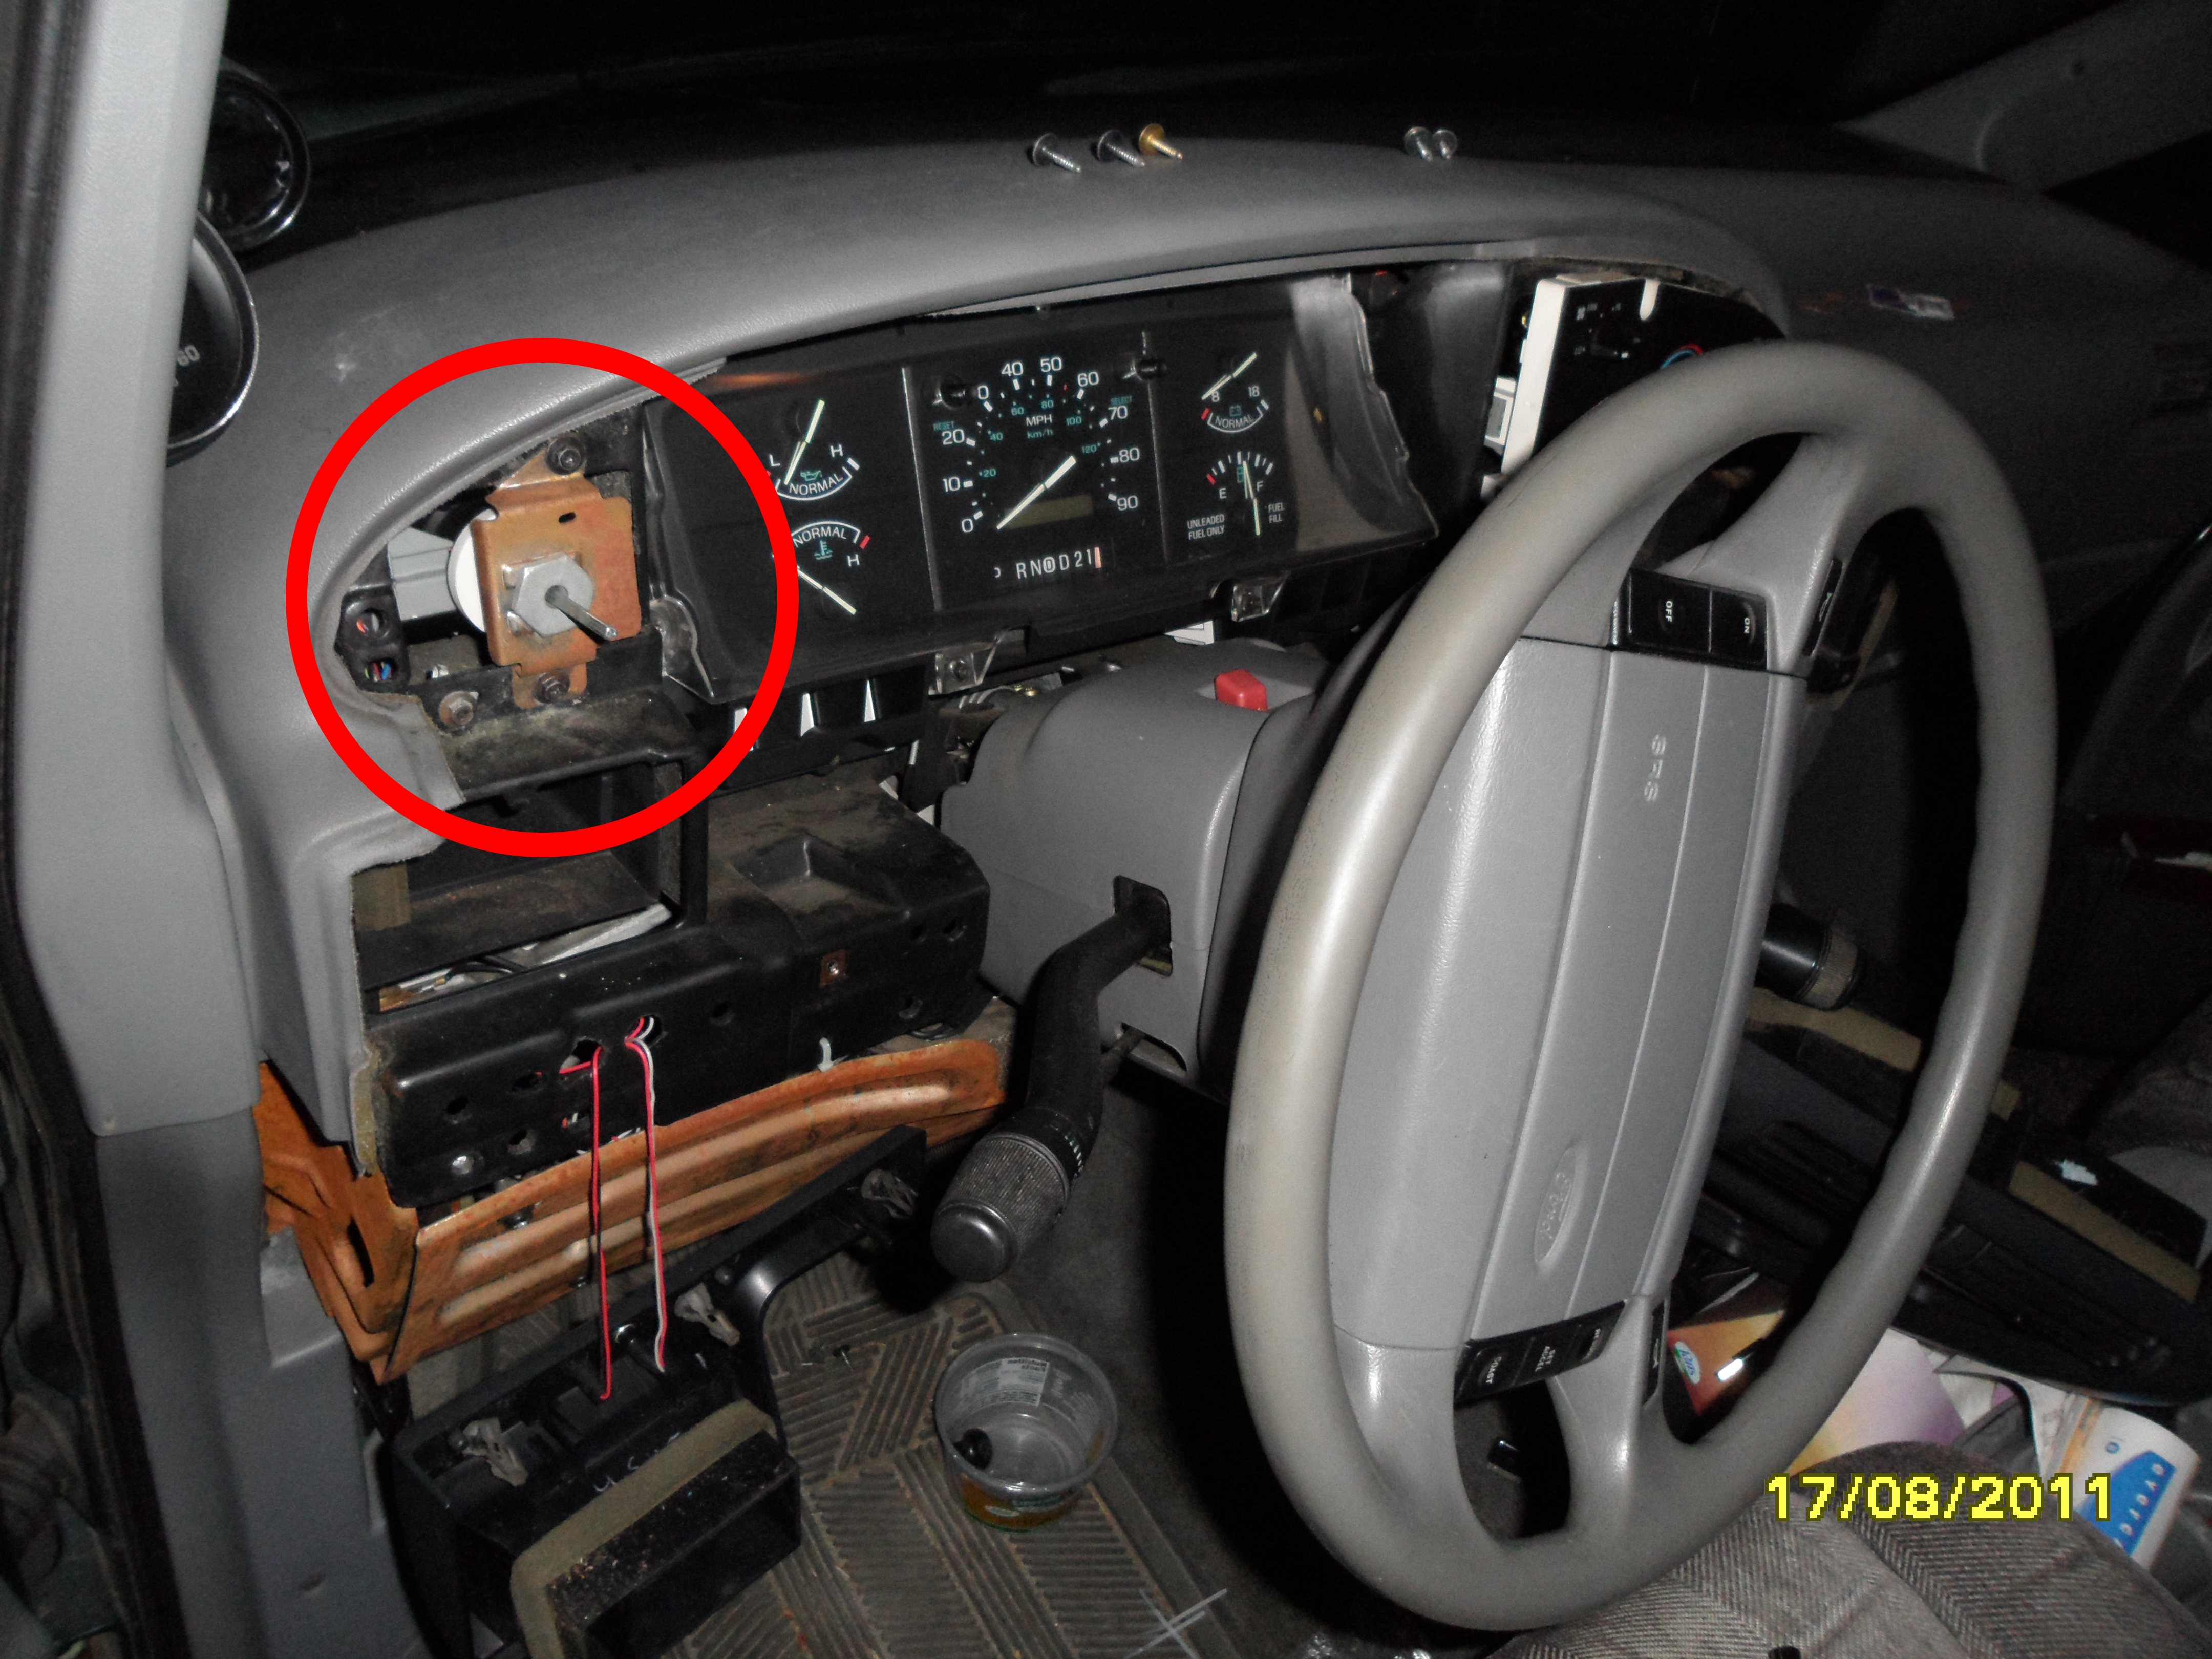
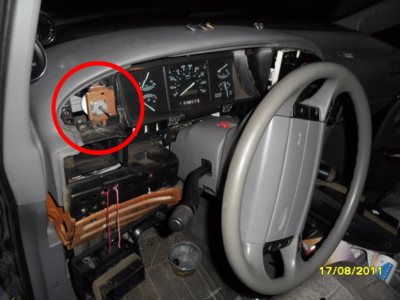
There's the switch in its adapter bracket.
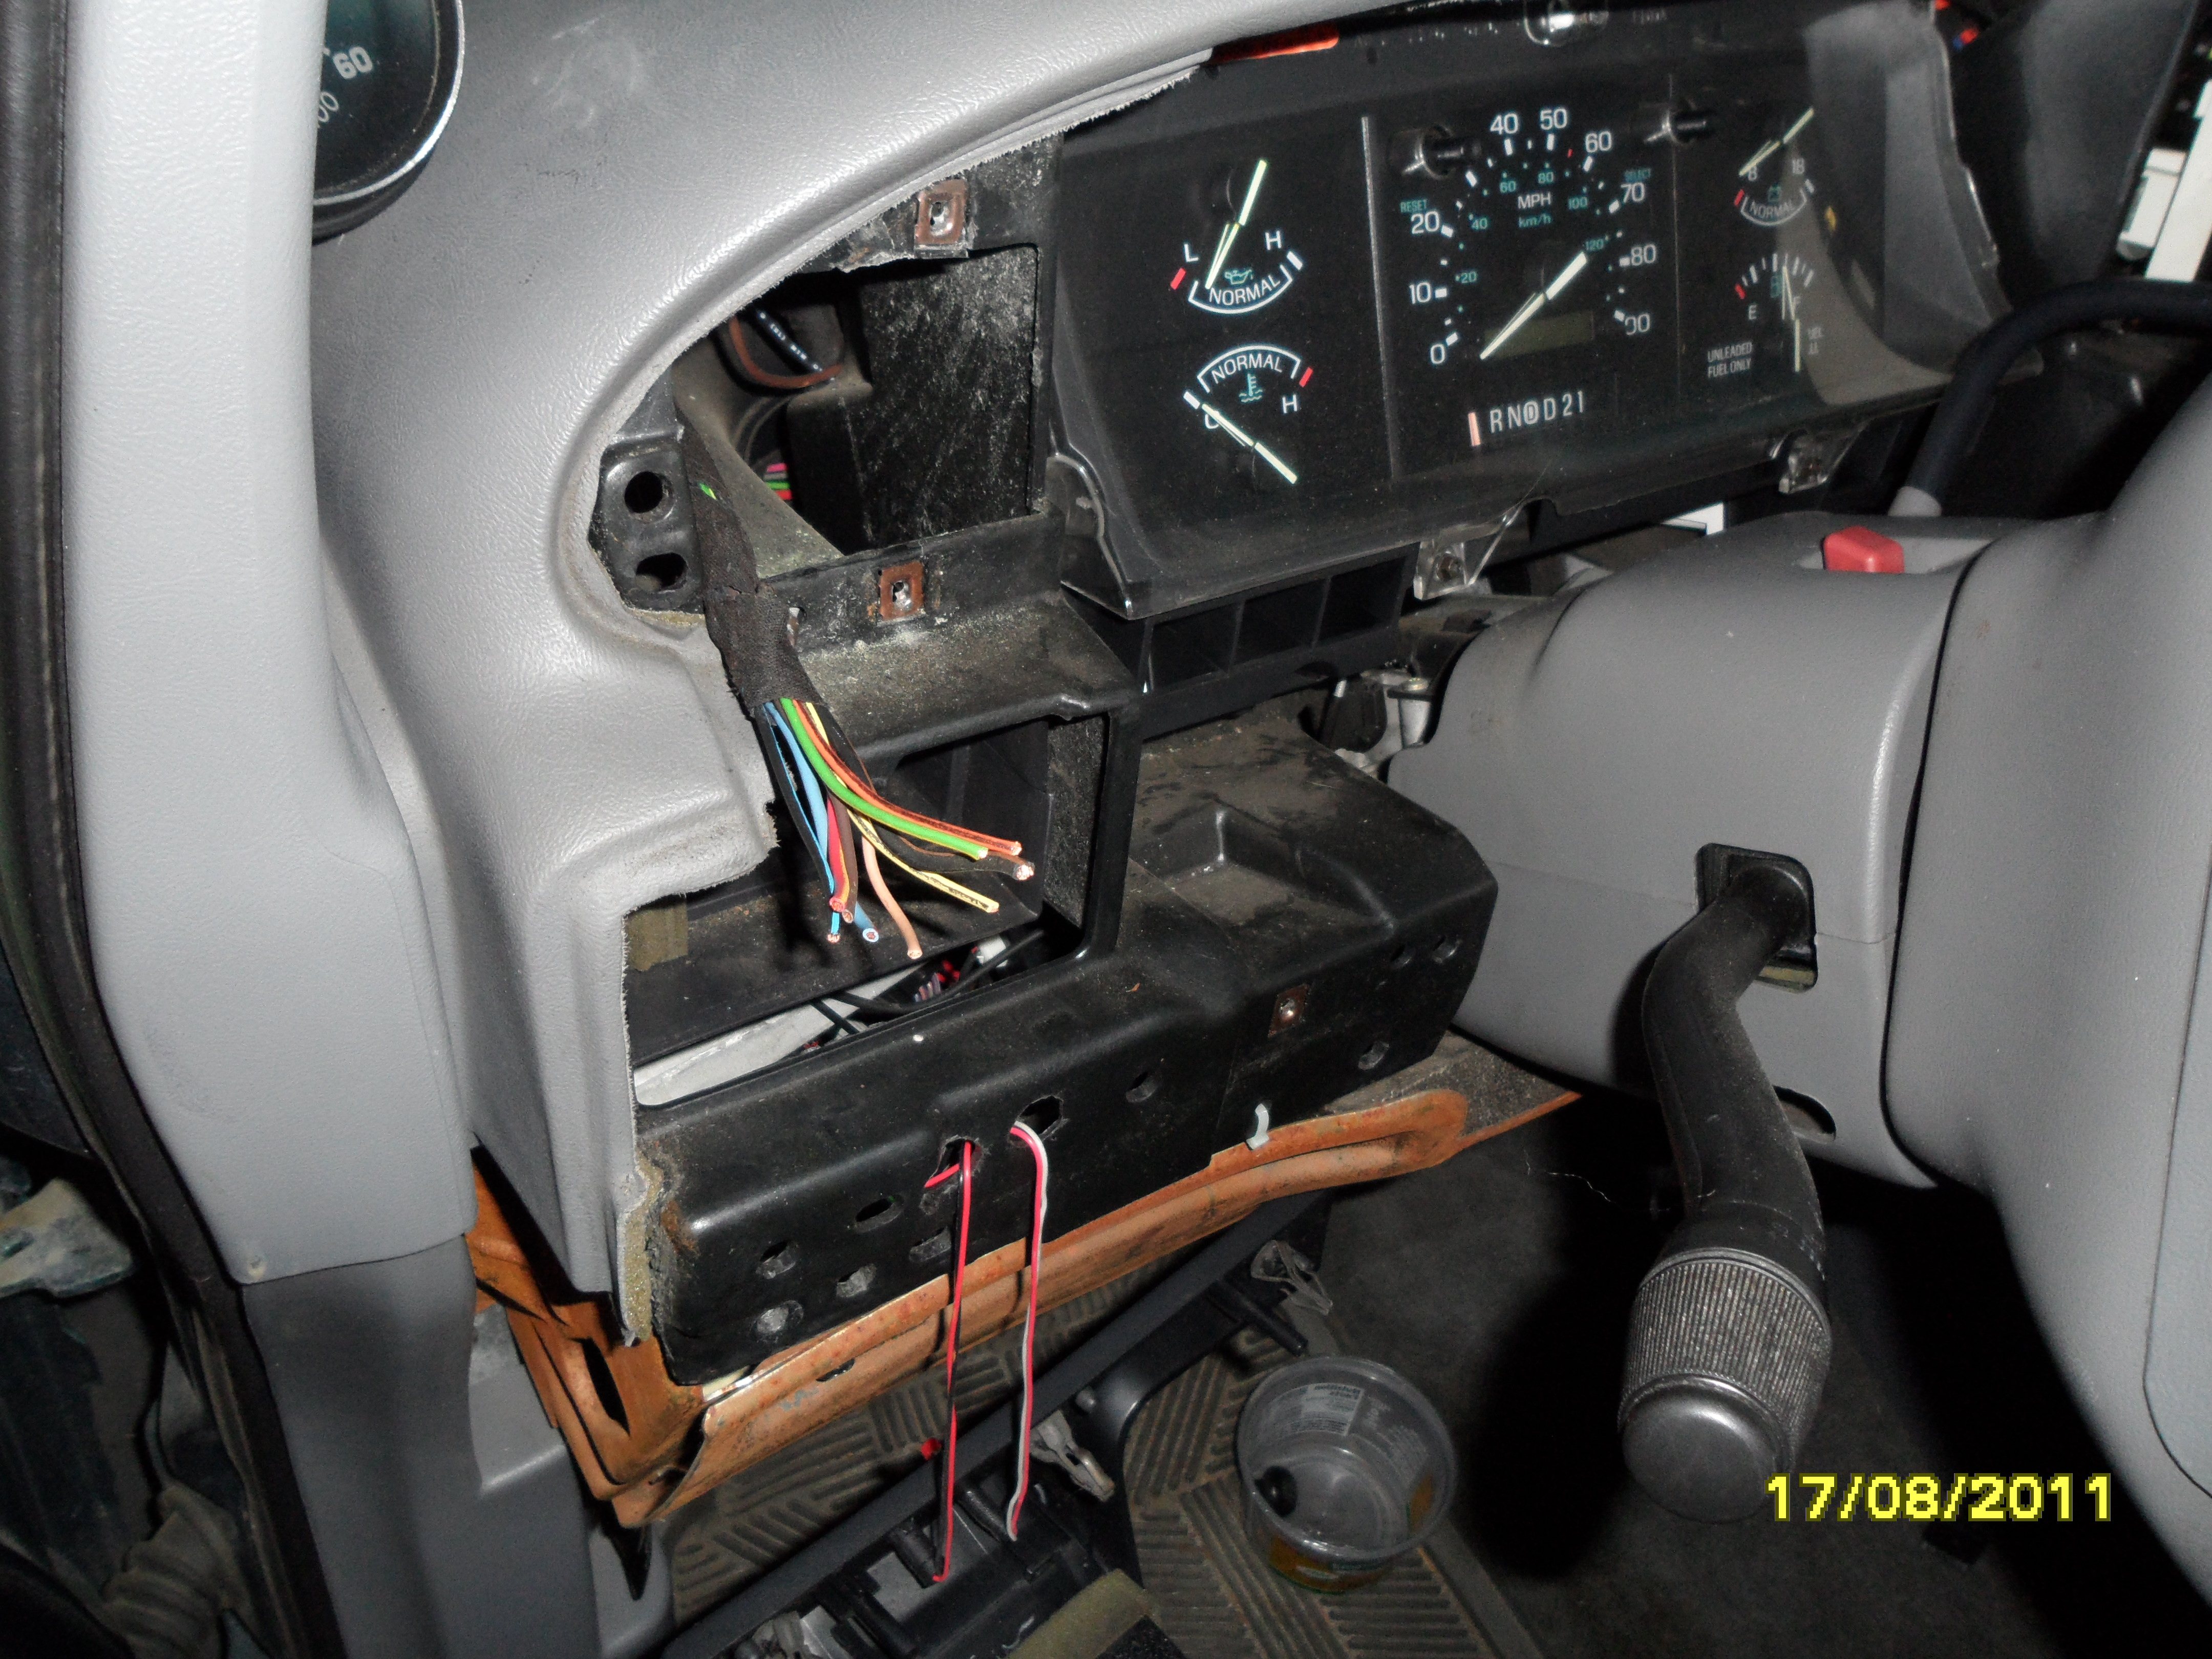
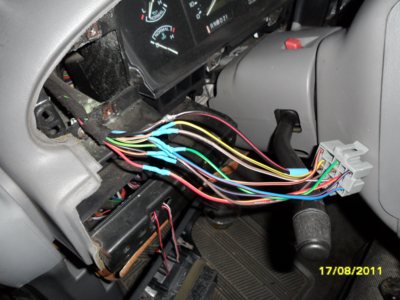
Remove the last two screws, and withdraw the switch from the dash.
The bits laying all over.
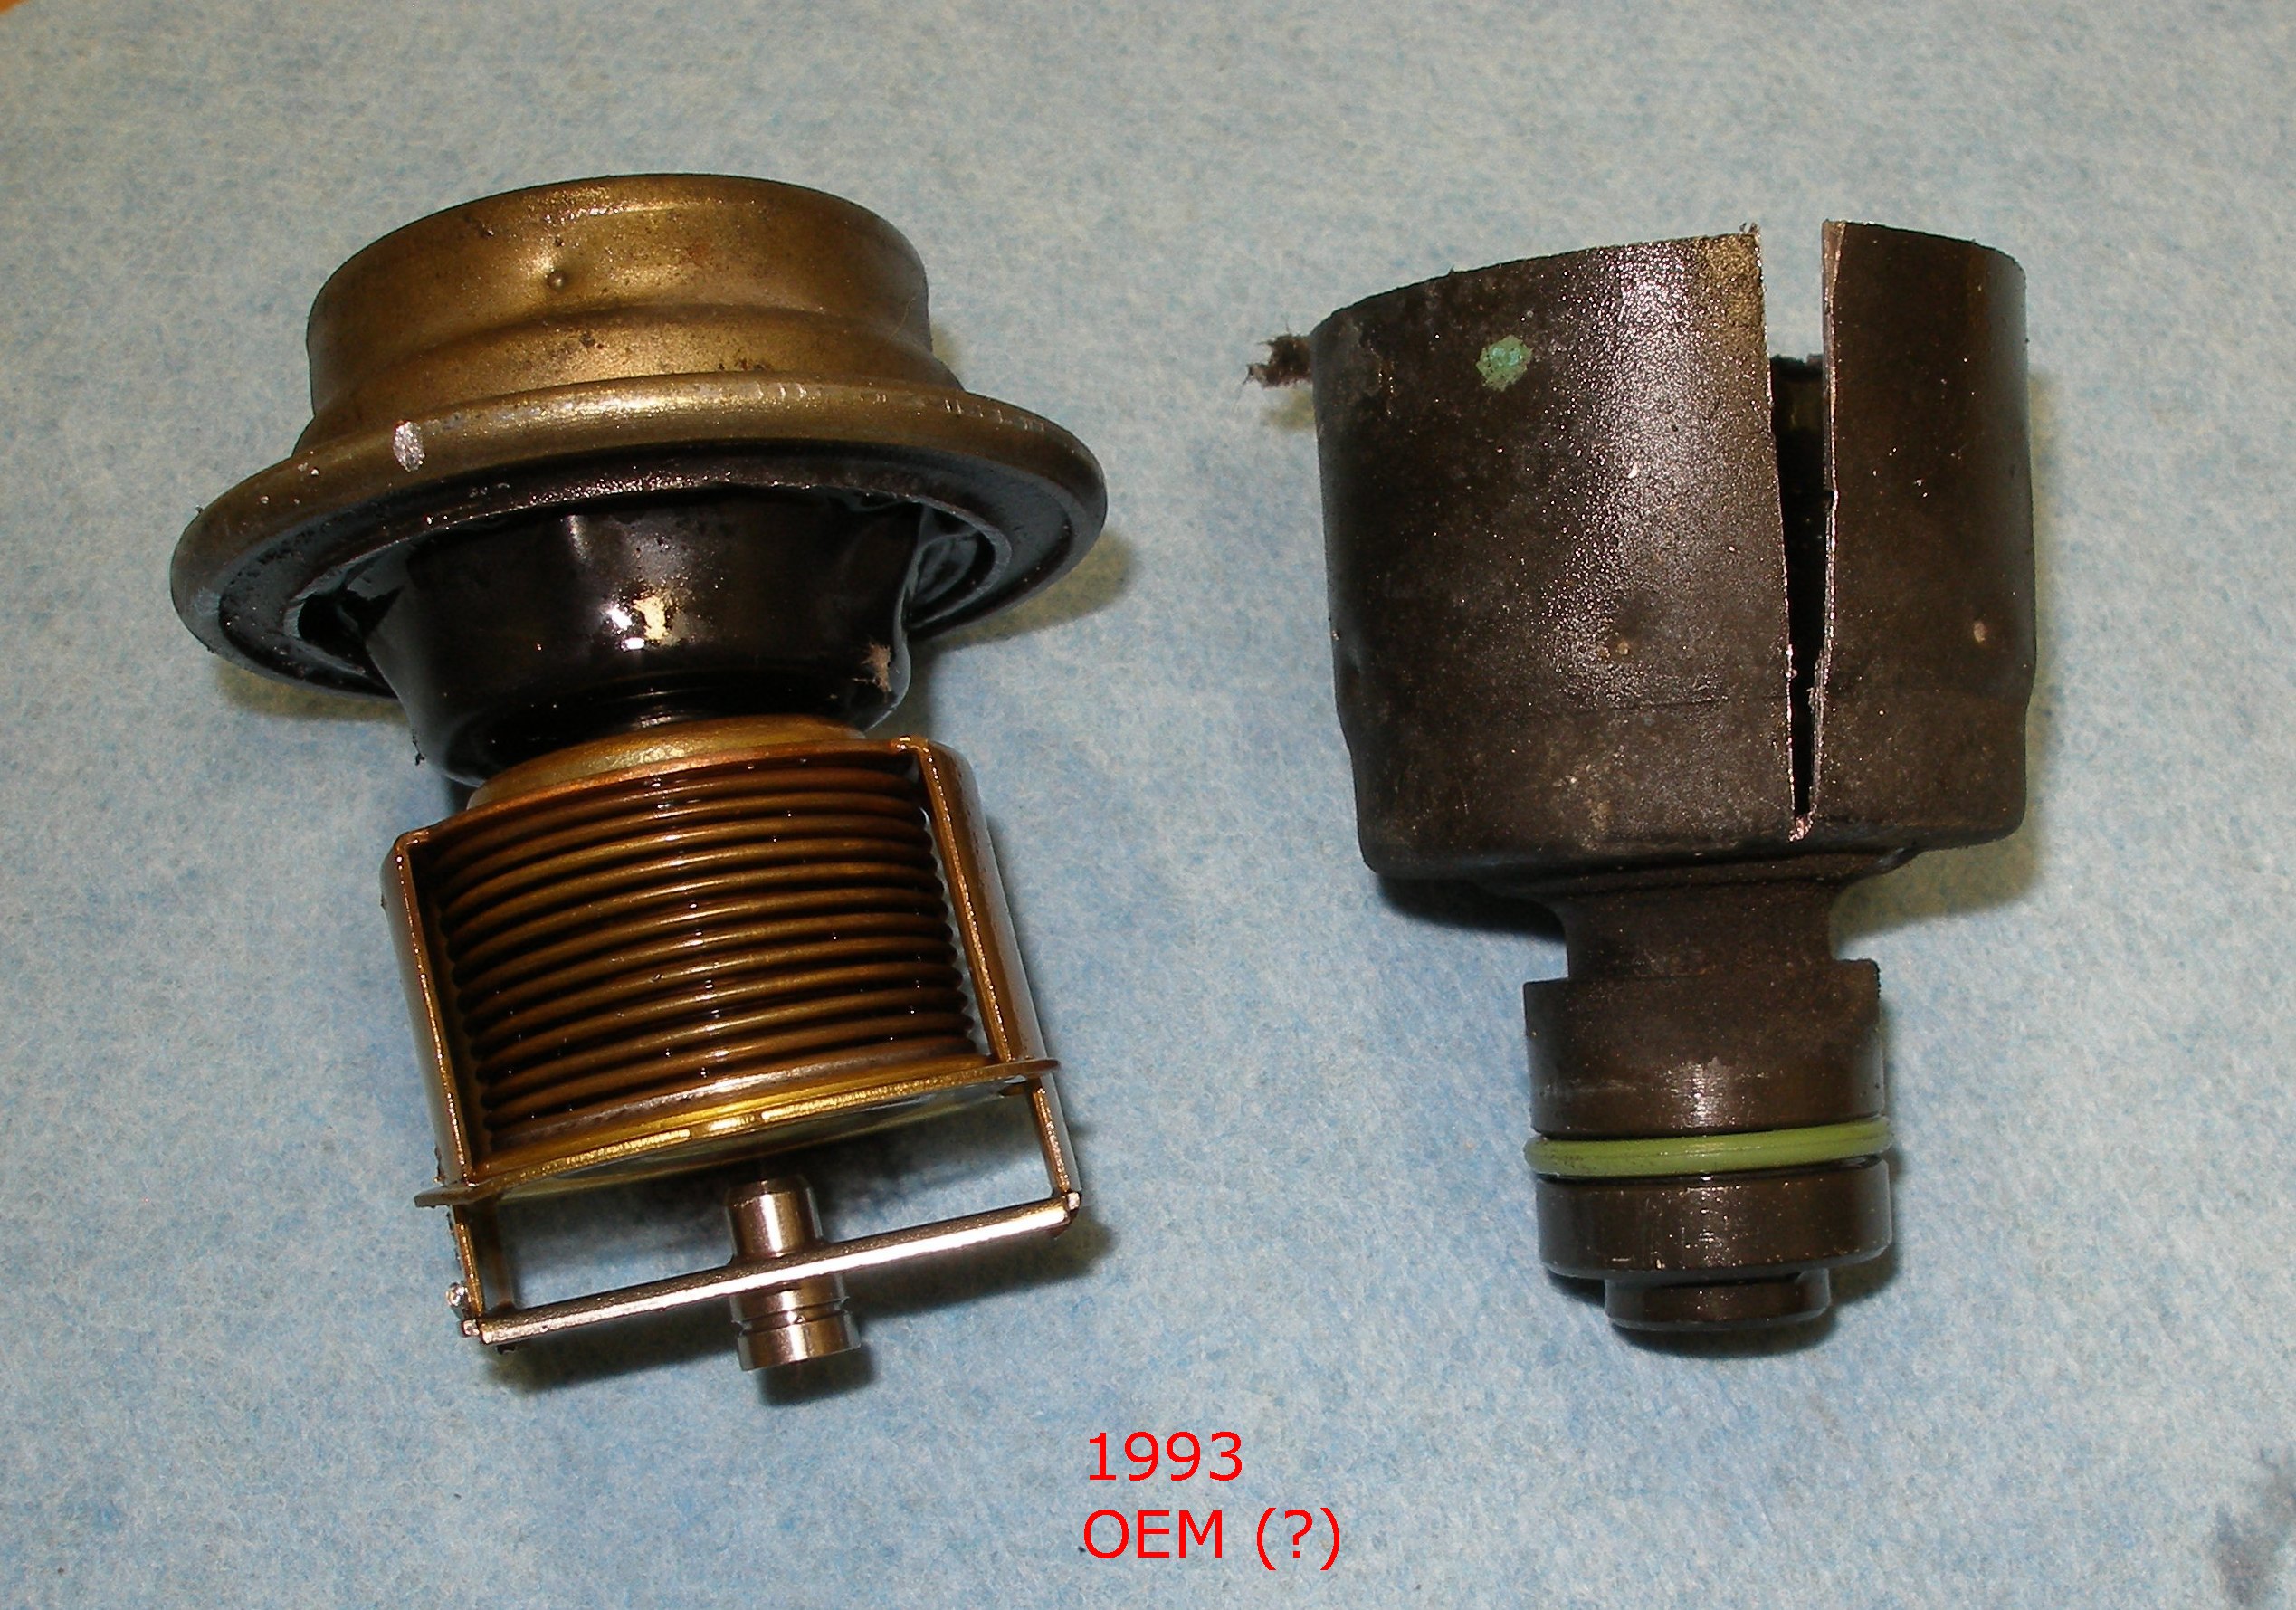
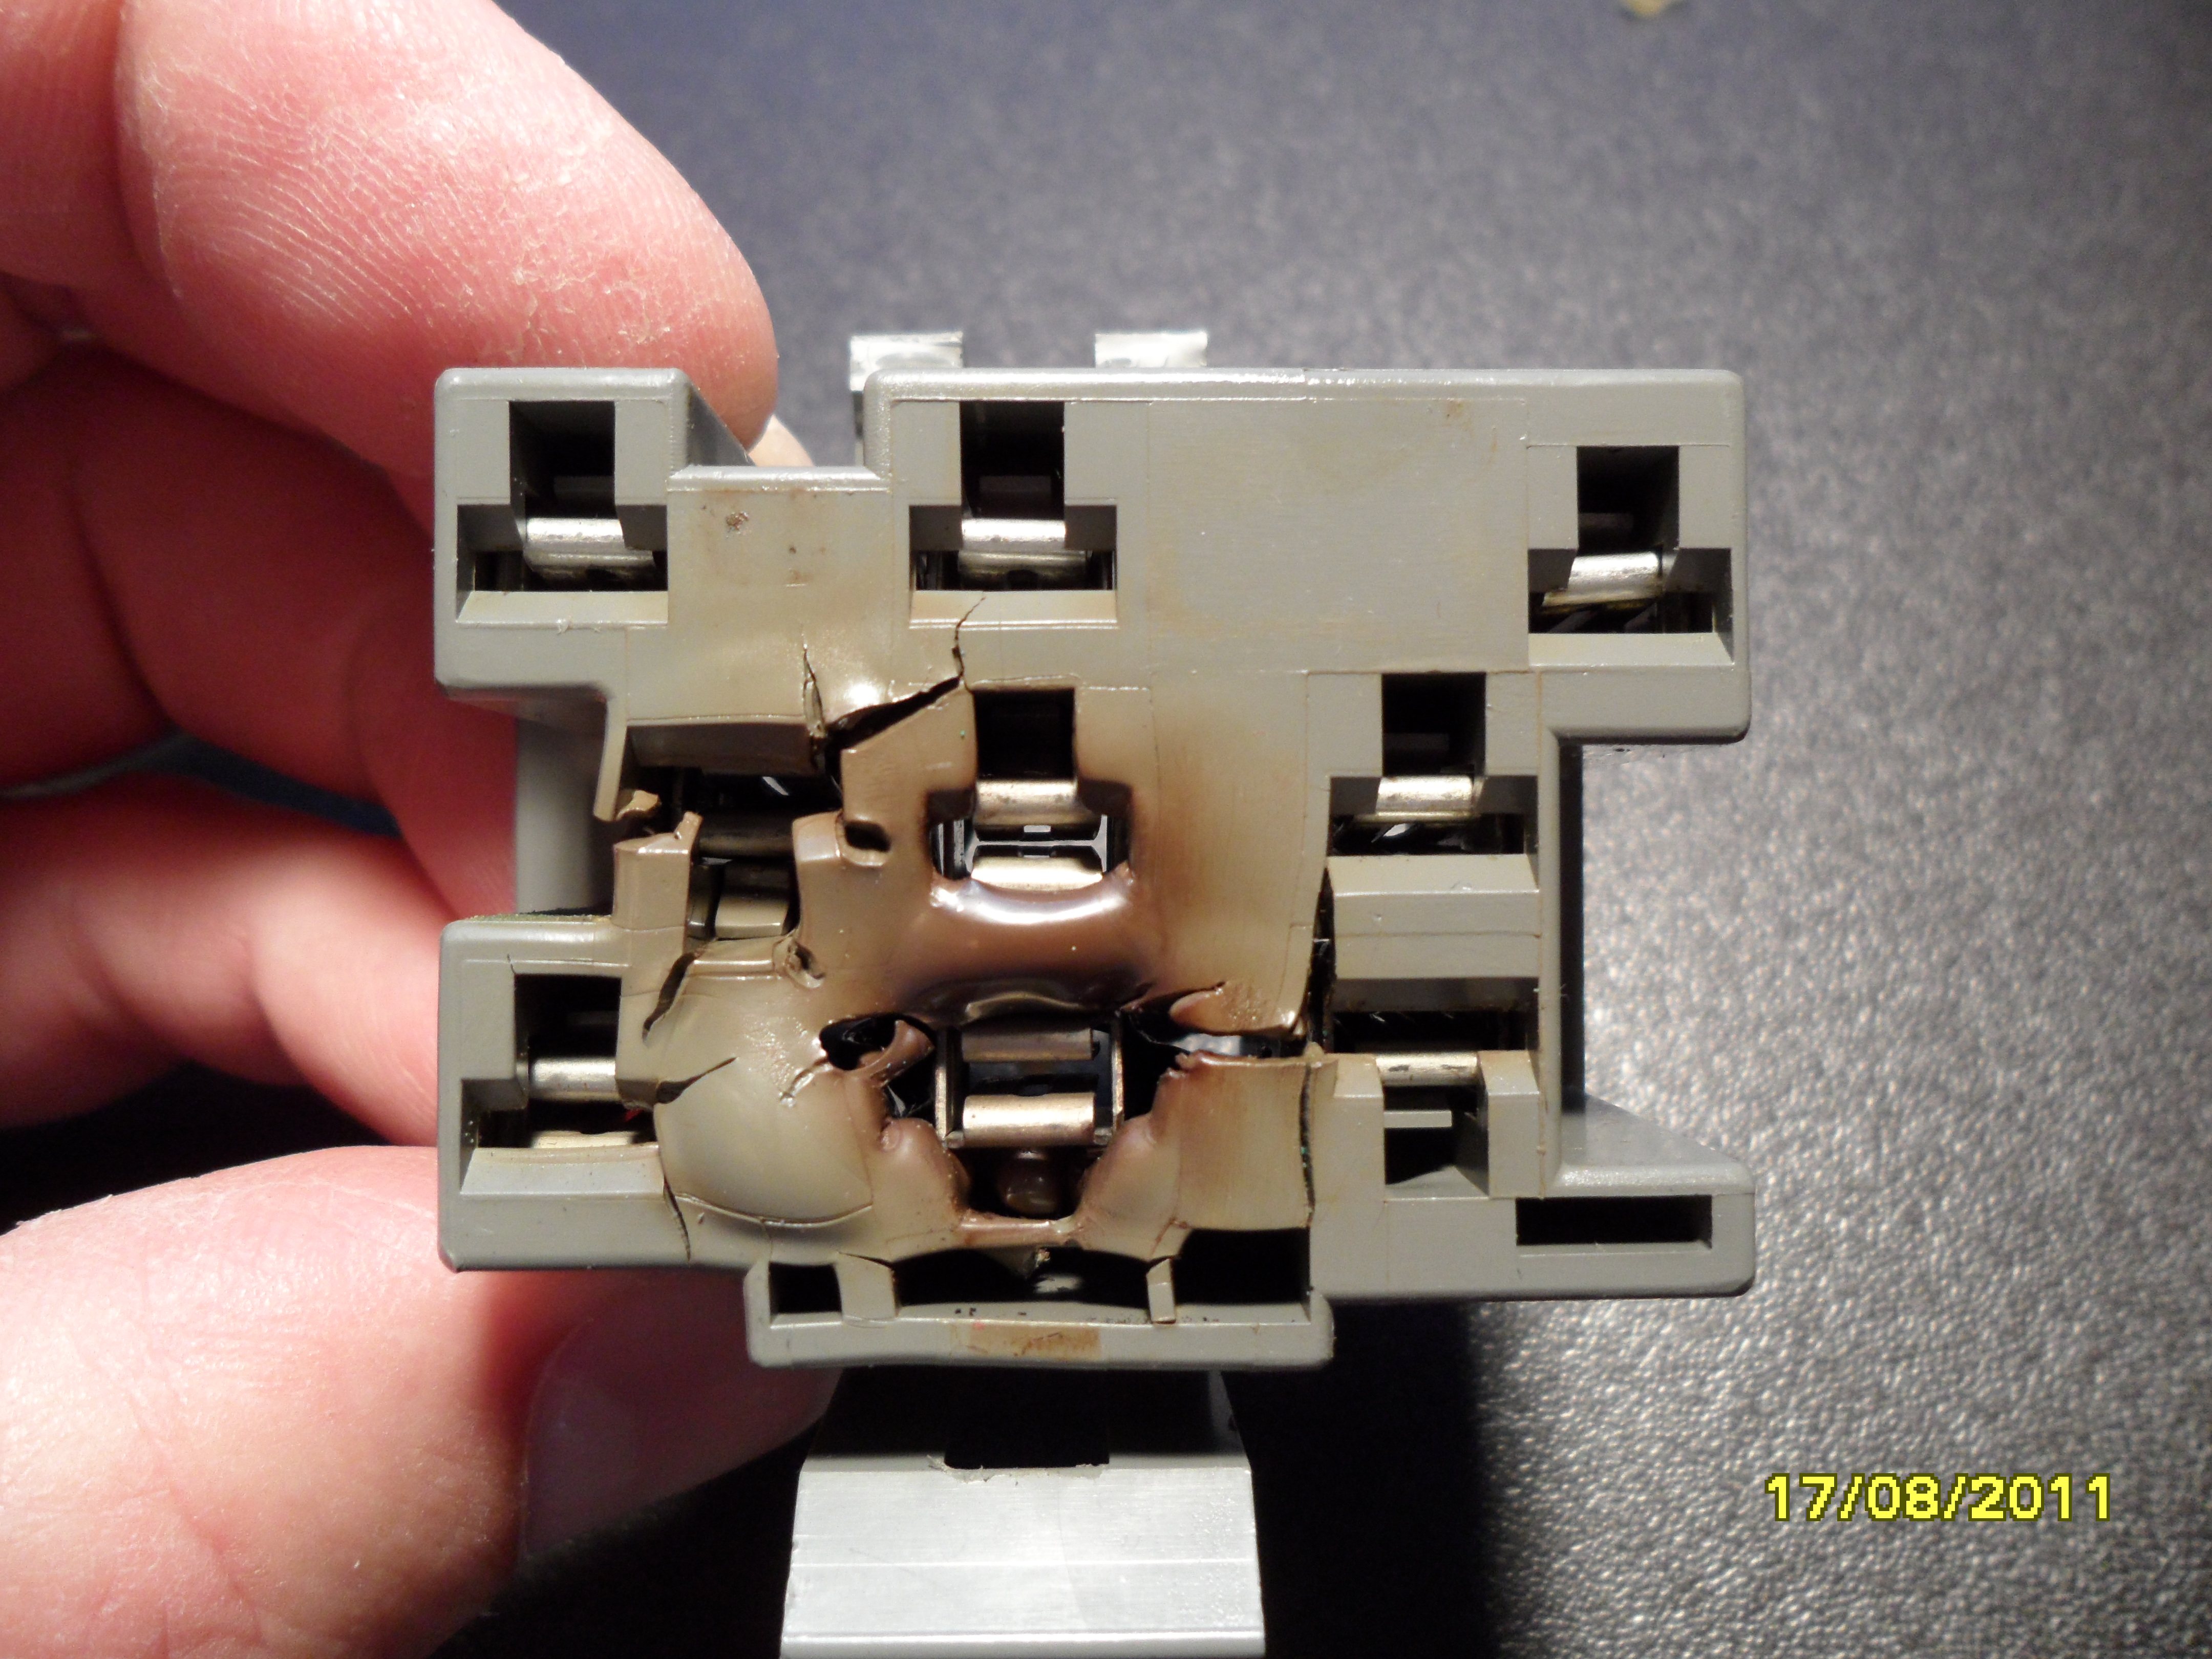
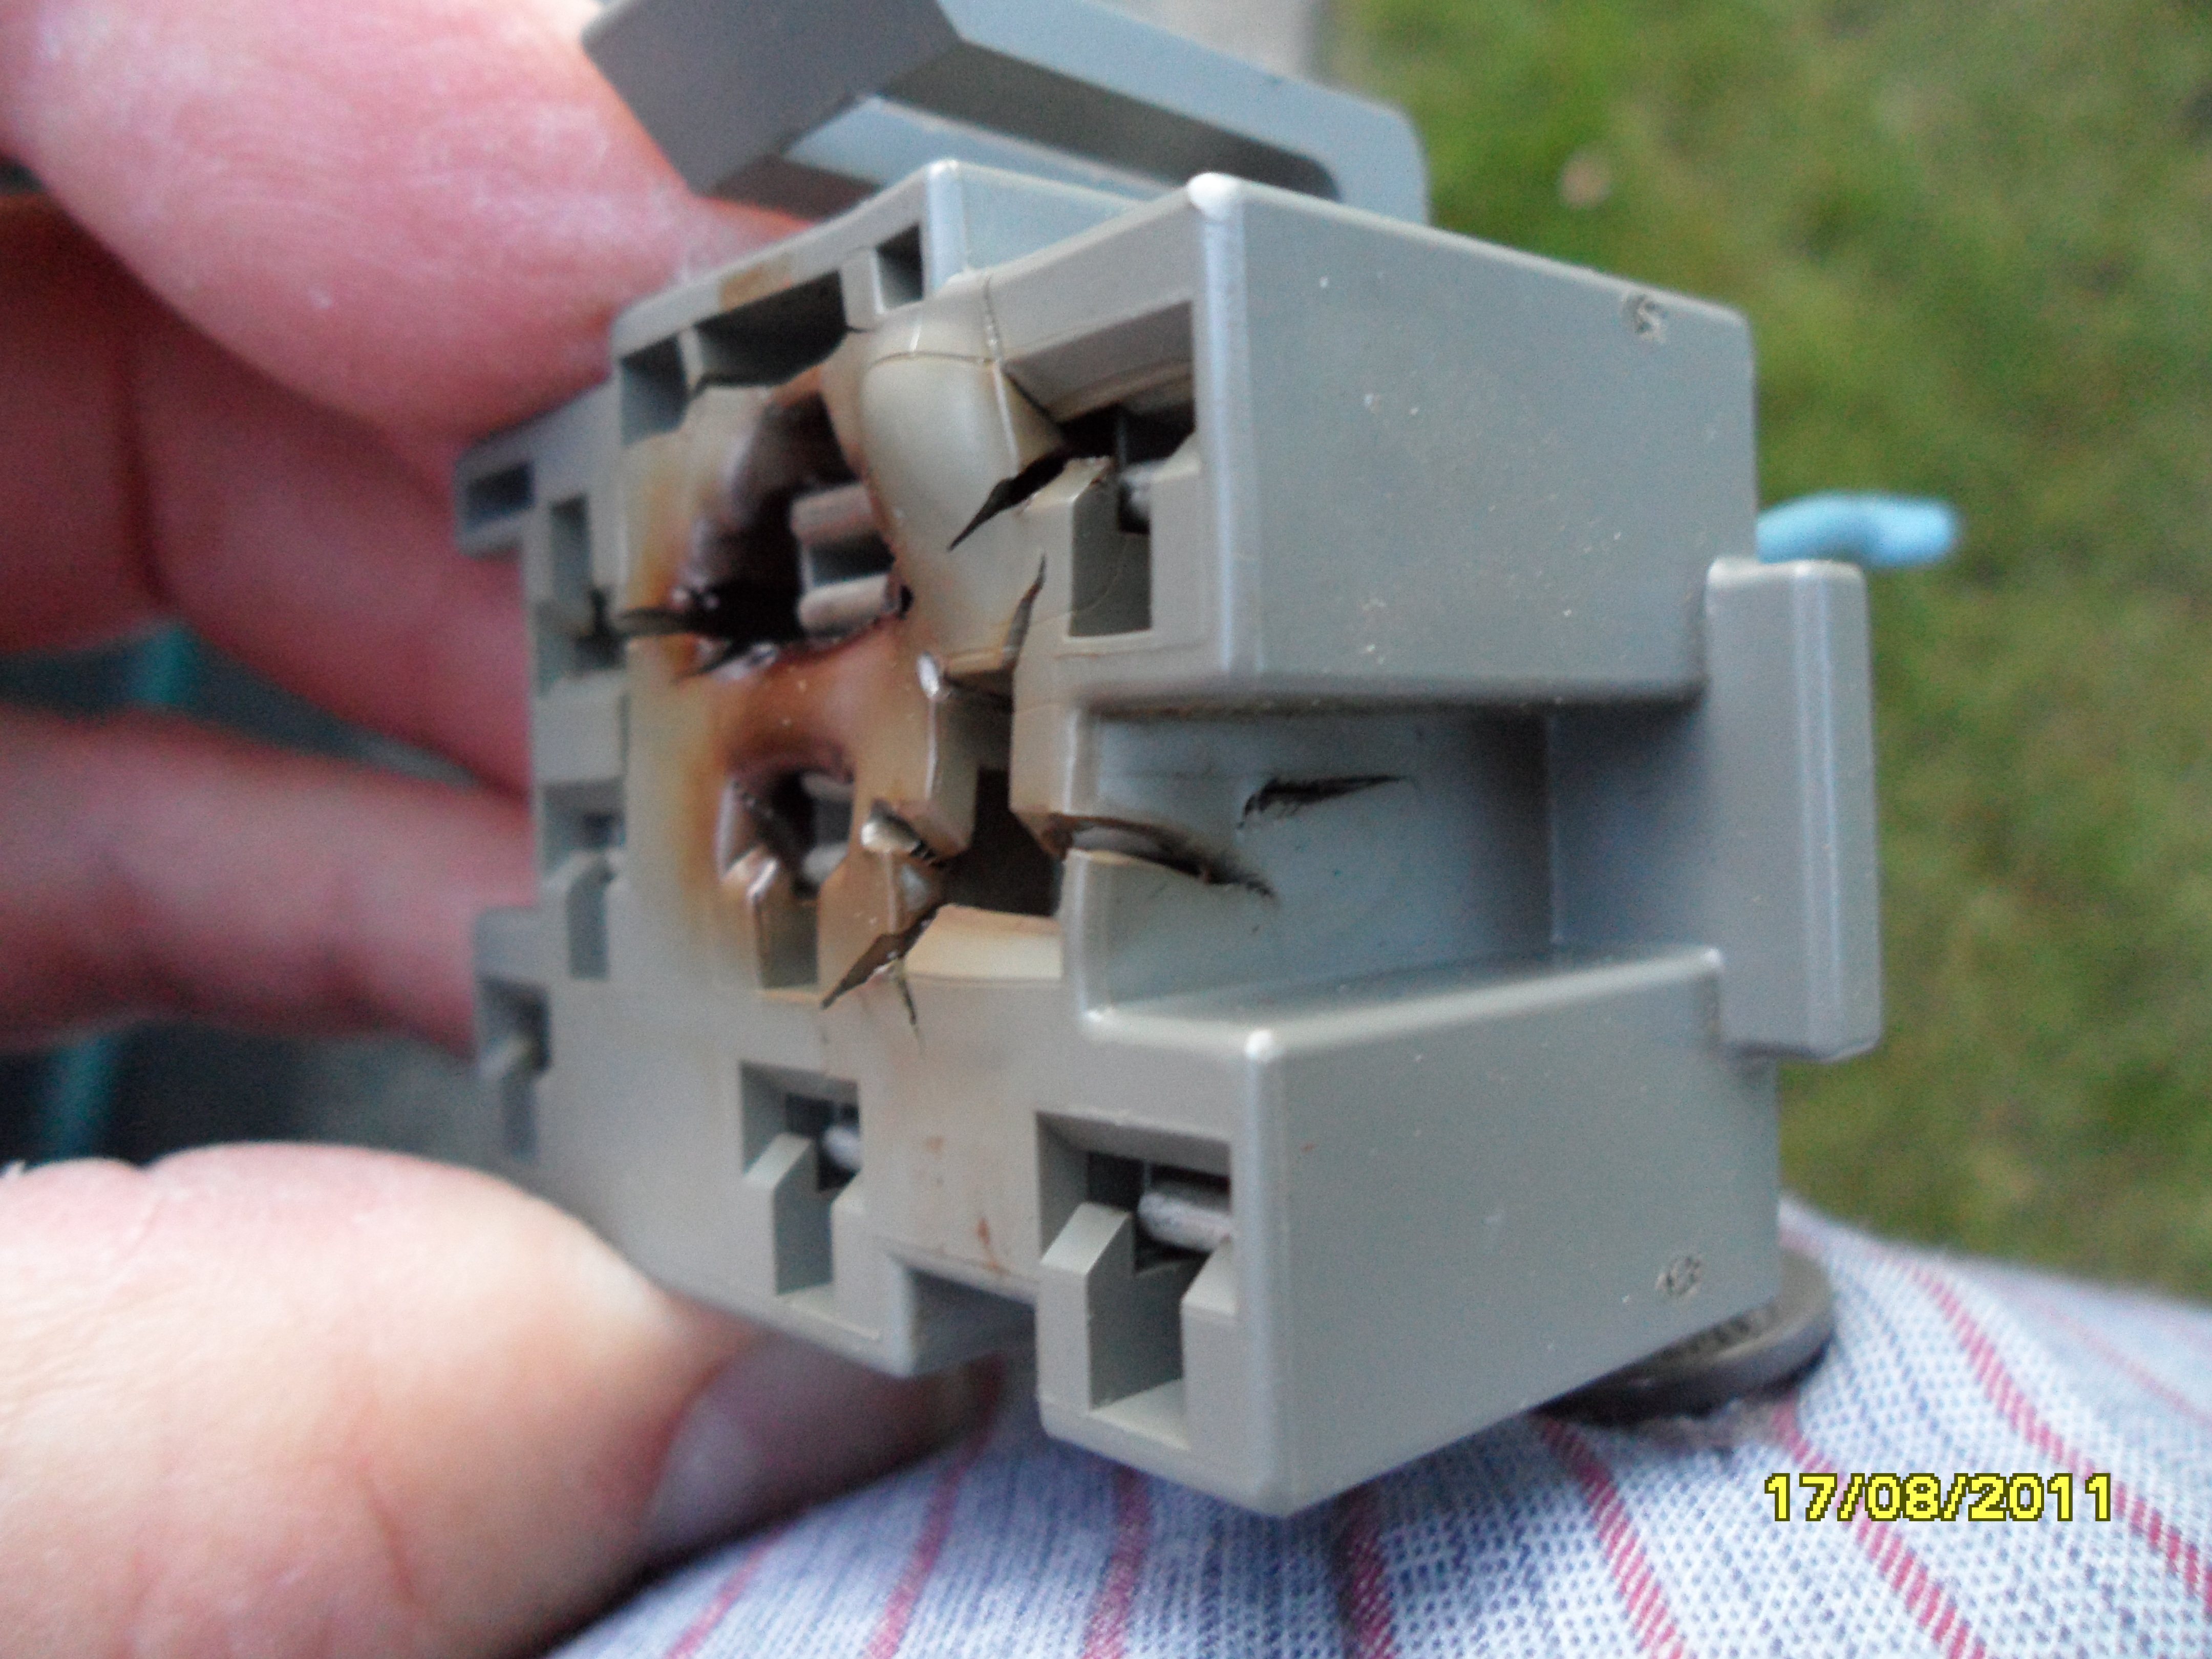
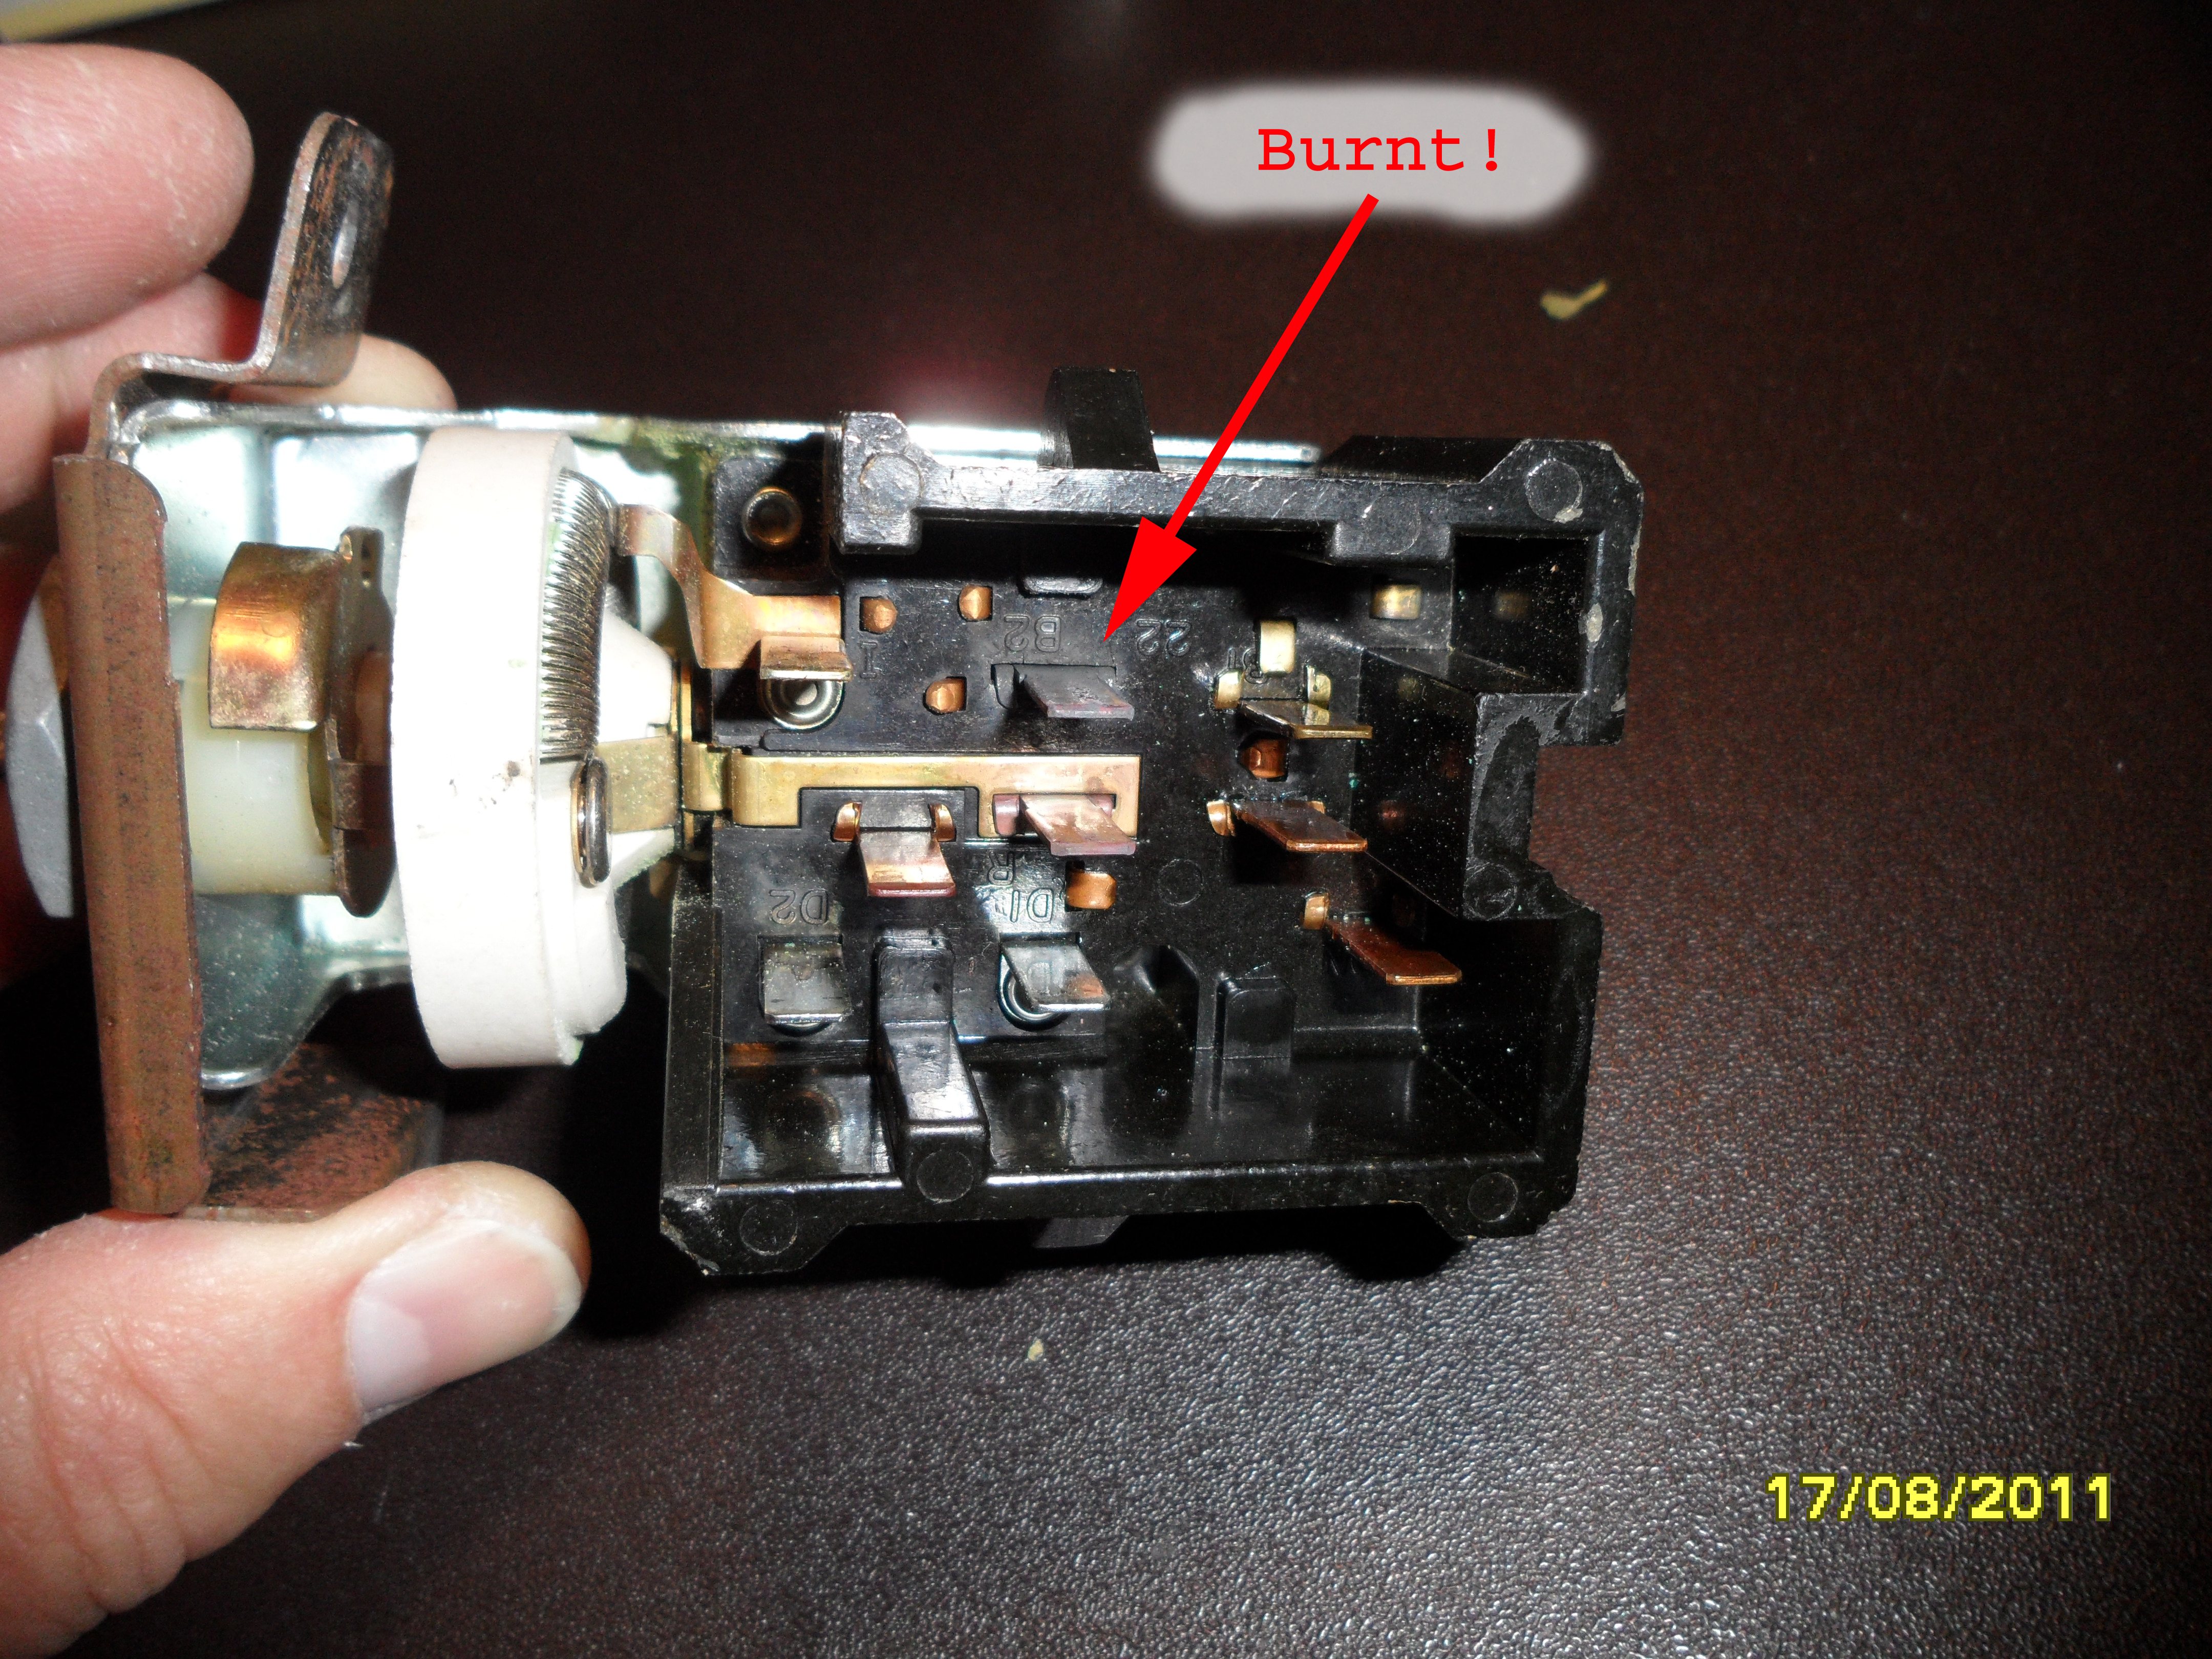
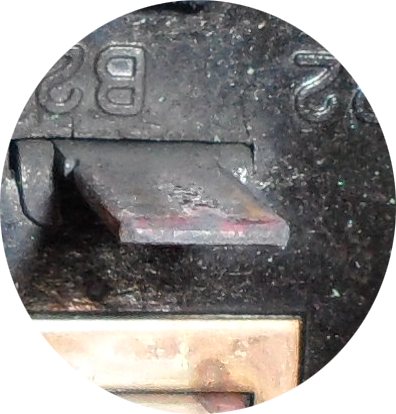
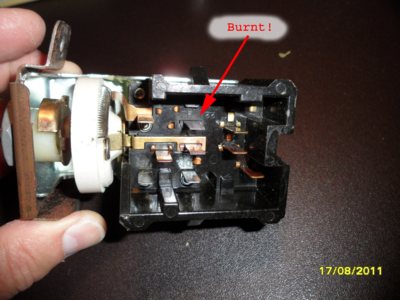
When I removed the switch from the connector, this is what I saw:
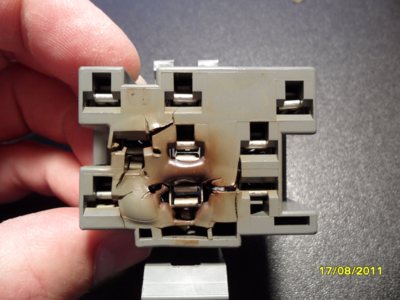
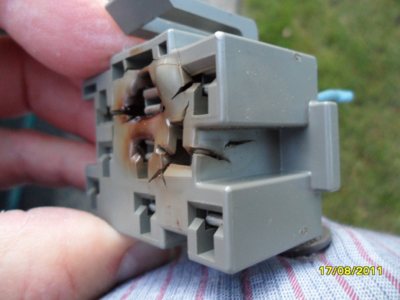
The contact for the taillights was burnt badly:

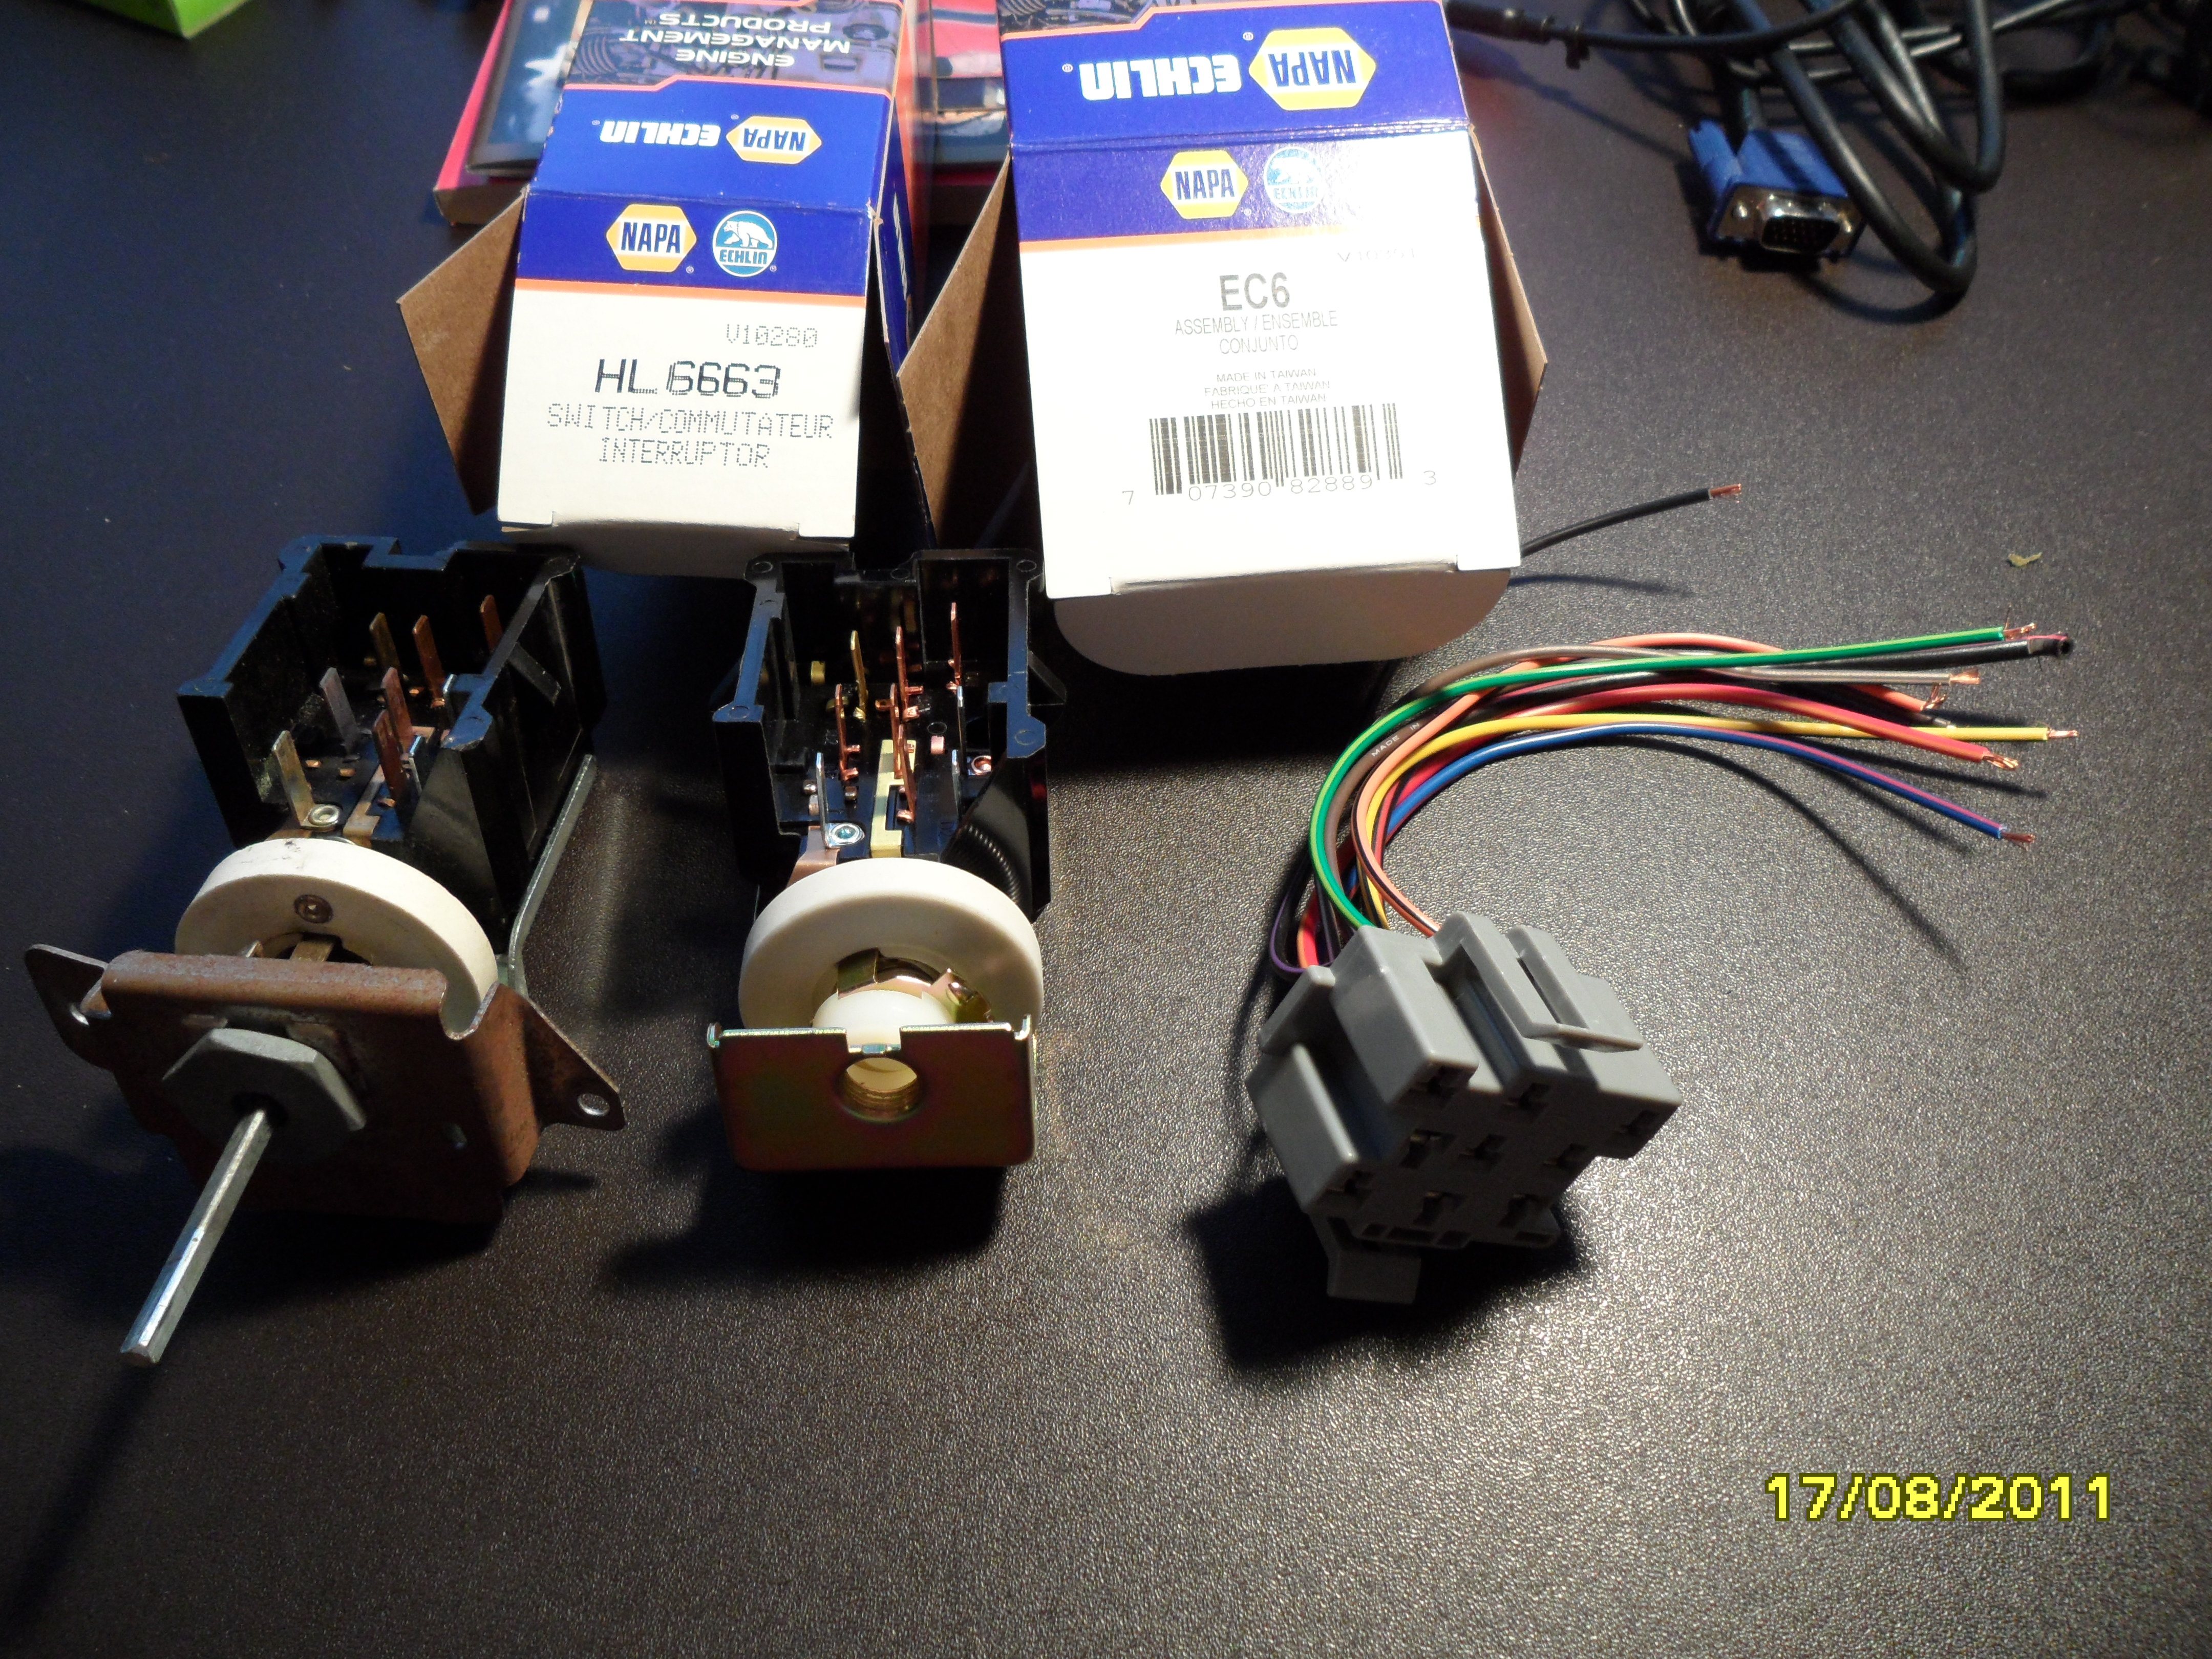
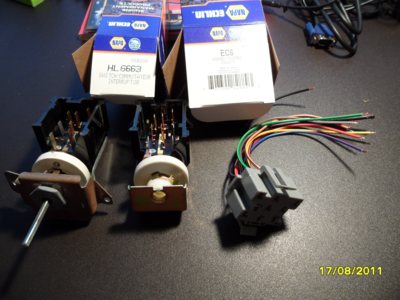
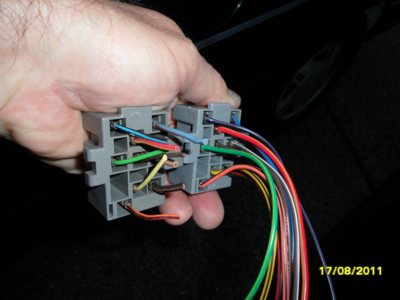
From left: old switch, new switch, new connector.
NAPA (Echlin) No. HL6663 headlight switch, $20
NAPA (Echlin) No. EC6 connector w/pigtail, $12
Note that Standard and BWD have connectors listed, but the years of models covered seem to vary widely.
NAPA had
NO listing for my '93 Aerostar. However, I gave them the BWD No. PT767, which they crossed-referenced into the Echlin BC6, and when he used his computer to tell him what models that part covered, my '93 Aero
is listed. Go figure.
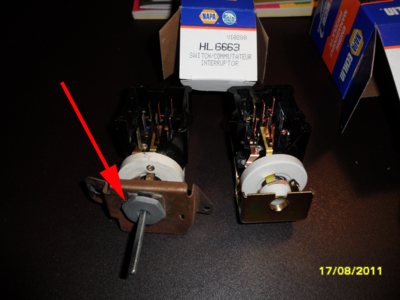
Use a 15/16" box-end wrench to unscrew the threaded retainer that holds the steel adapter plate to the front of the switch.
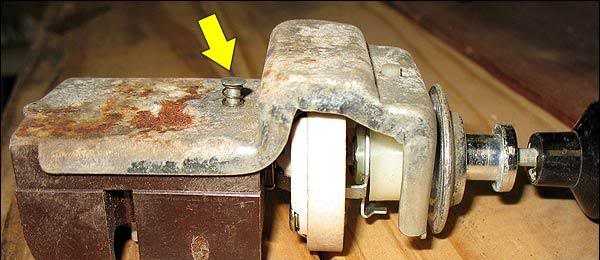
Transfer the shaft from the old switch to the new. I didn't get a picture of the release button, but here's someone else's pic. Pull the shaft out as far as it will go,
then depress the button shown and pull the shaft out completely. To install, just push it fully into the new switch; it will self-lock in place.

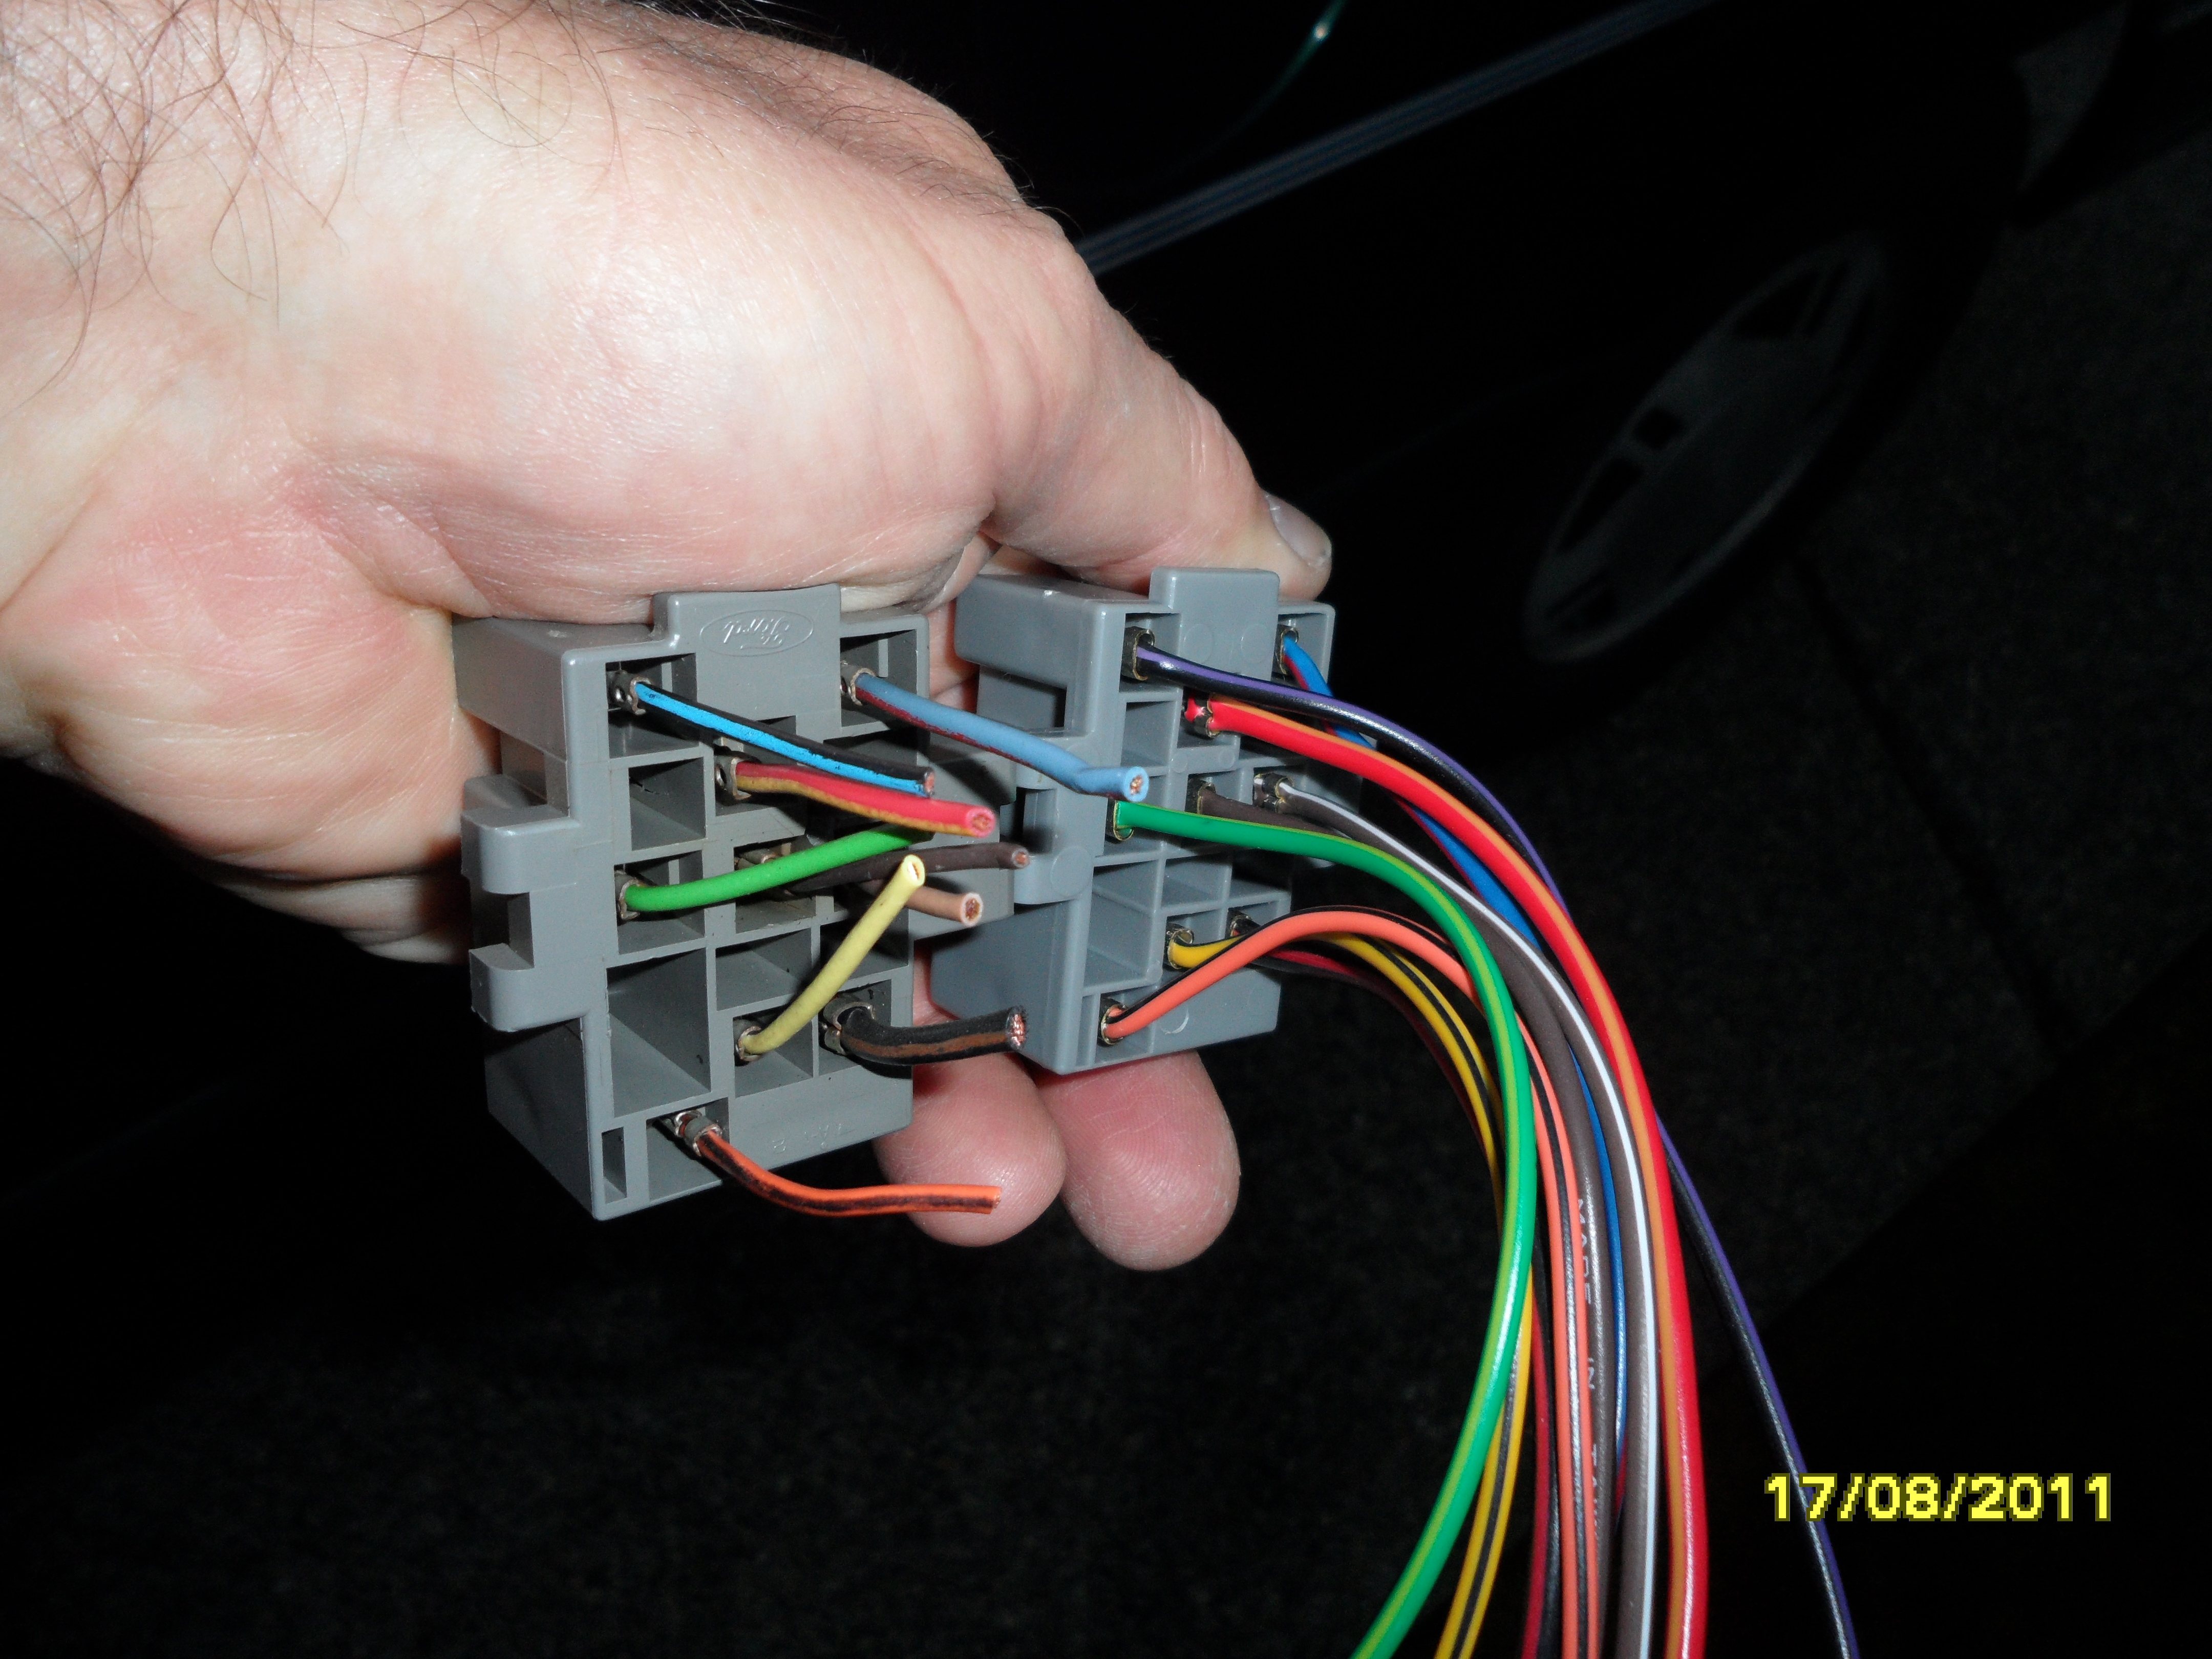
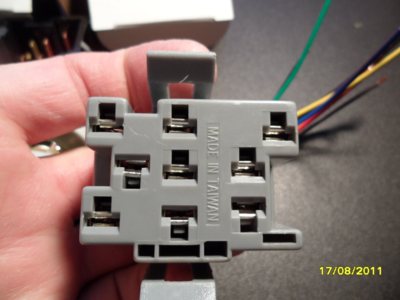
Cut off the old connector

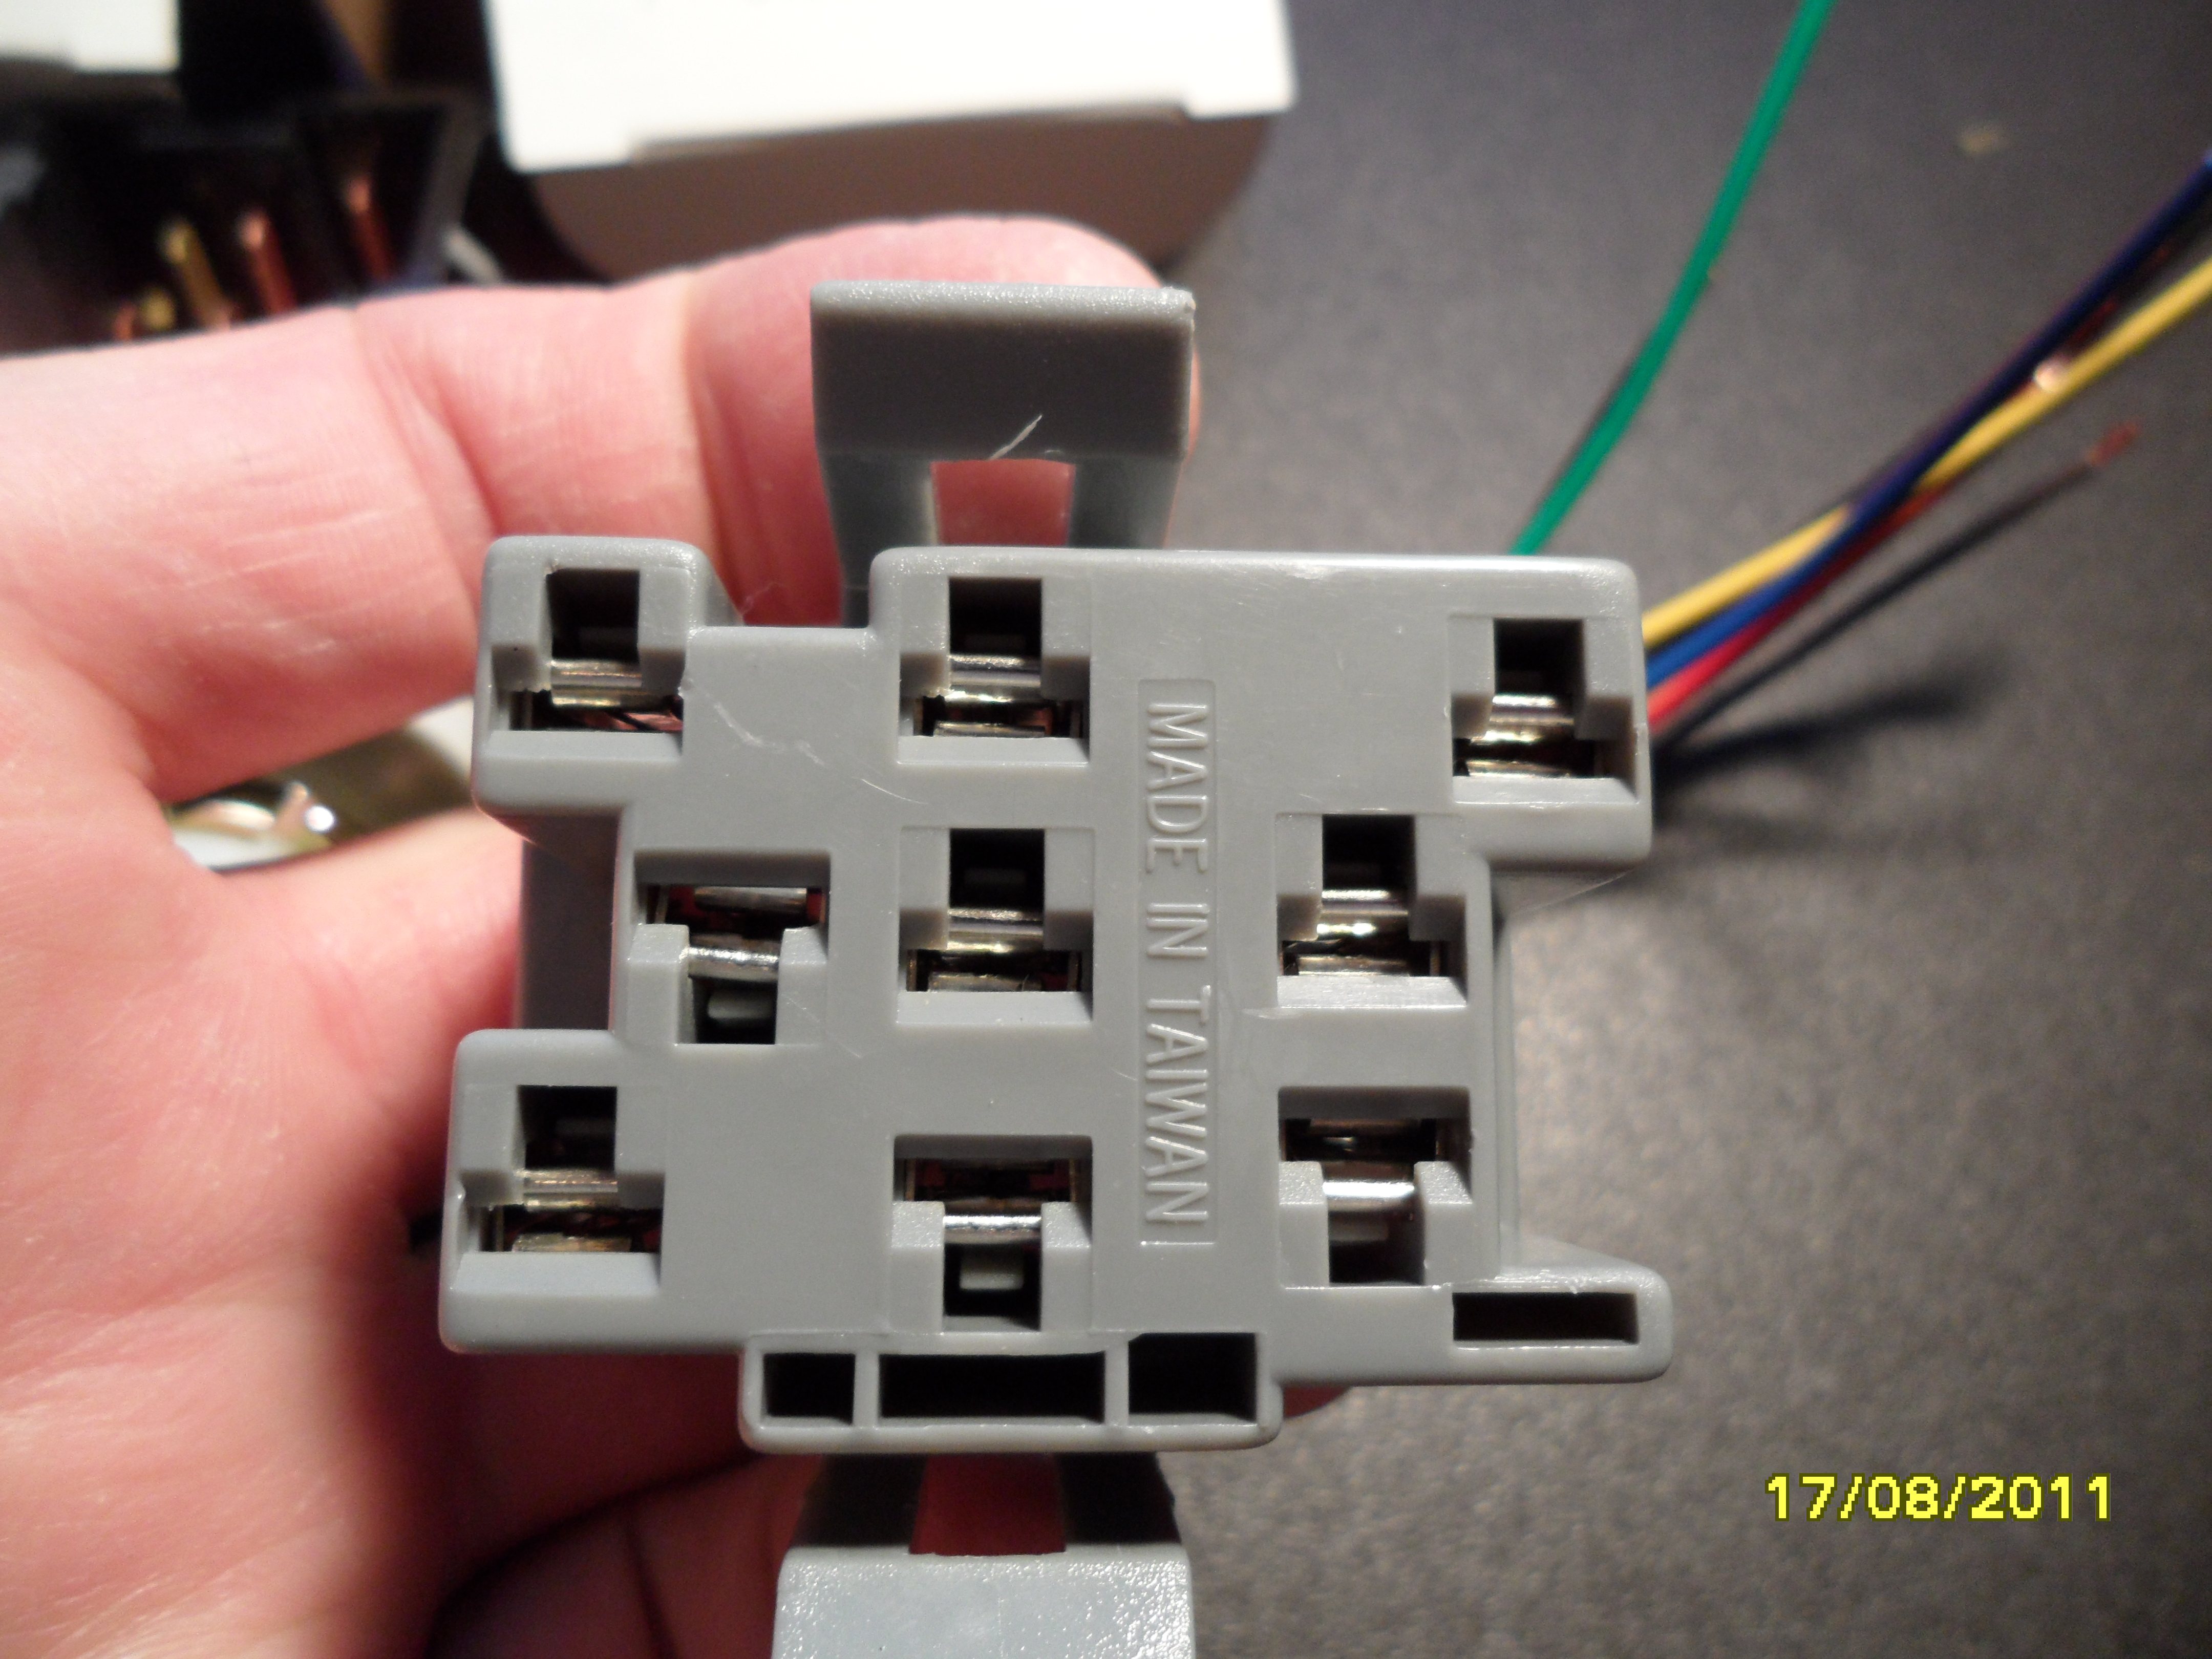
Connectors comparison
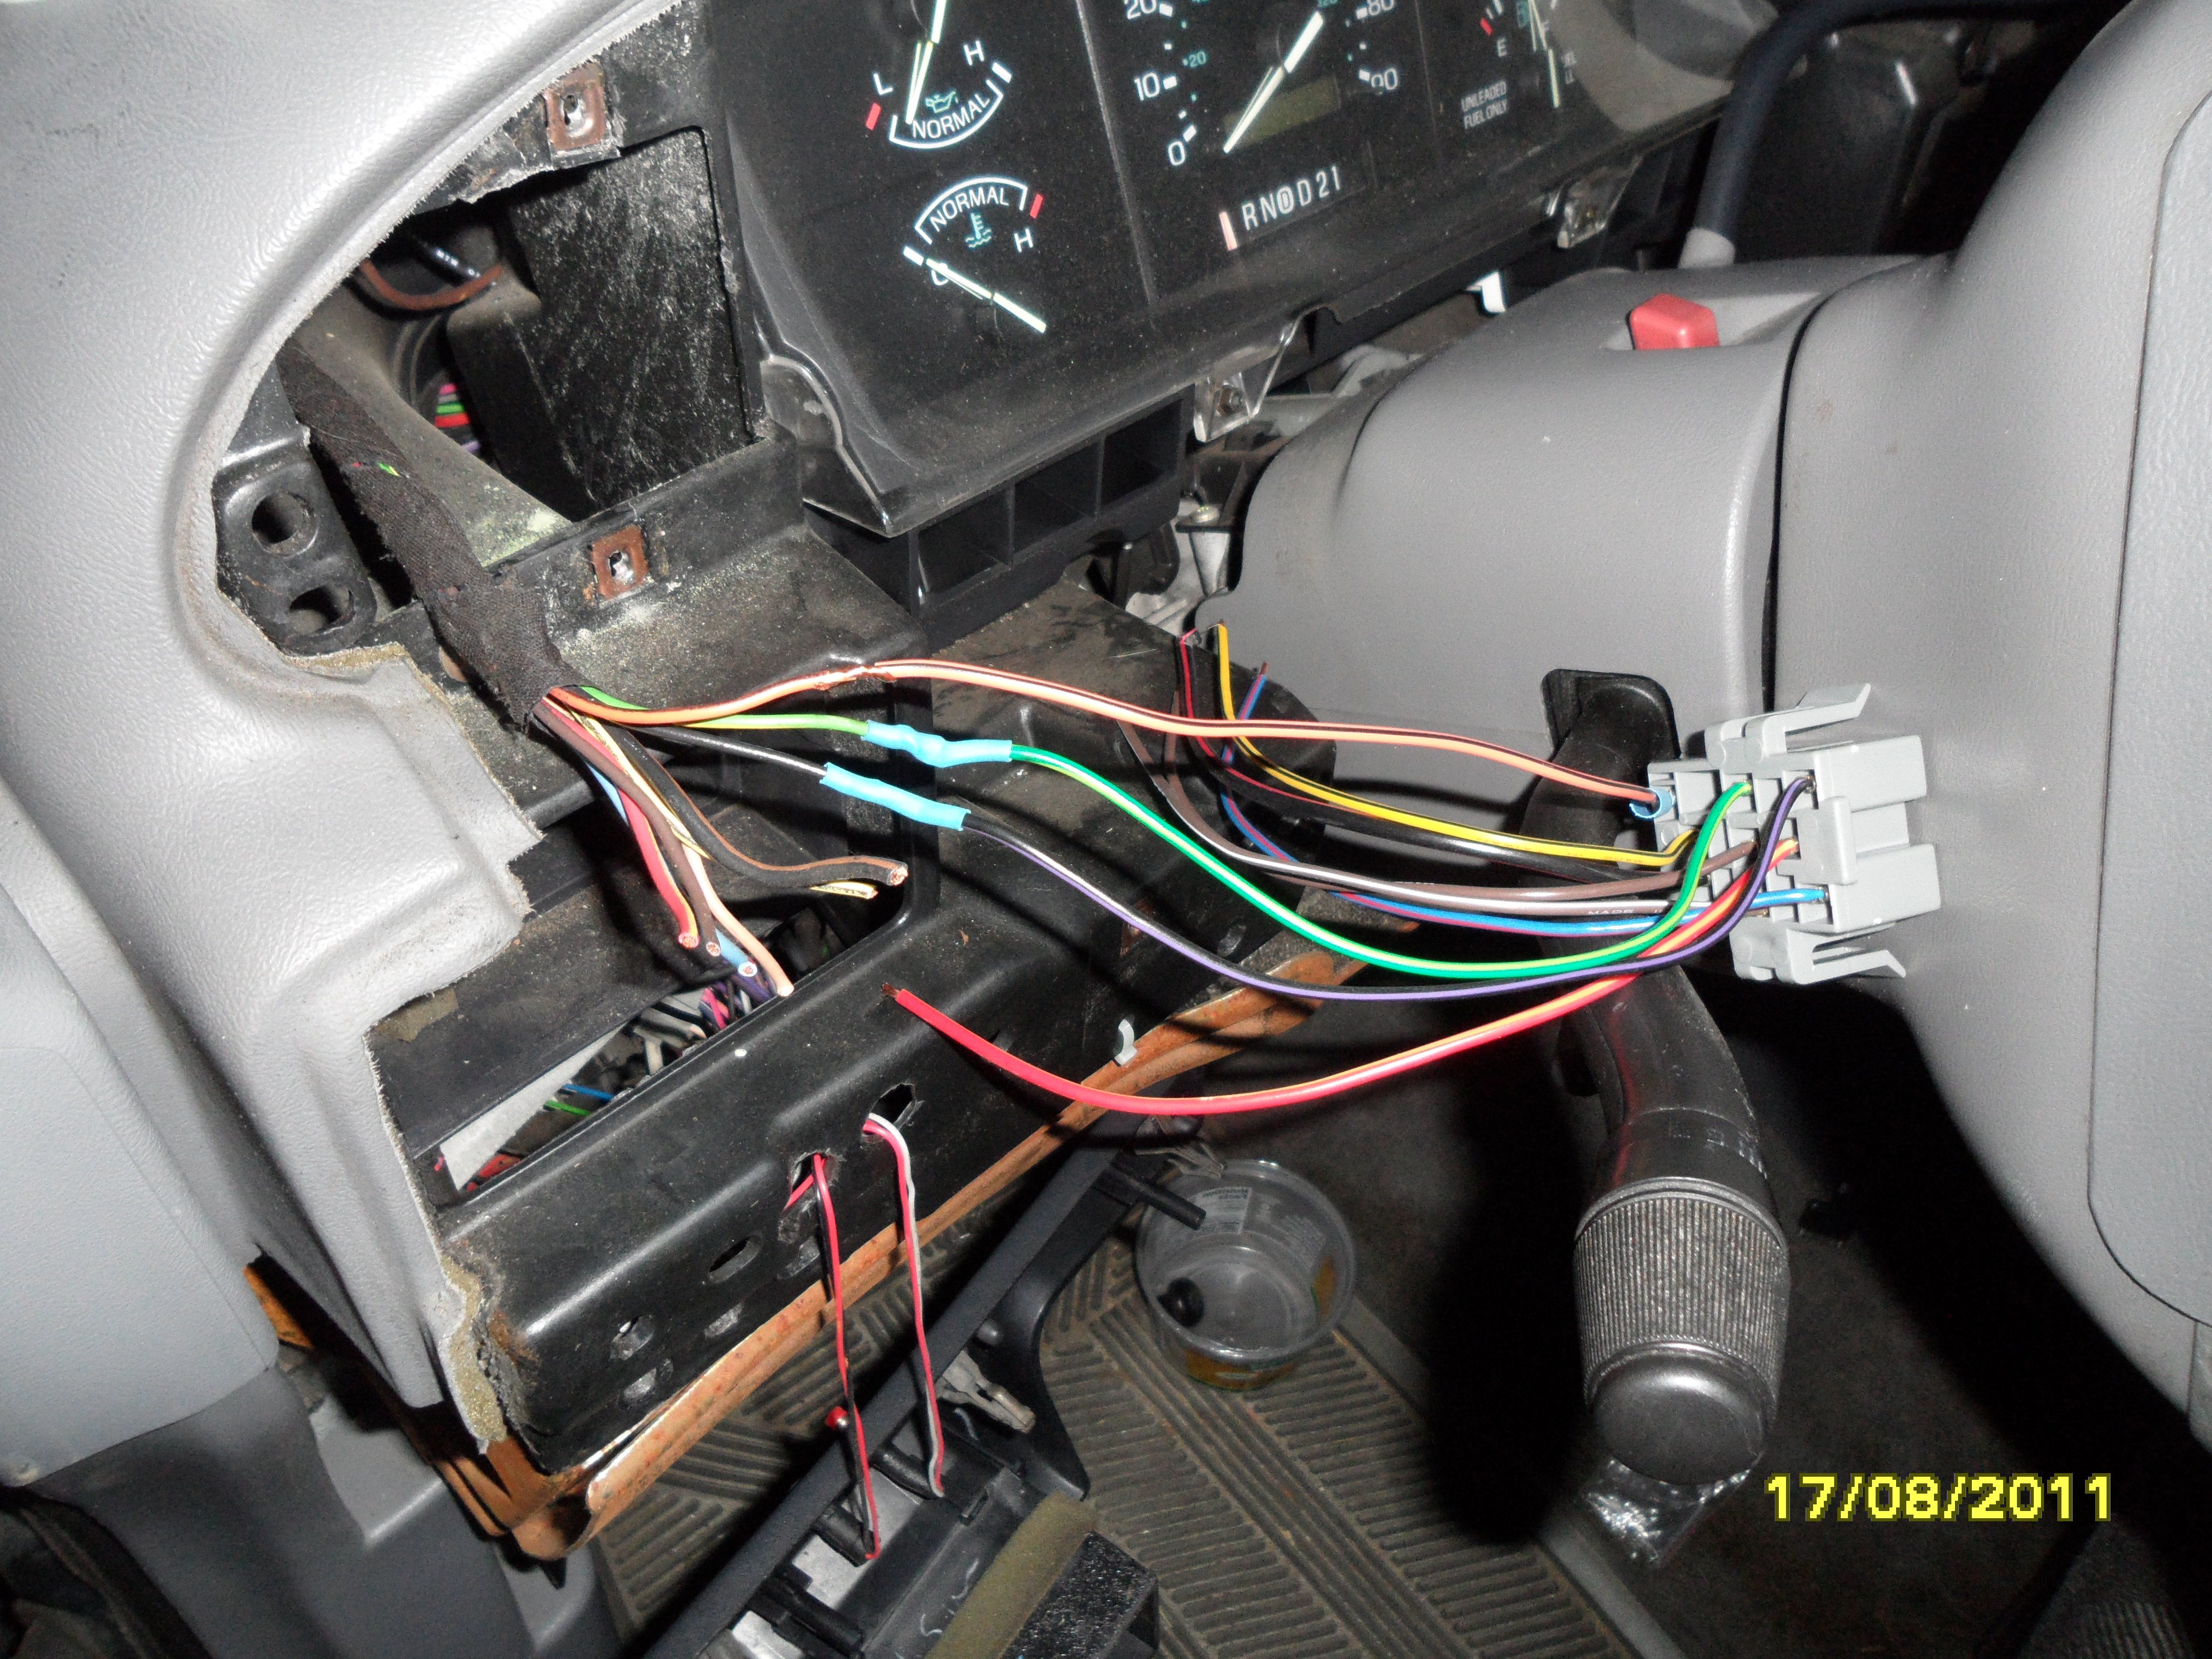
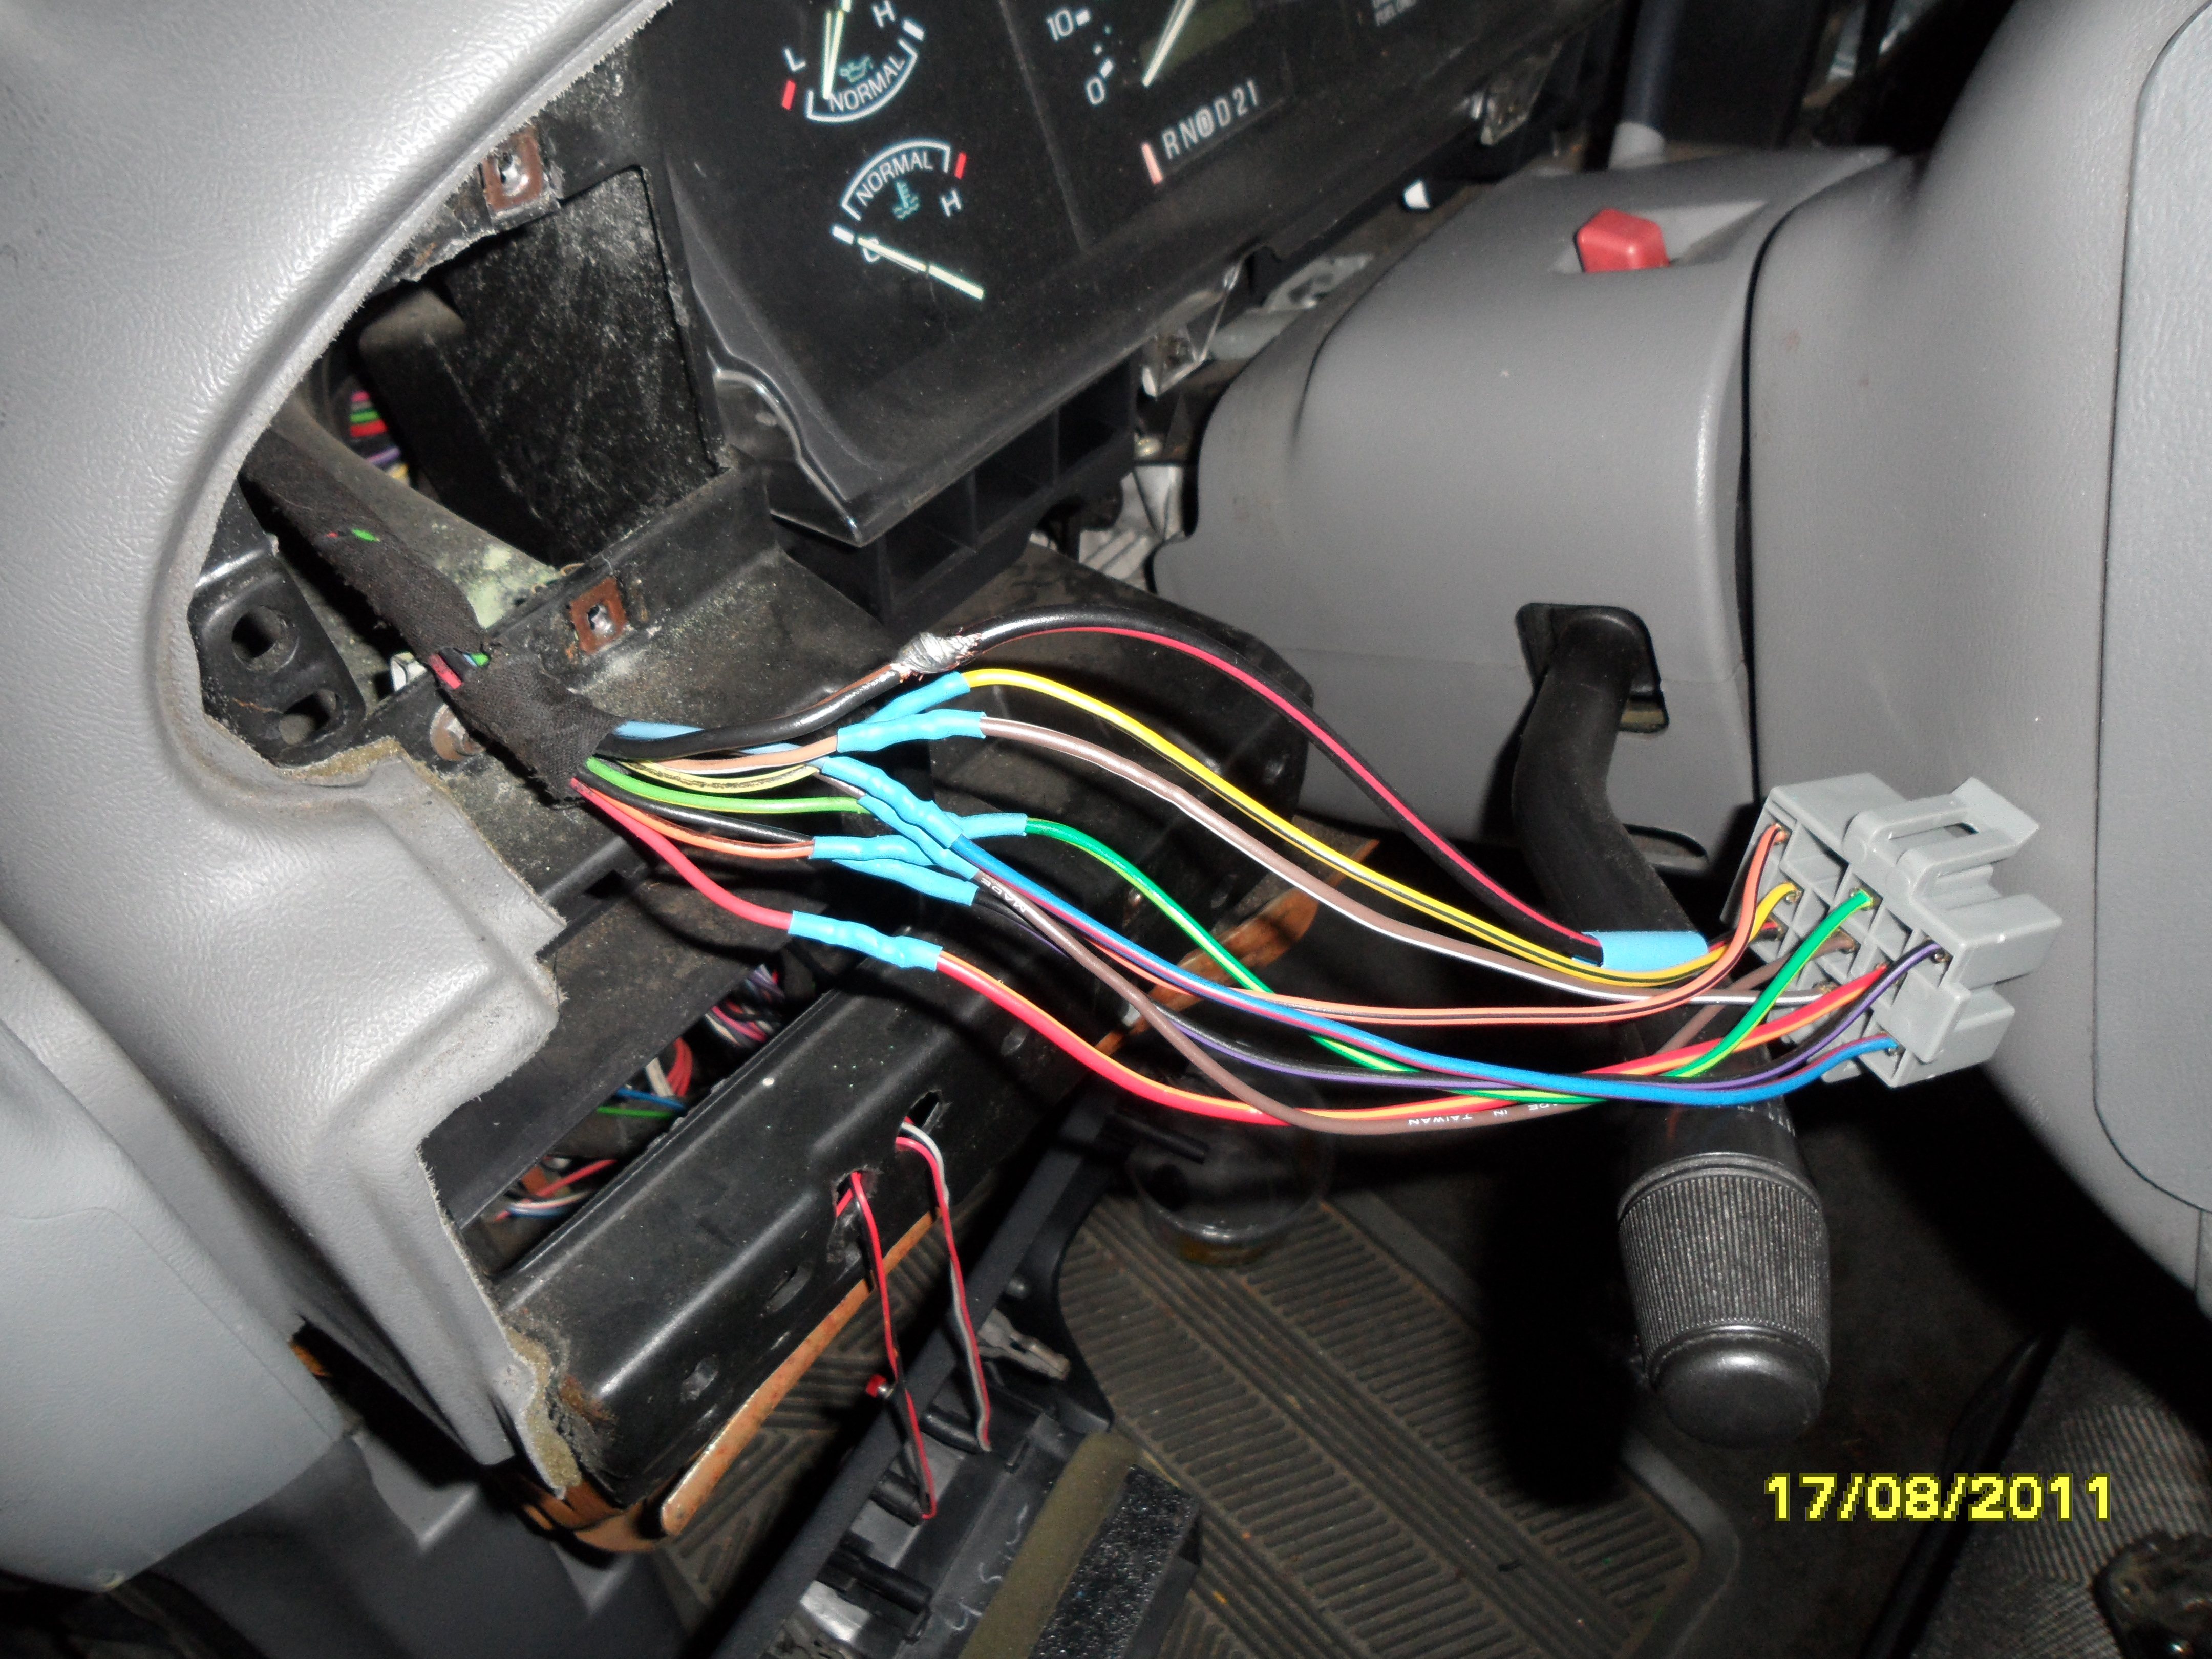
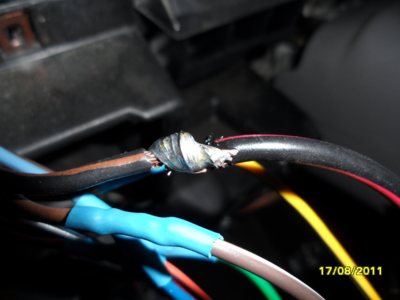
Soldering the nine wires

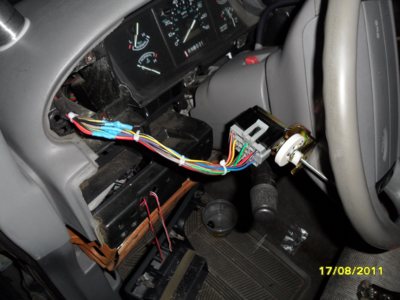
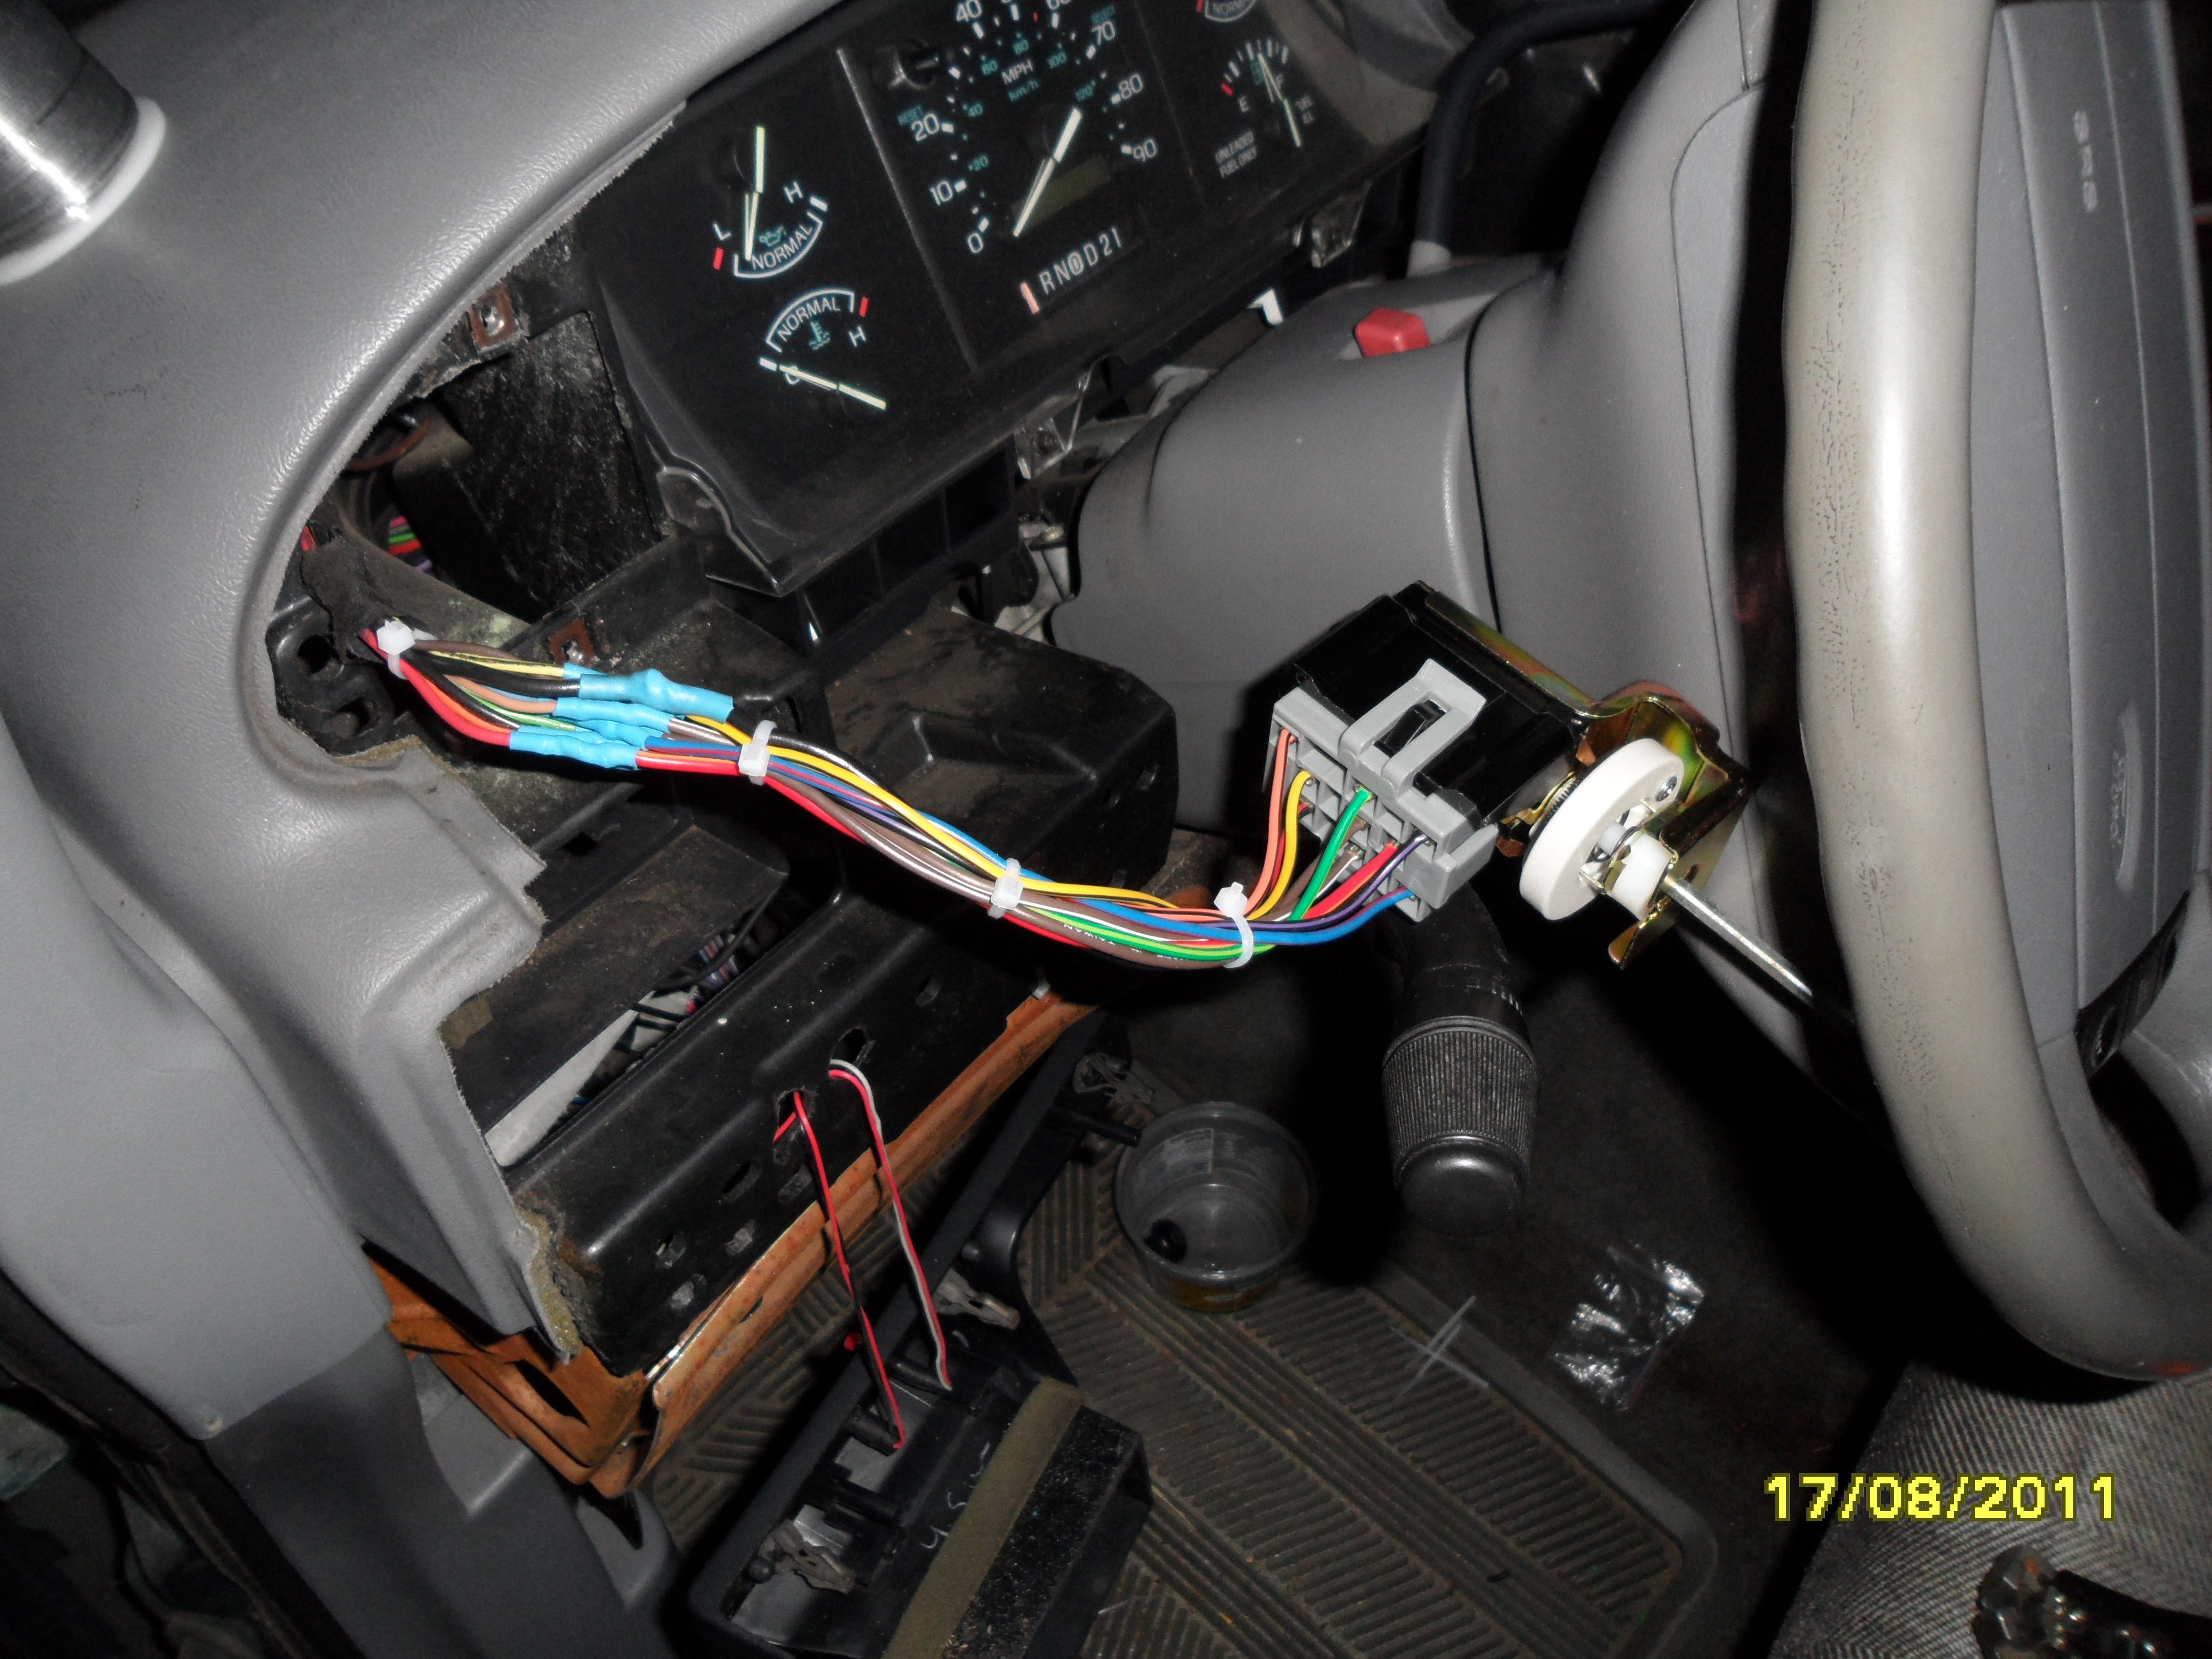
Reassembly is, as they say, the reverse of disassembly.
( no pun intended) Picture of that please.