One starter is from an '81 in a JY last year, and is labled as a factory reman:
The other is one that came with an engine I bought bare a couple years back:
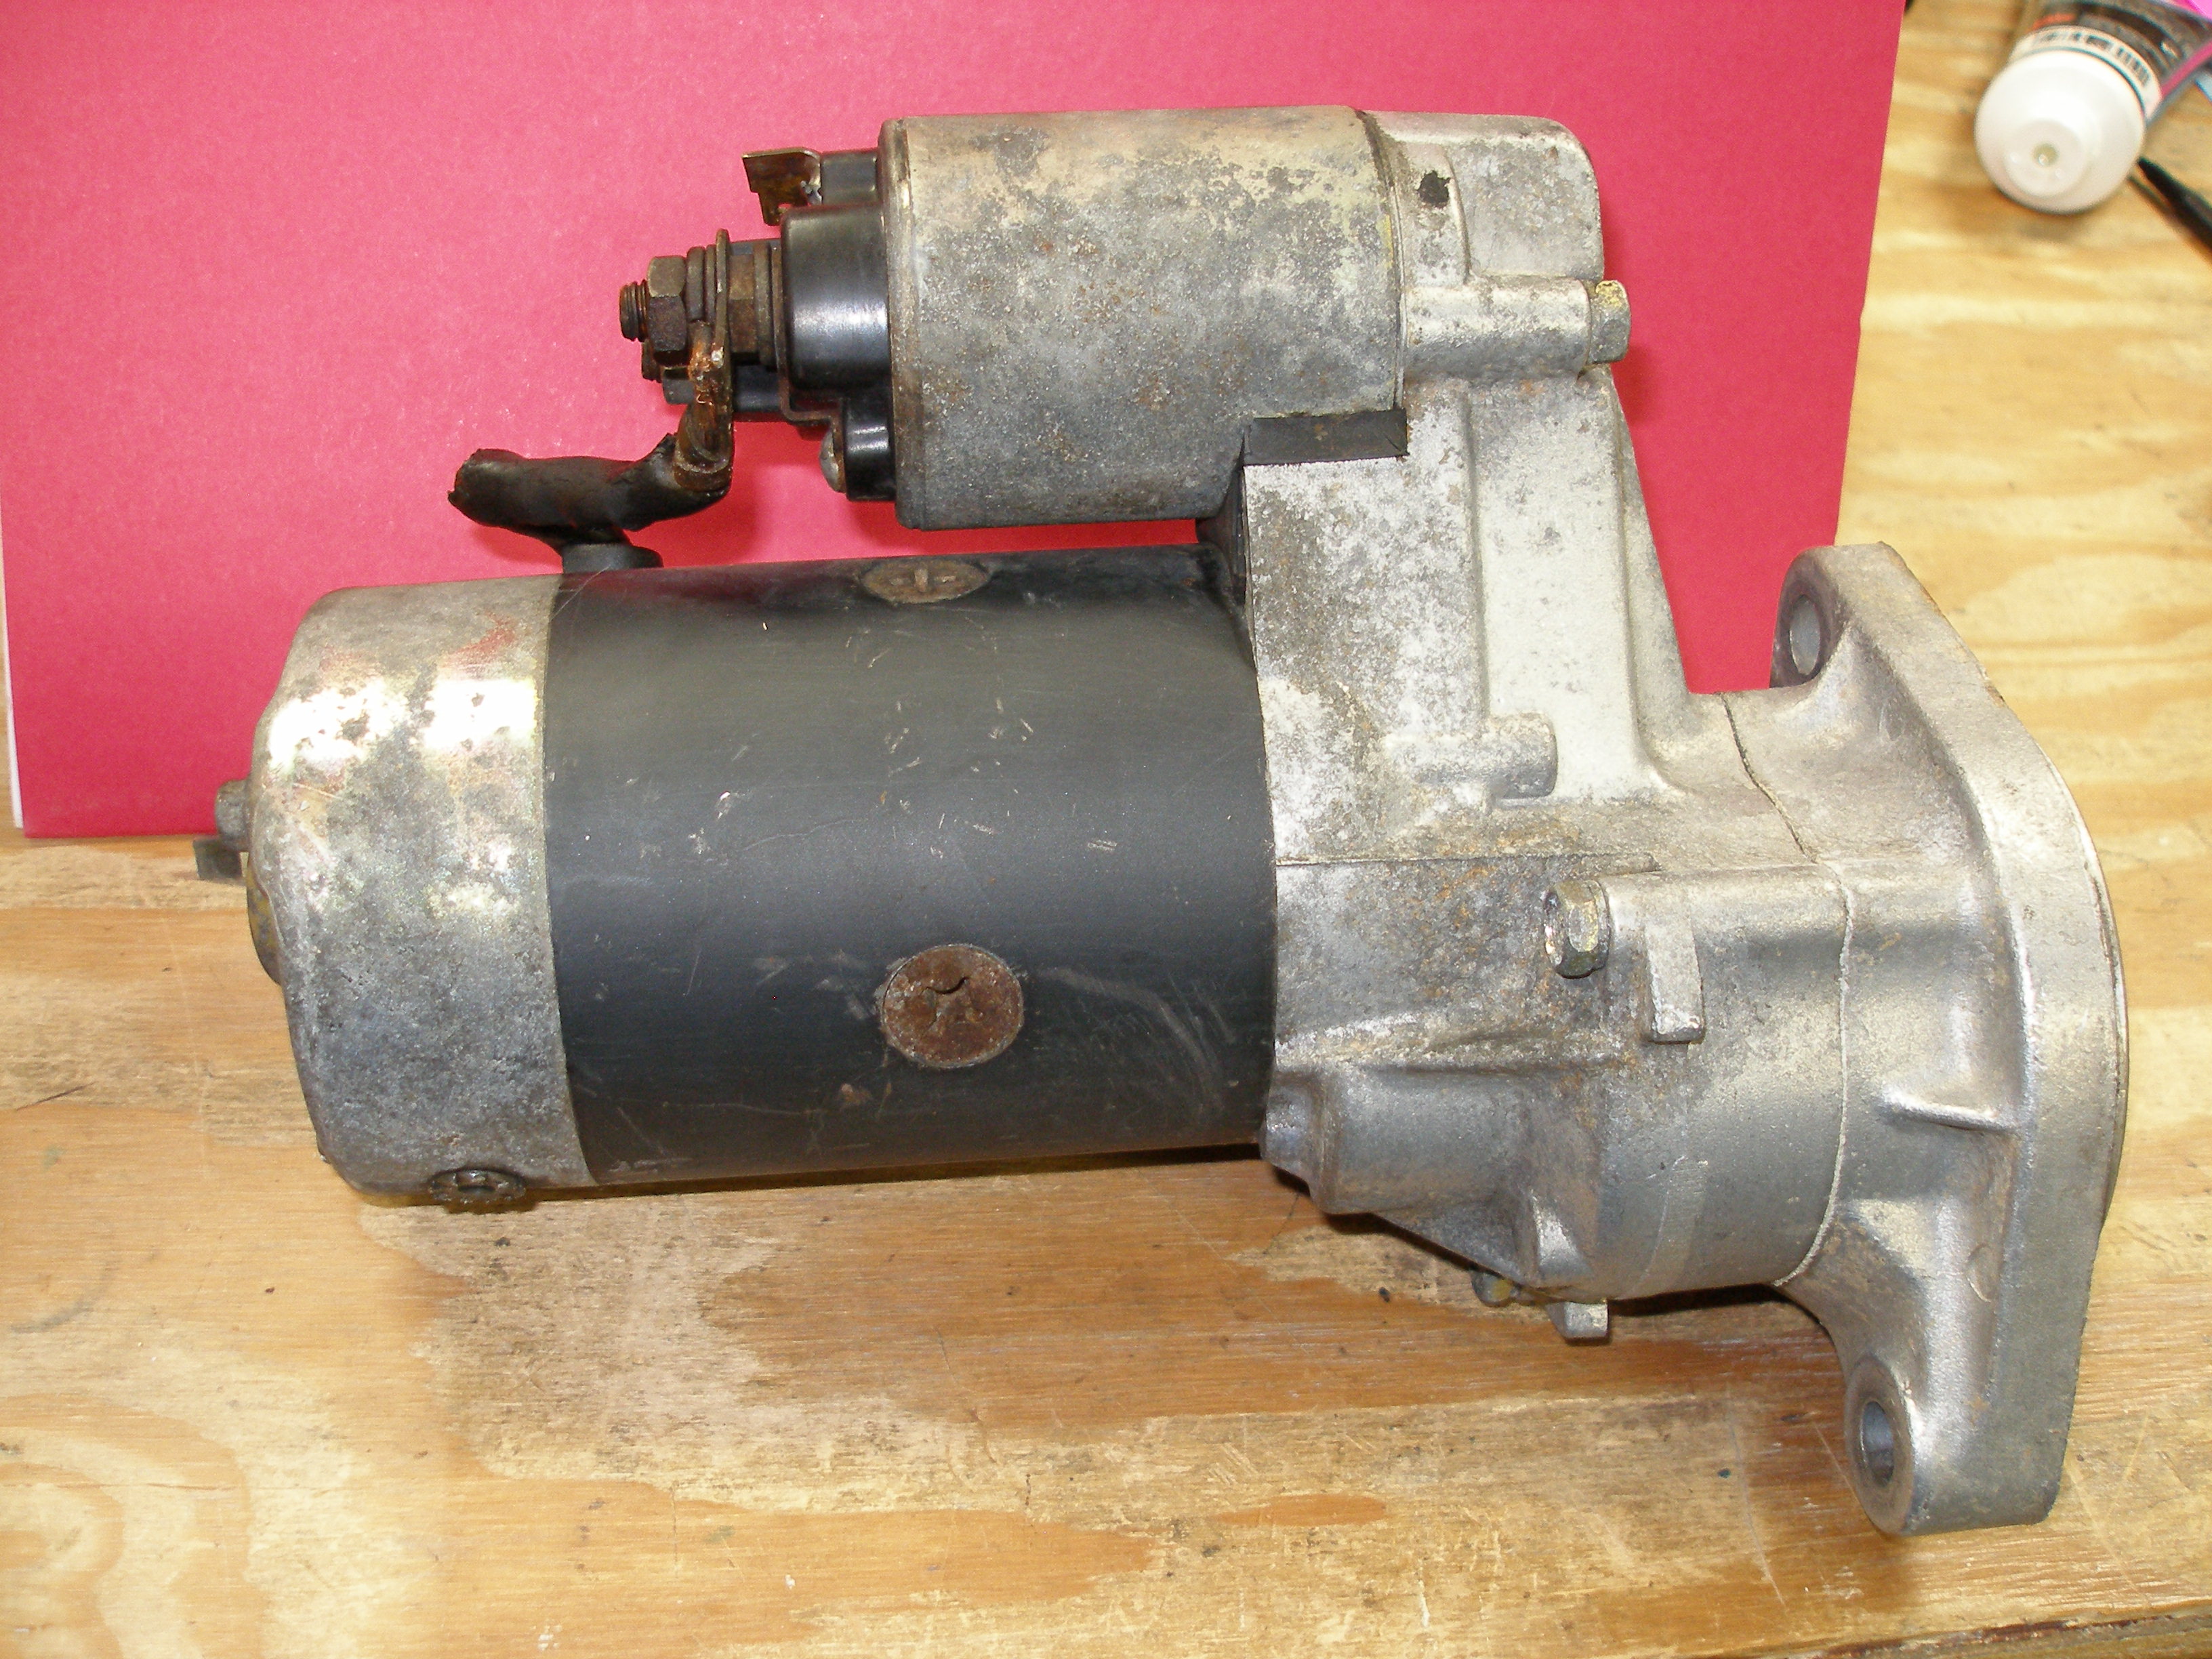
Bridging the solenoids large terminals confirmed that both starter motors run, but neither solenoid would actually pass current, or enough current.
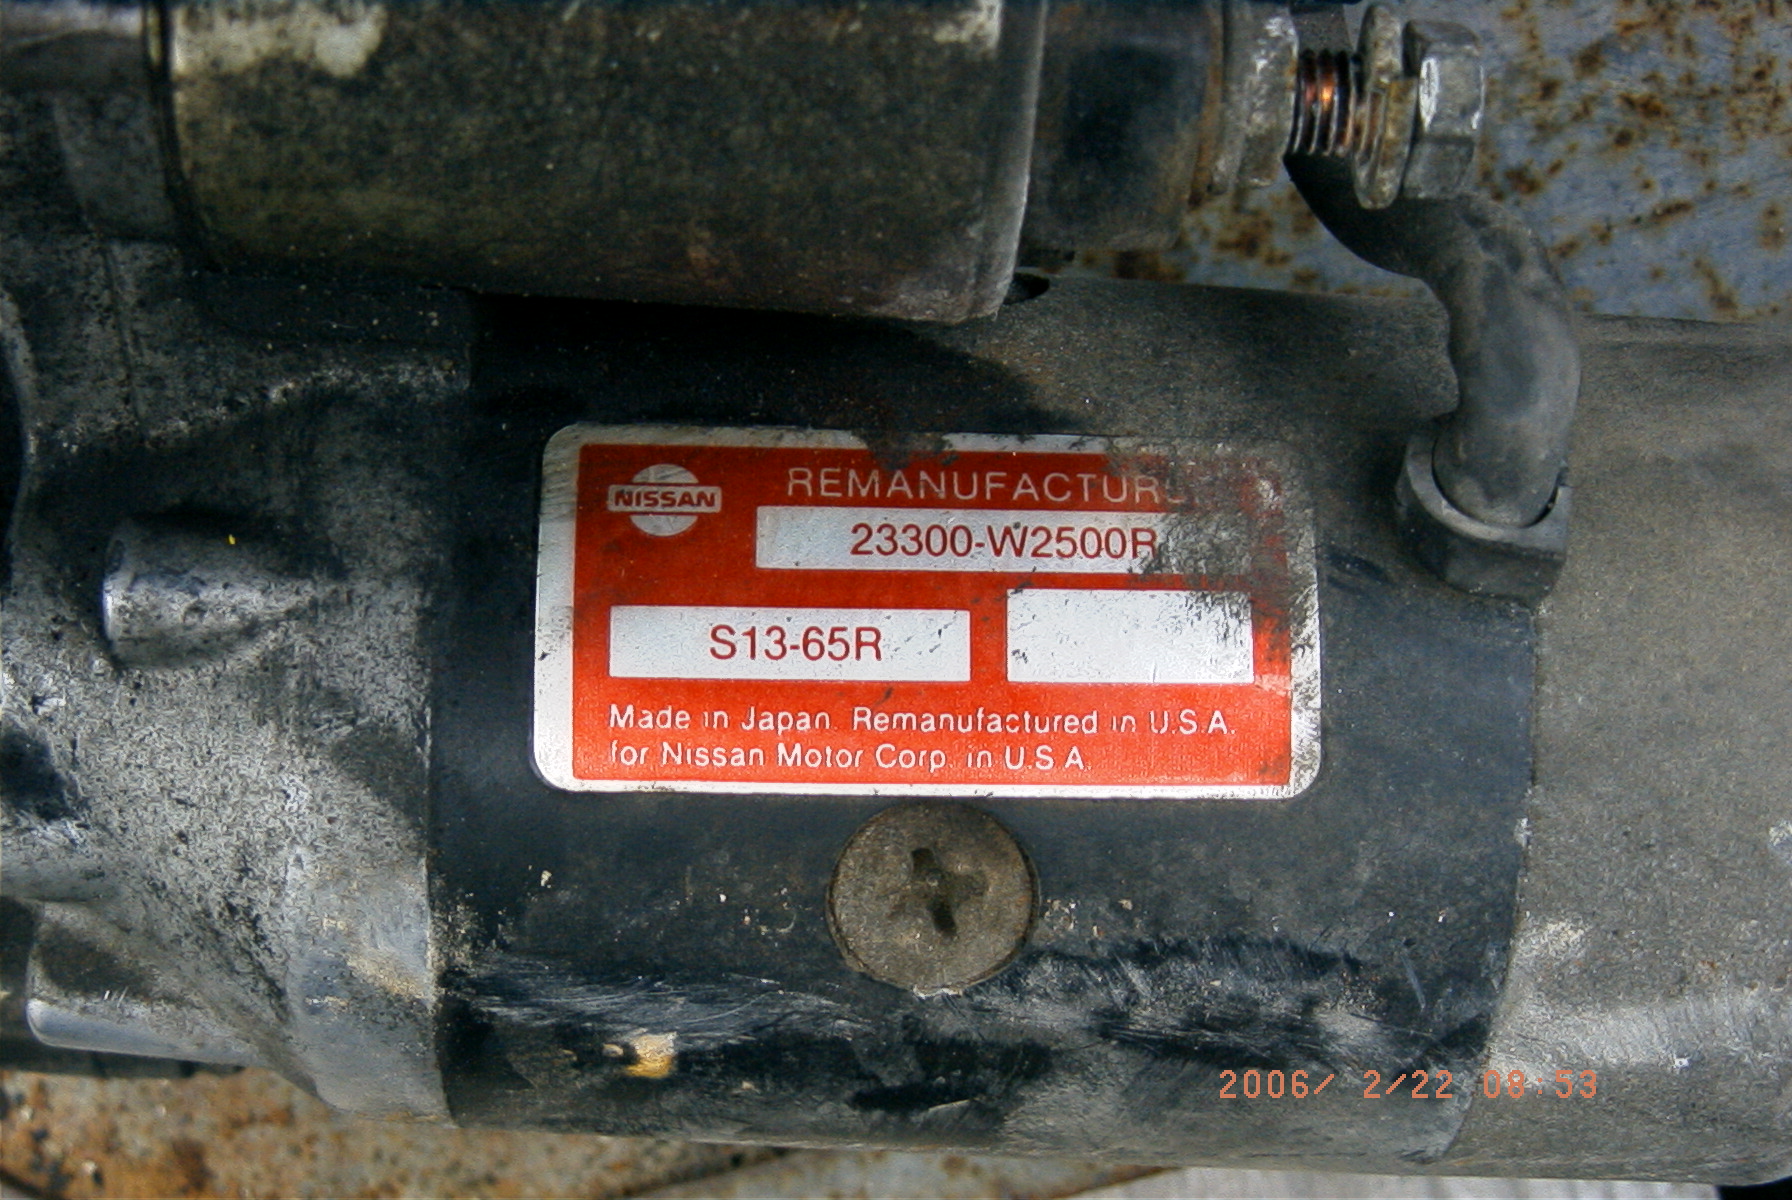
Some starter info:
Nissan's Part No. for the later LD28 starter (Apr-81-onward) is 23300-W2500. The Hitachi Part No. for the same unit appears to be S13-65. The latter No. was more helpful in the long run.
Some solenoid info:
Nissan's part No. for the Apr-81-on LD28 solenoid is 23343-W1700 and Google shows many hits, most Taiwan and China sources.
Nismoparts.com turns that number into B3343-07G00, which doesn't seem to get anywhere, but they list it as available (for what that's worth) for $61 + $10.
NAPA (Echlin) lists a solenoid, ECH ST306, $72


But $72 is a lot of money.
It took three tries (and I sent a lot of parts back!), but I was able to source a replacement solenoid for about $30 ea. I bought three
I need to stress that when it comes to Hitachi, there are dozens (and I am not exaggerating) of similar-looking solenoids. This number fits and seems to work.

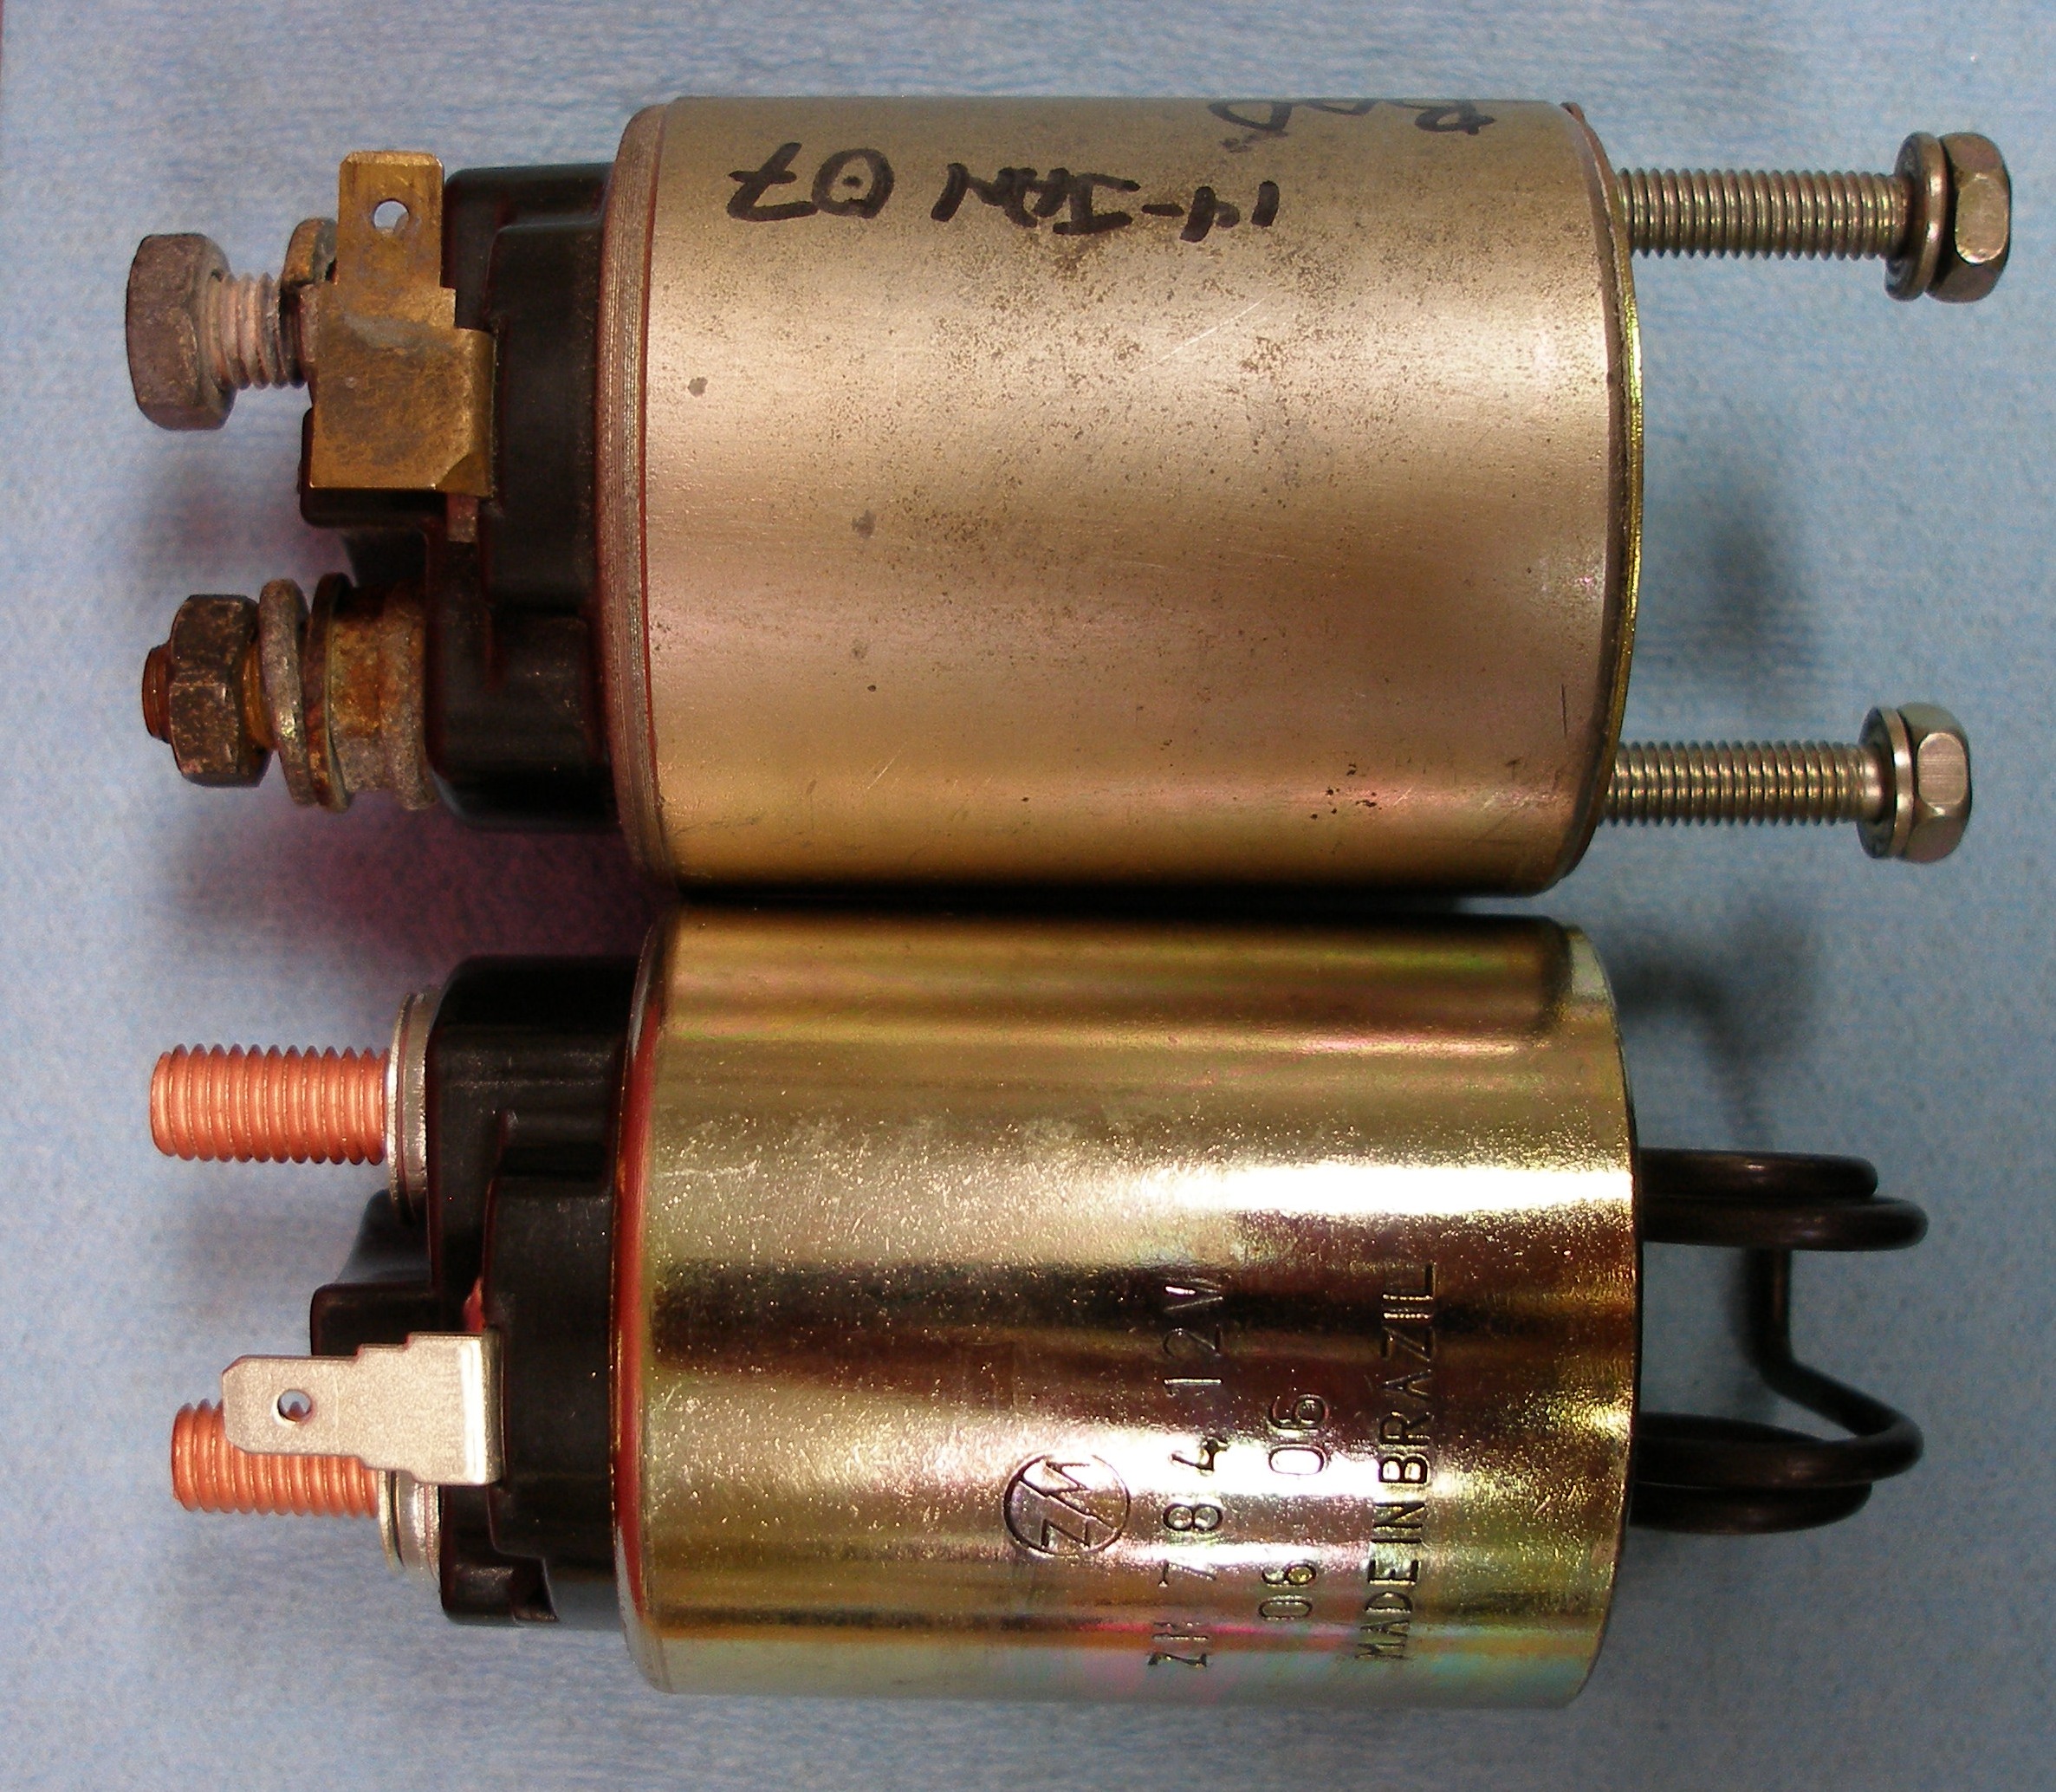
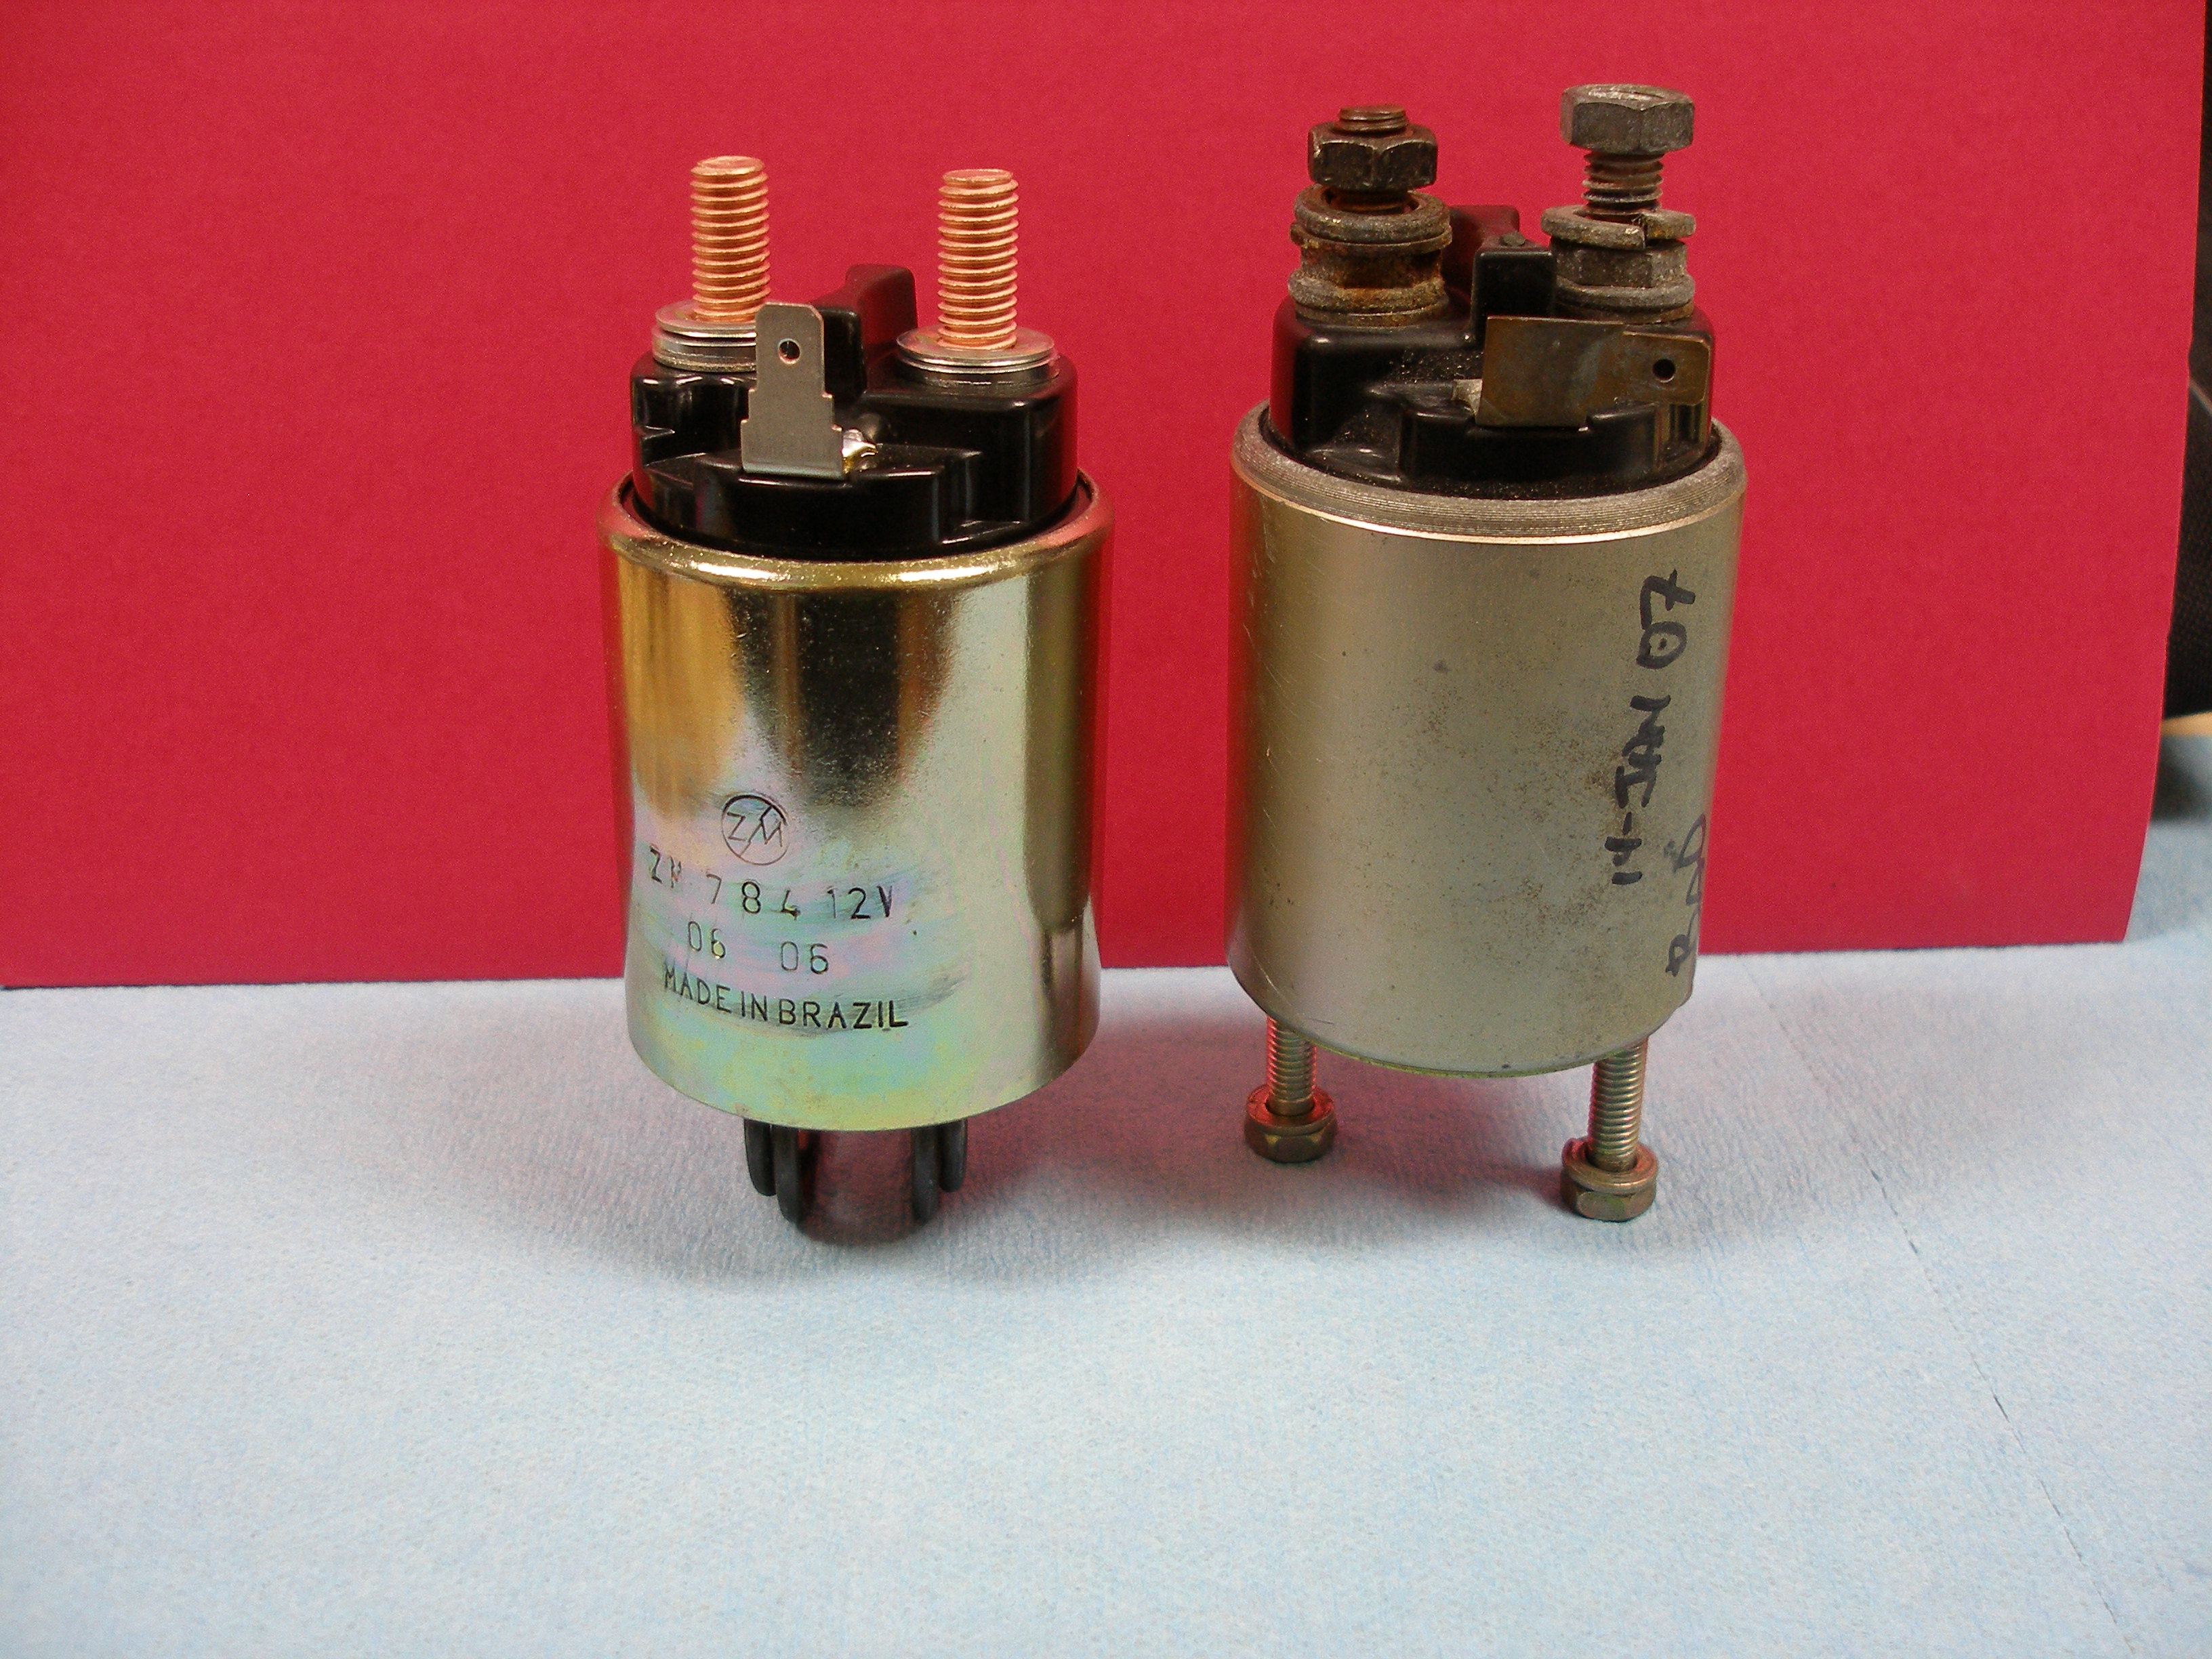
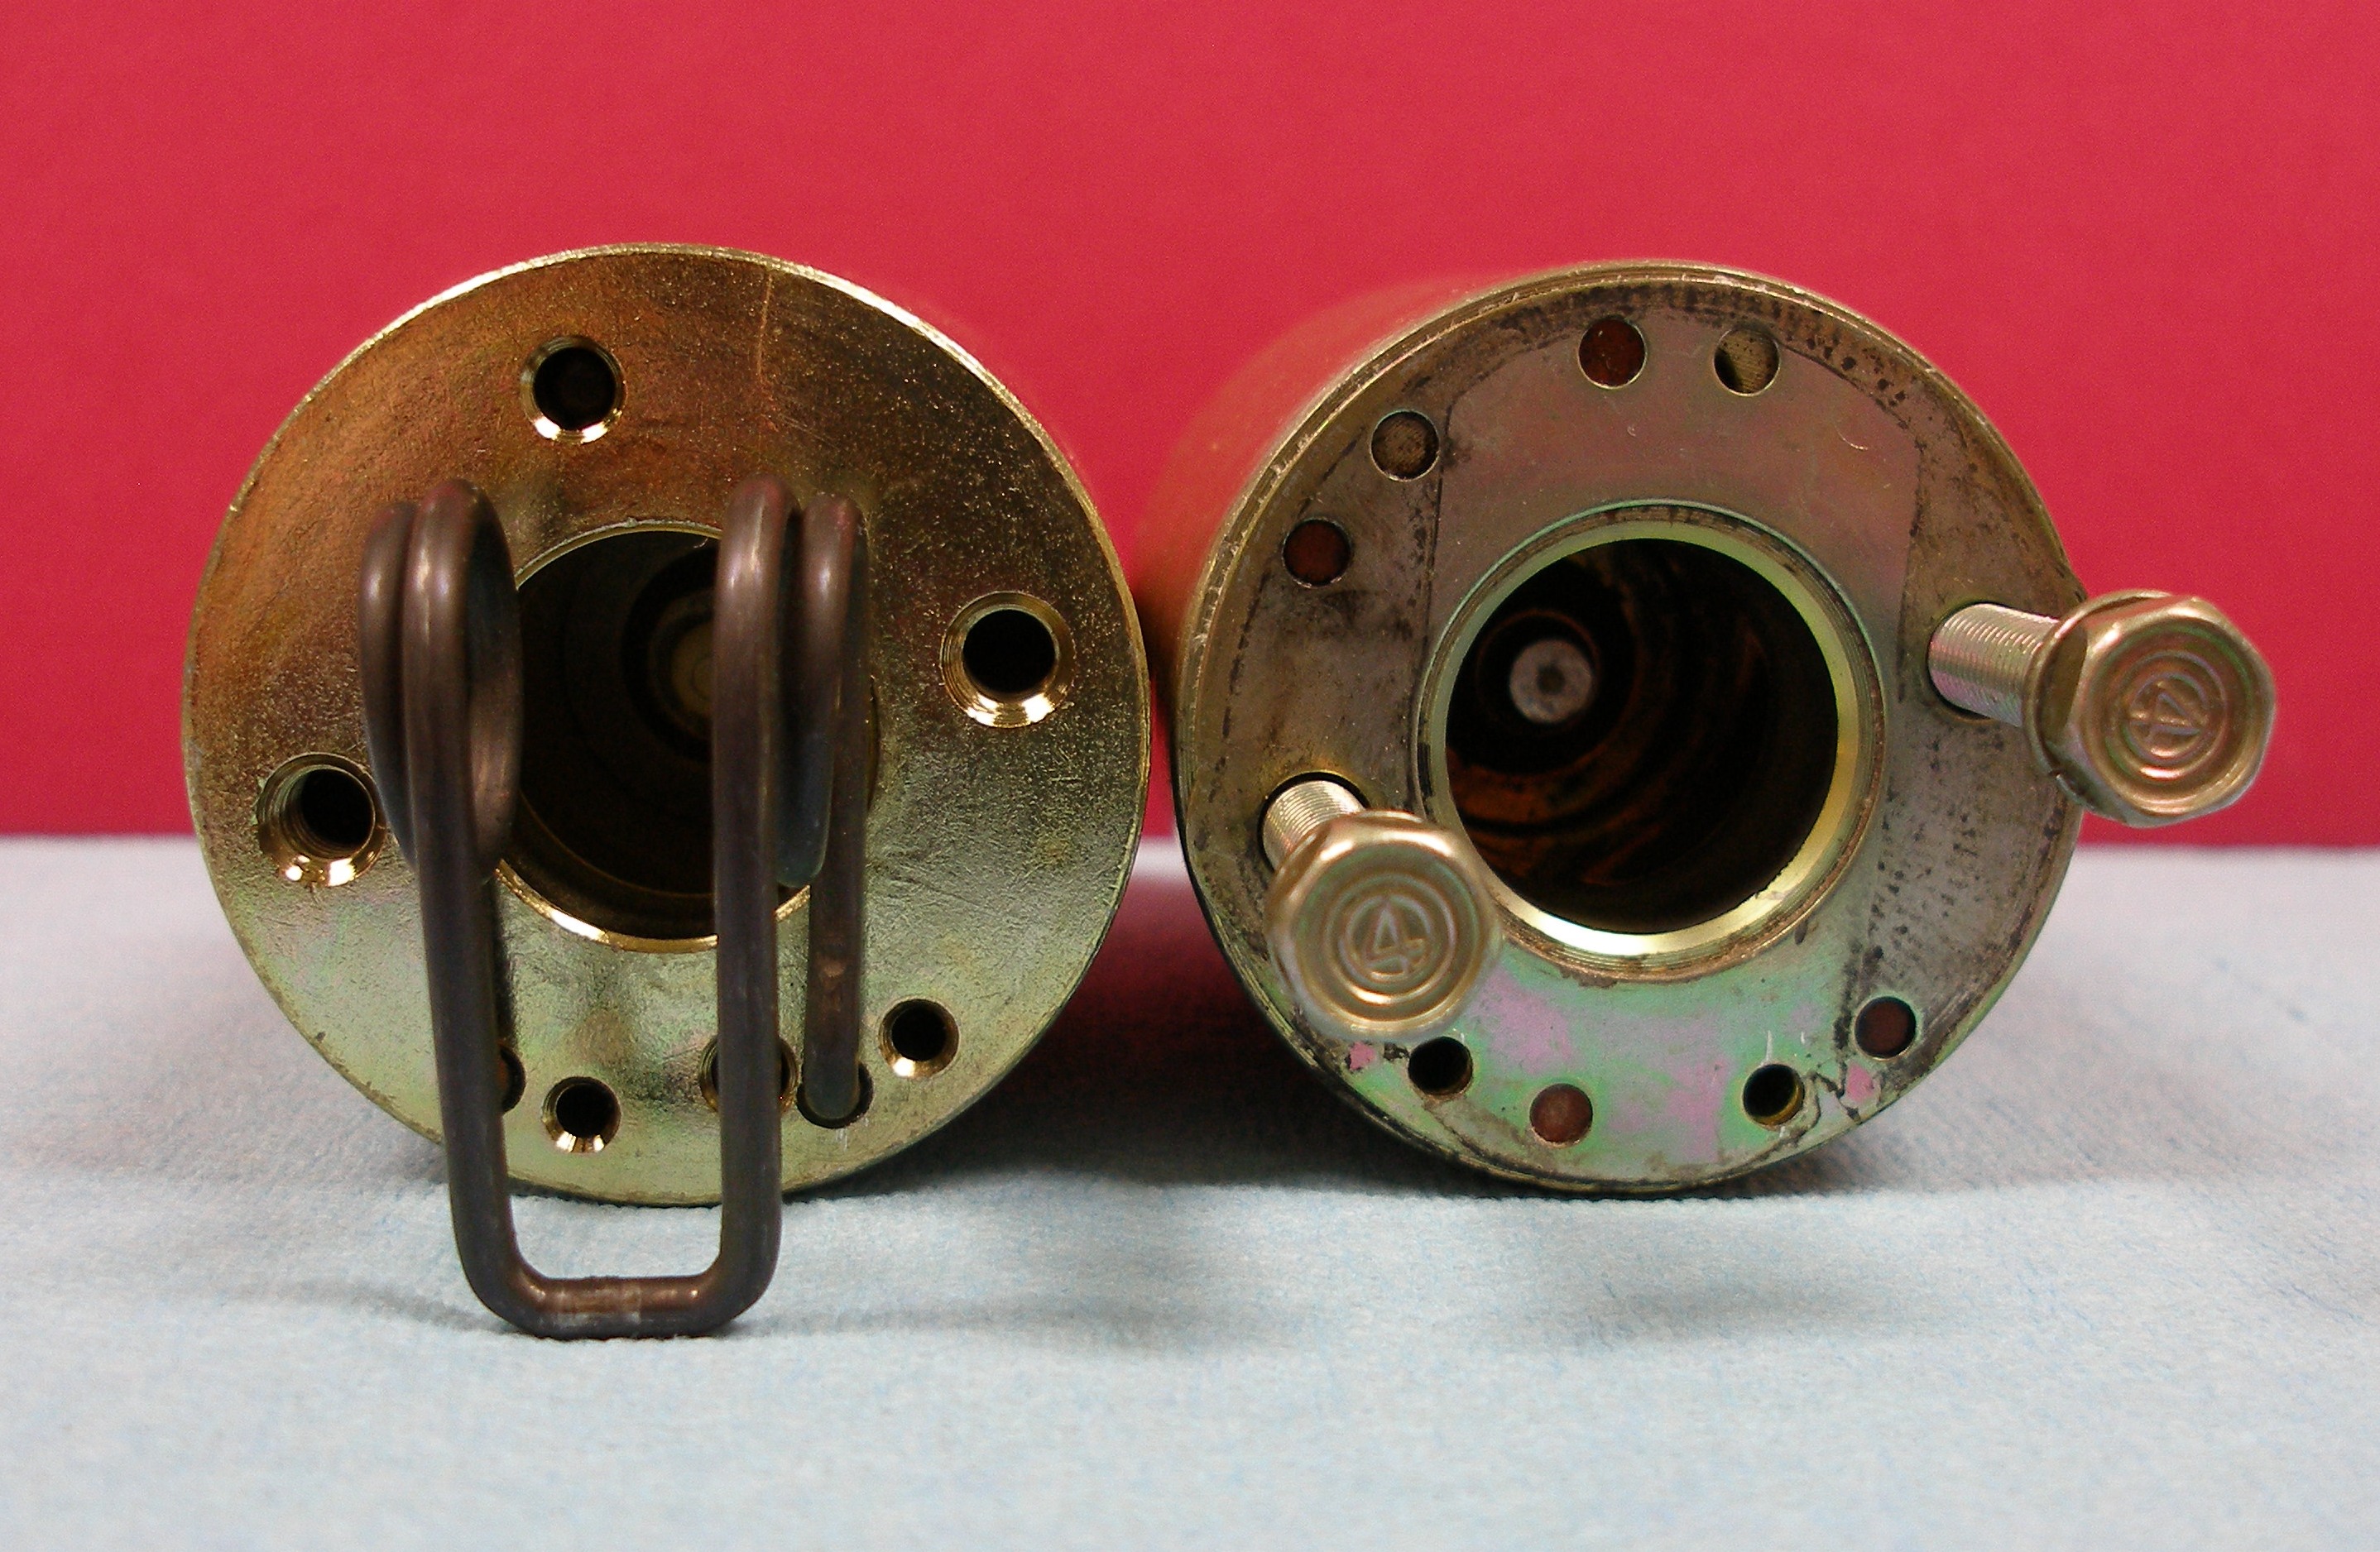
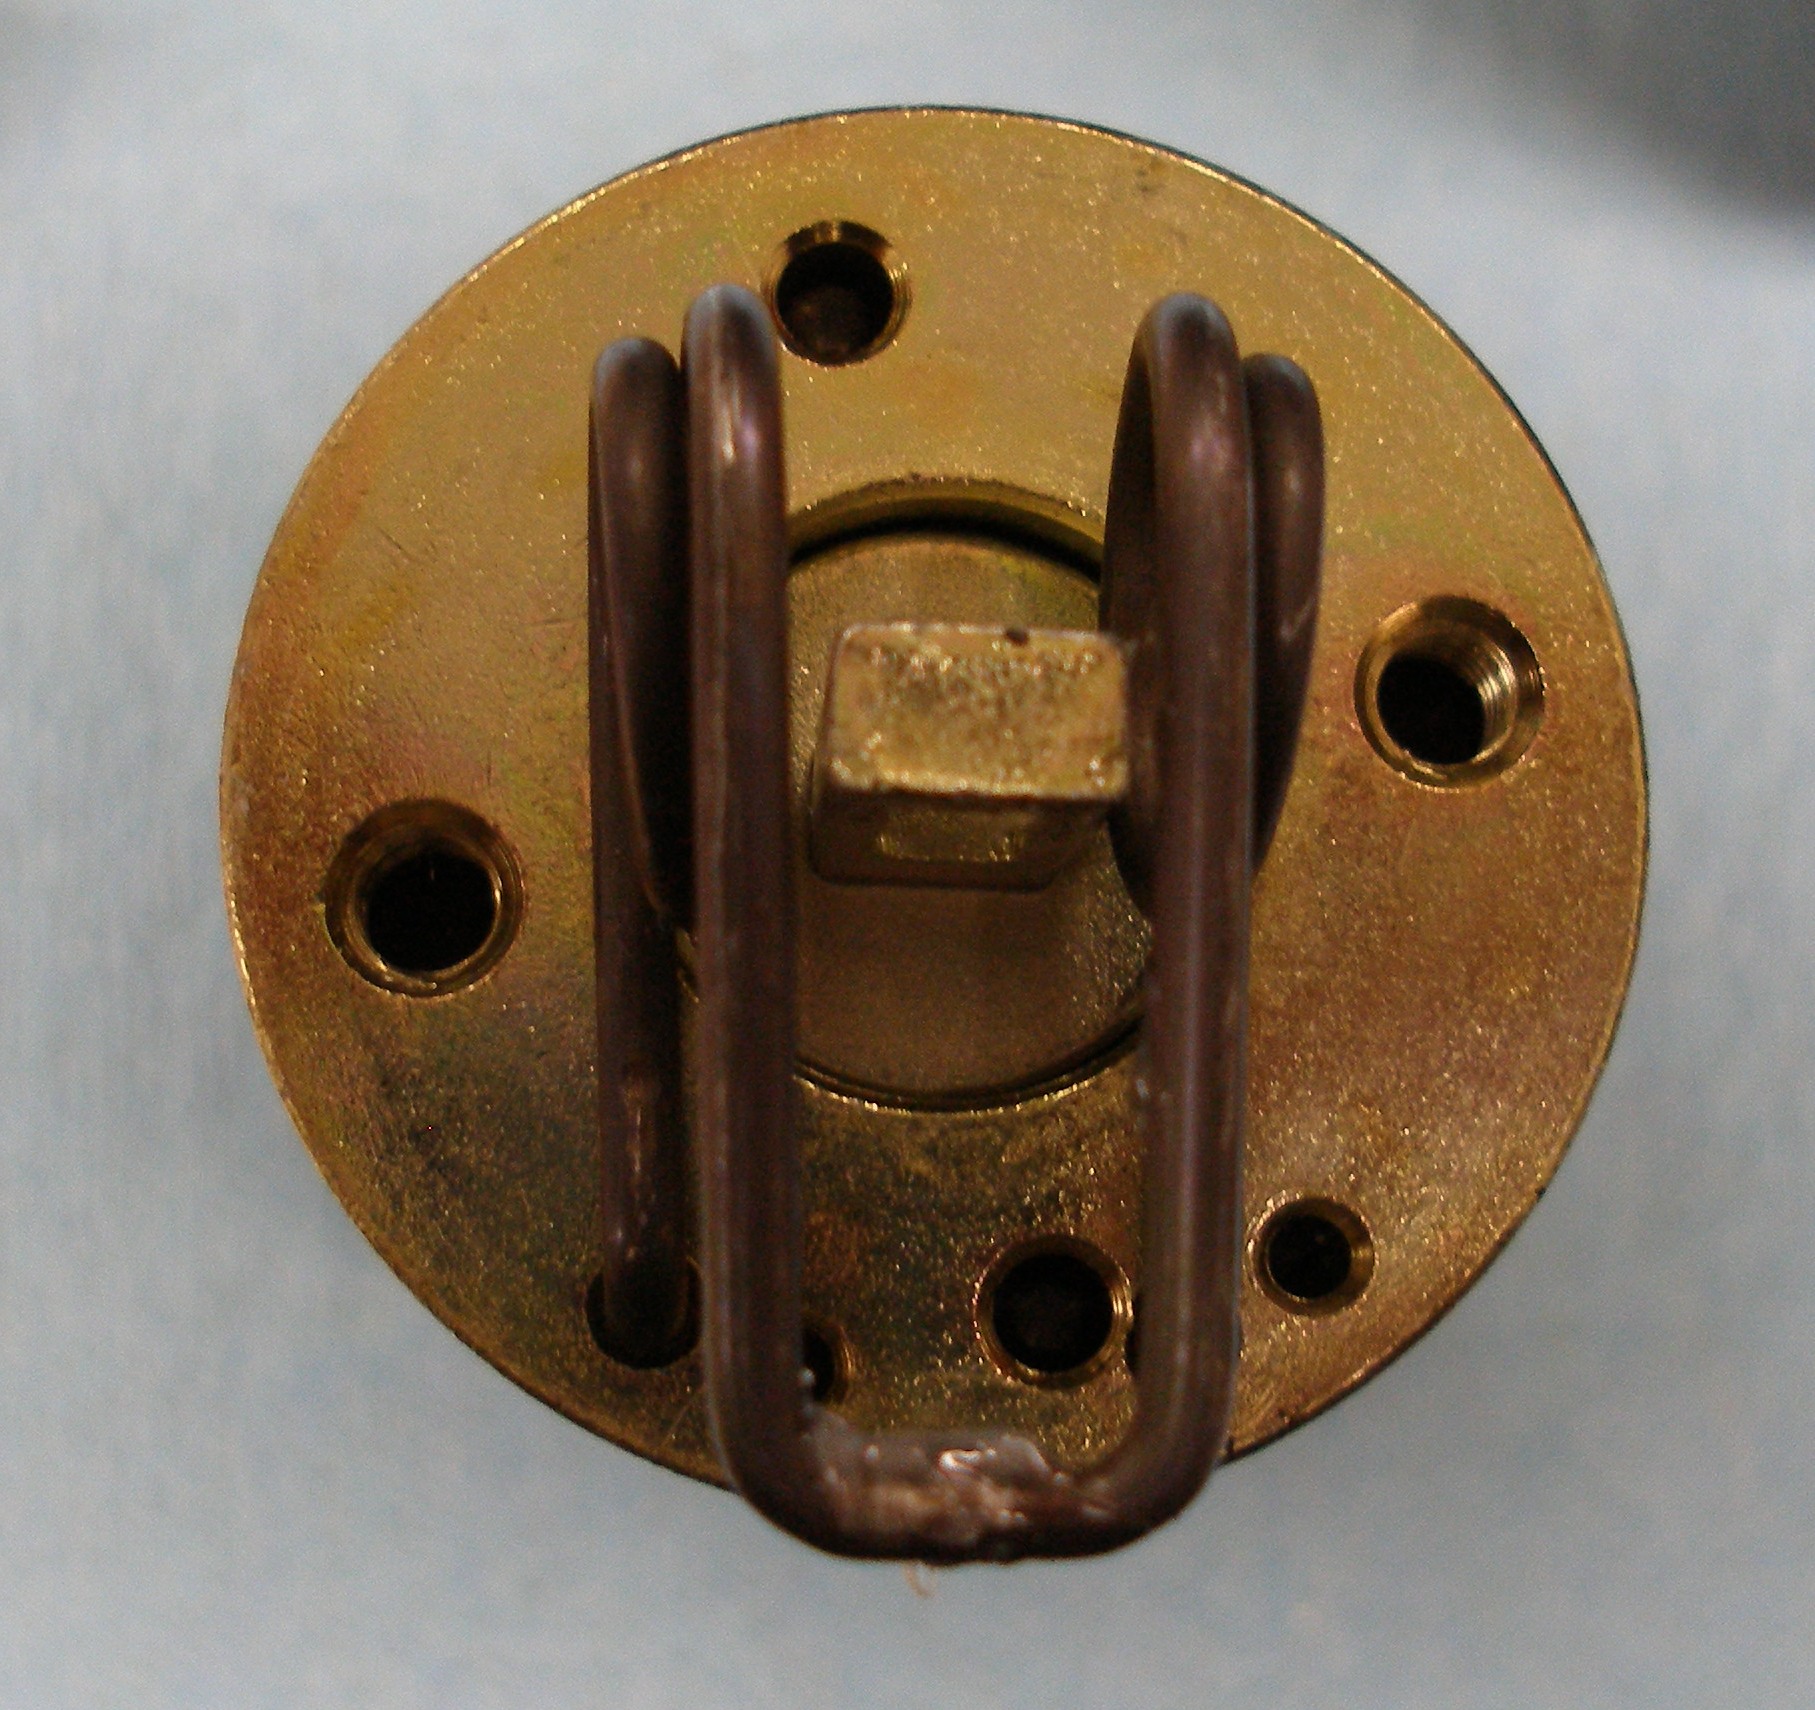
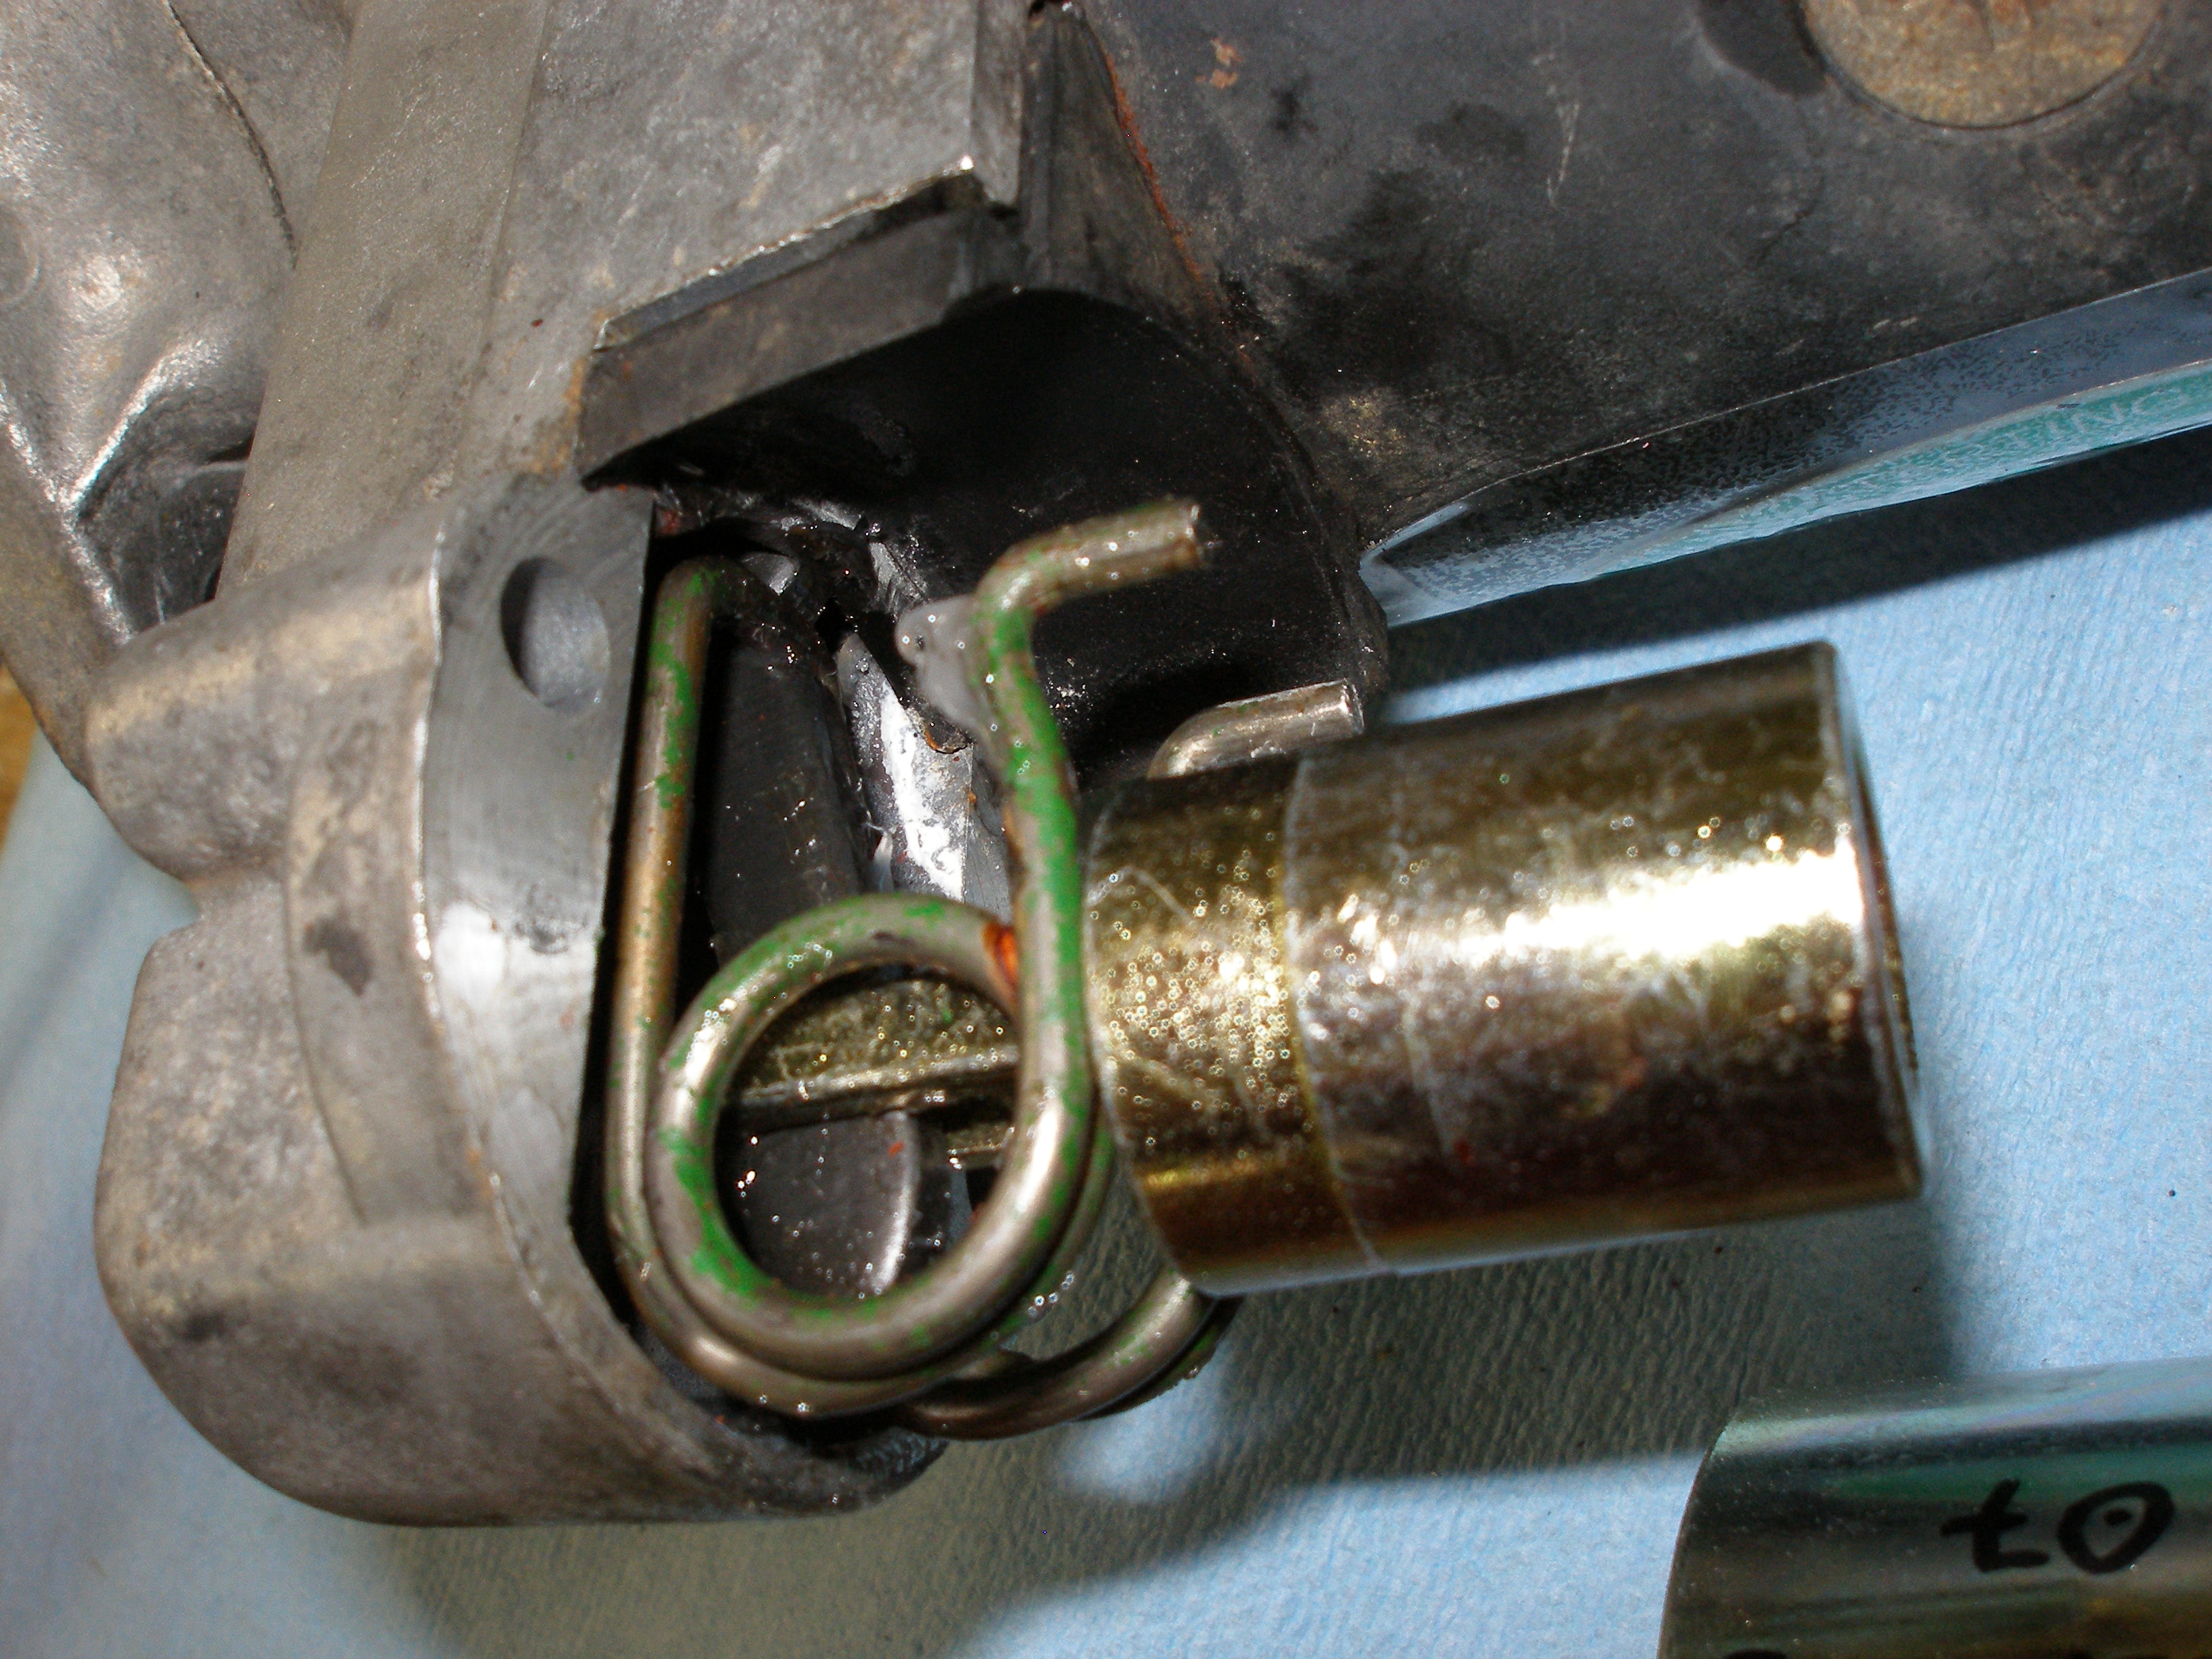
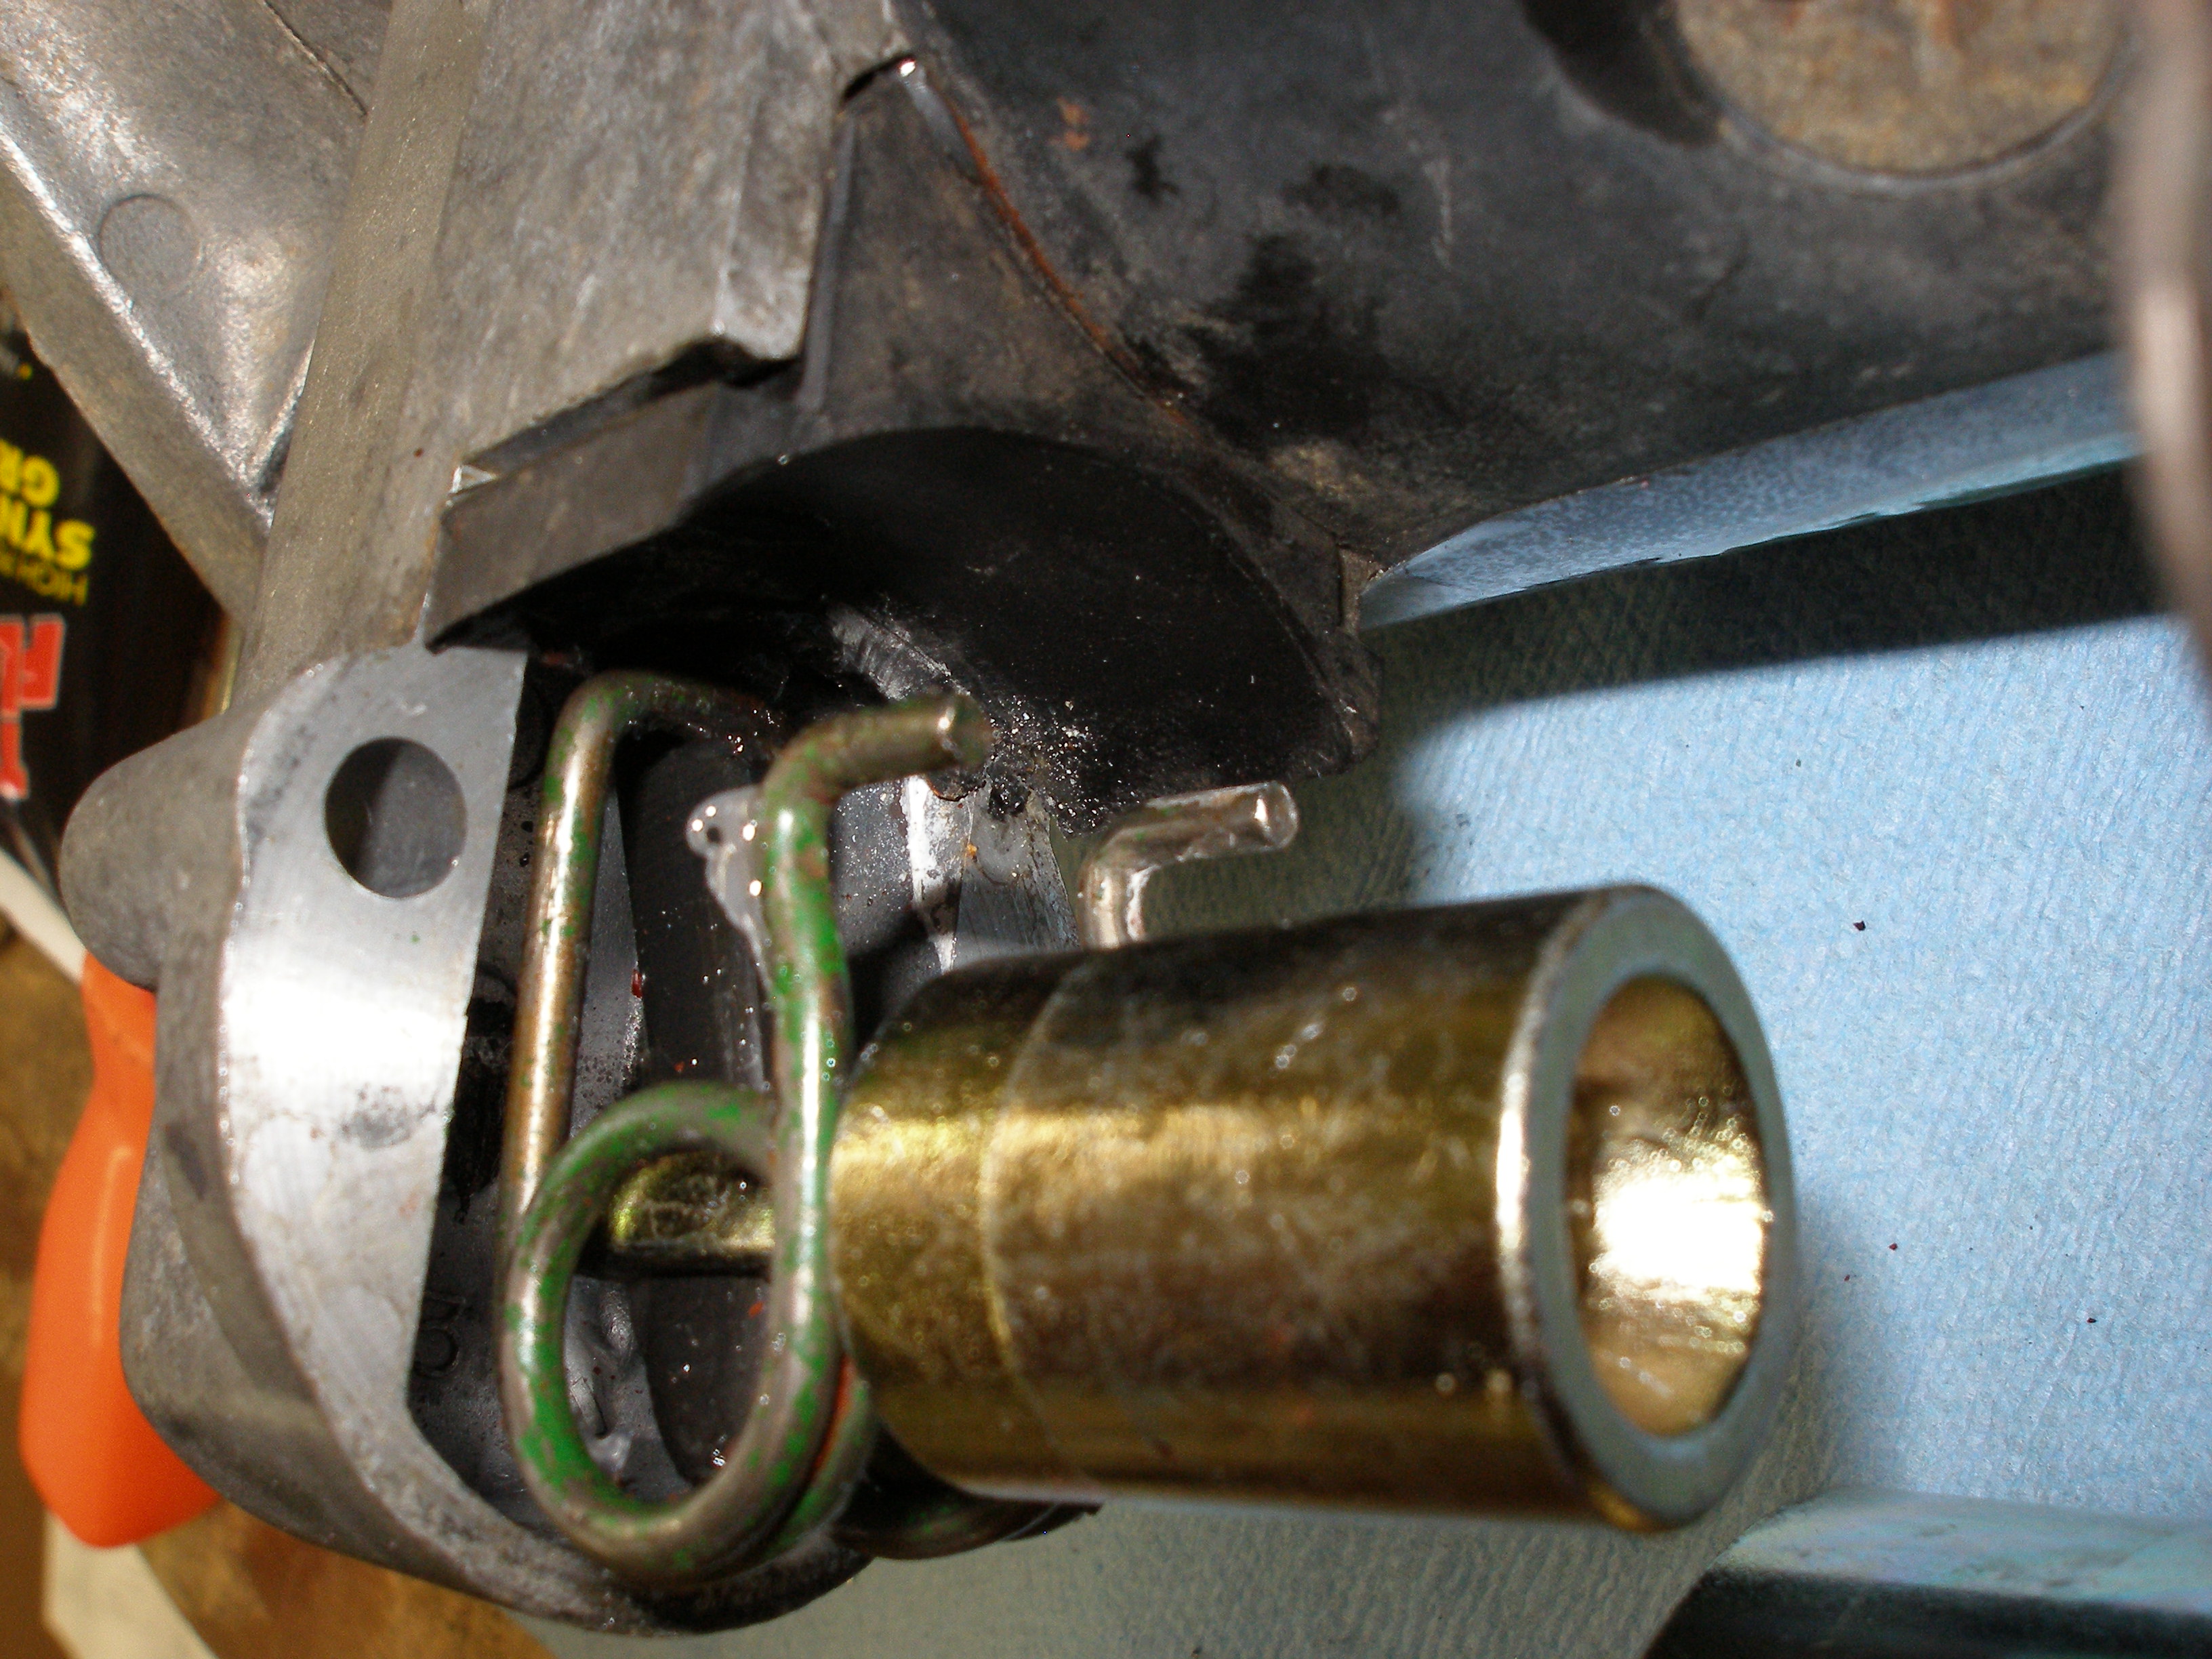
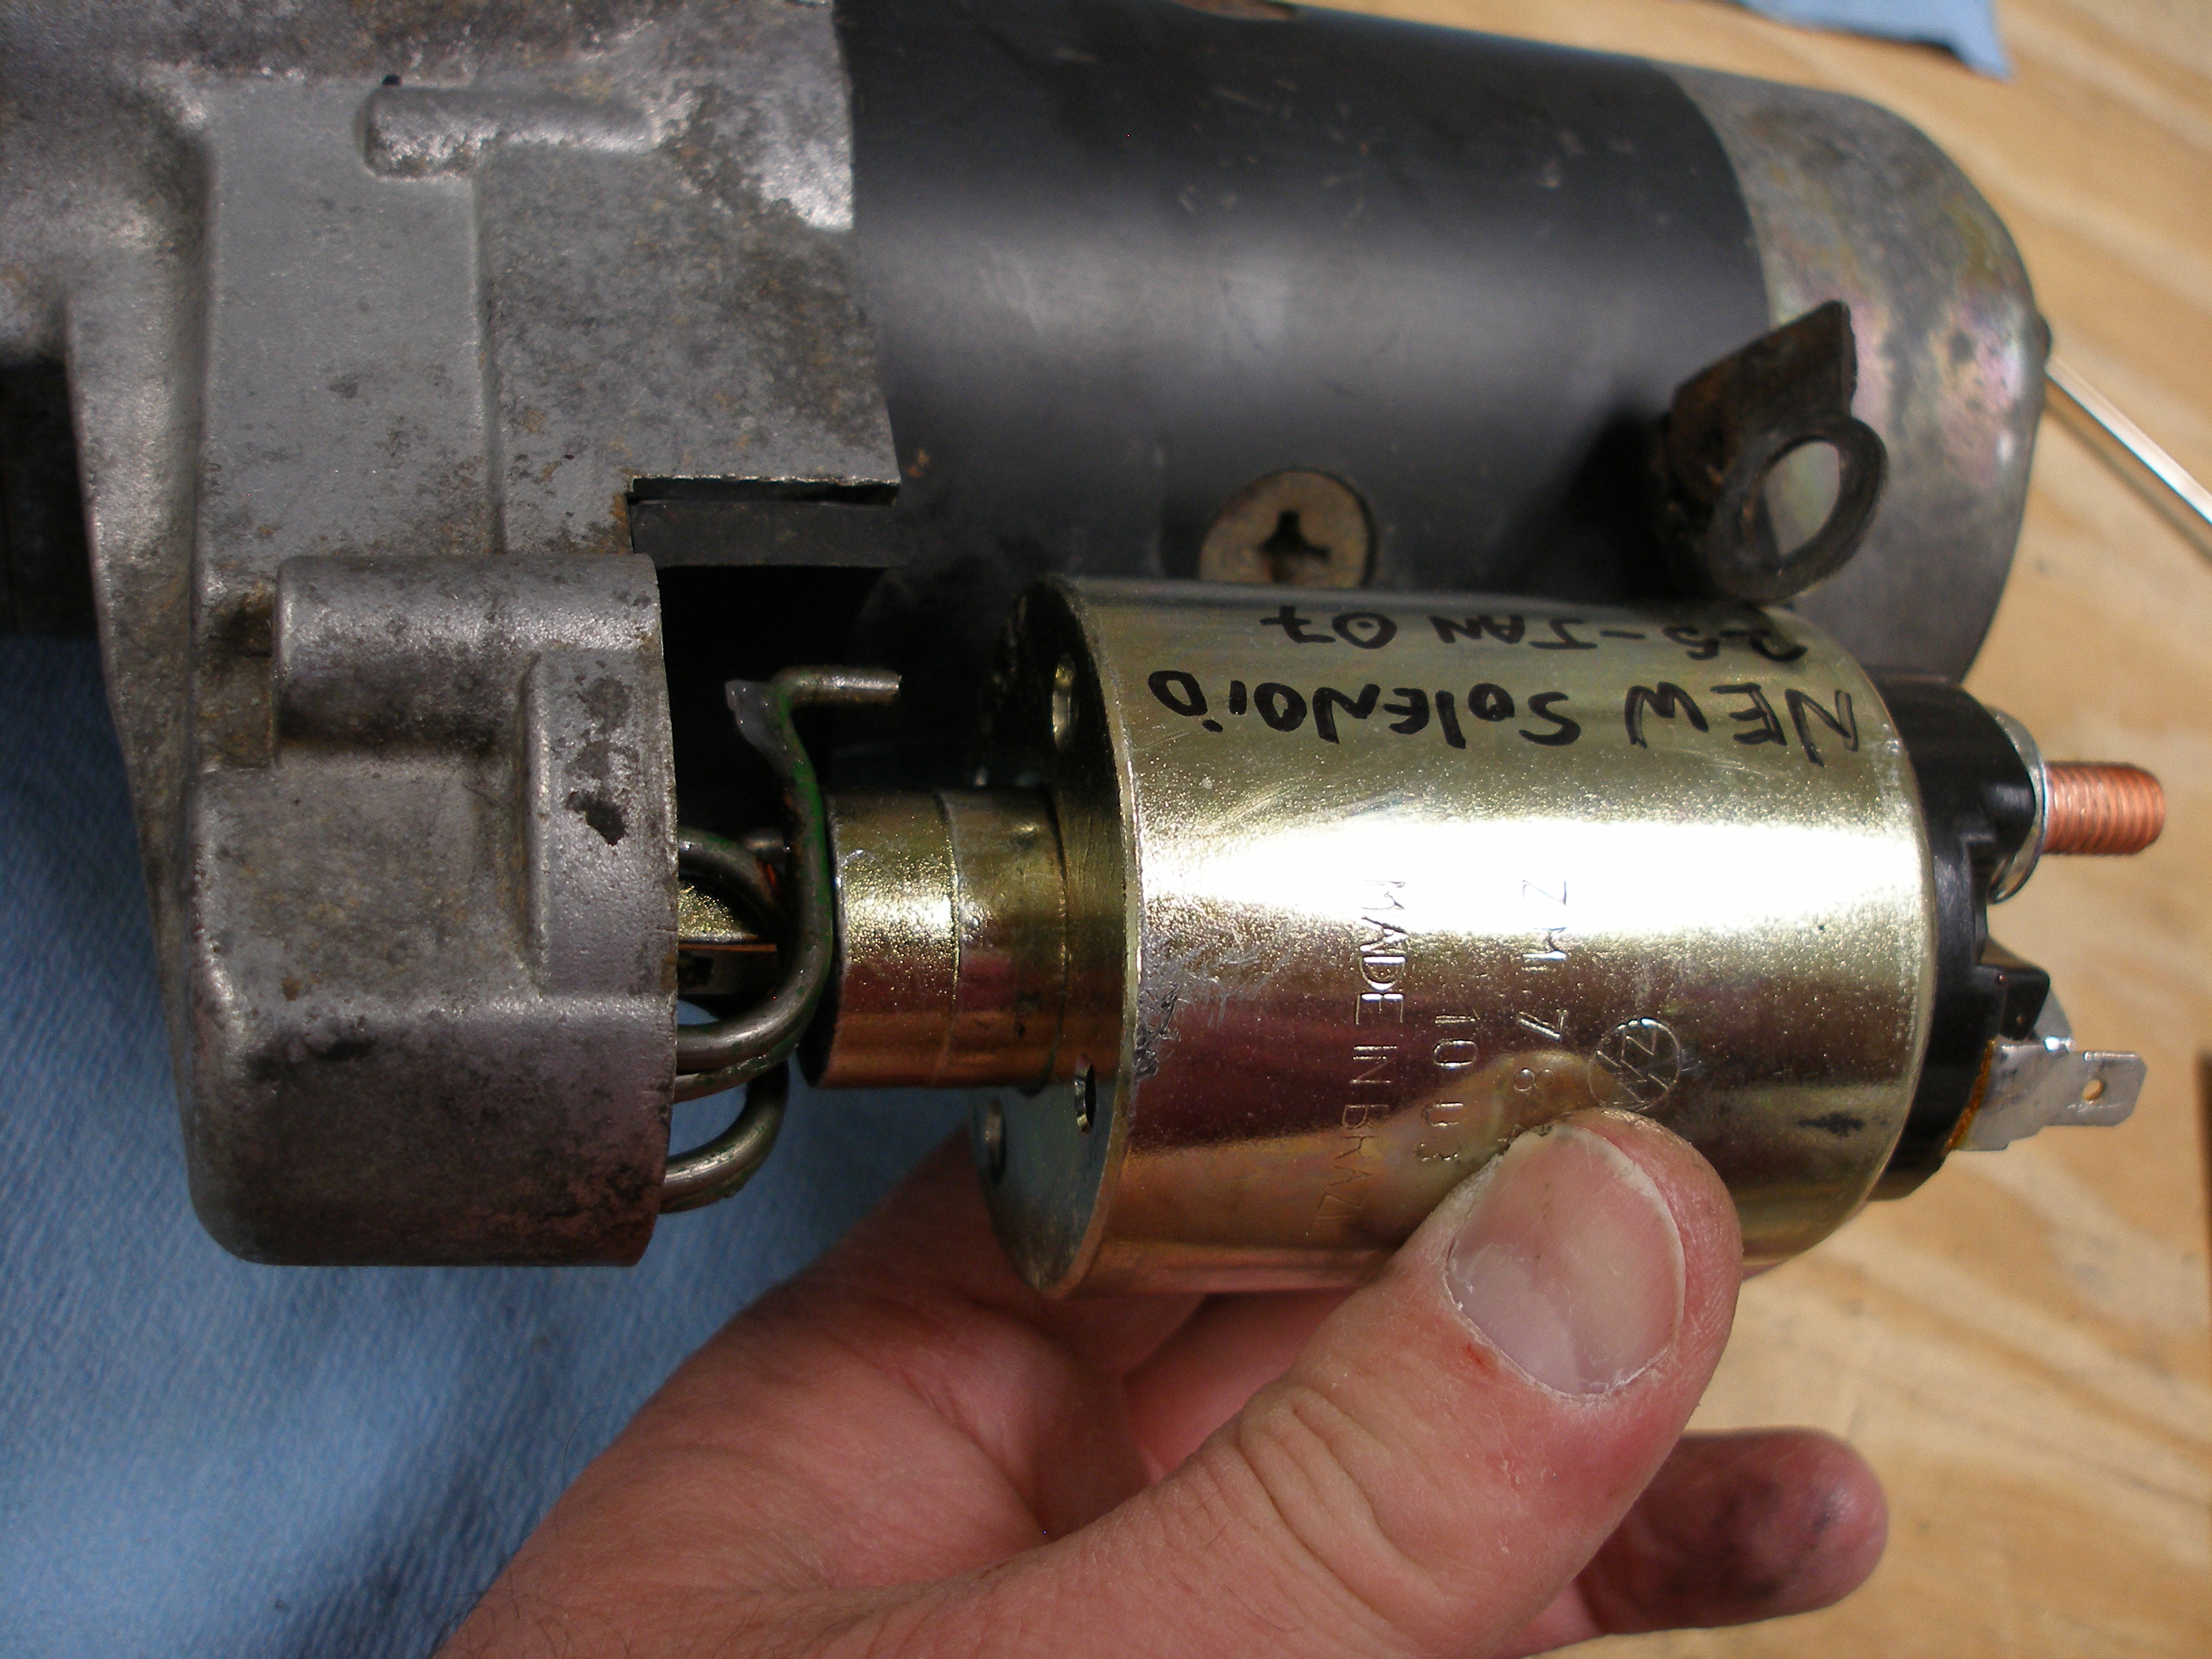
In particular, note that the solenoid's bolt pattern is at an angle to the spring holes.
The SSHI-804 has the correct angularity of those mounting holes. The wiring end cap's alignment is off by a few degrees, but this is cosmetic only. Also, the spade terminal is not right-angle. This should not present a problem, but I have not installed either of these so I don't know for certain.
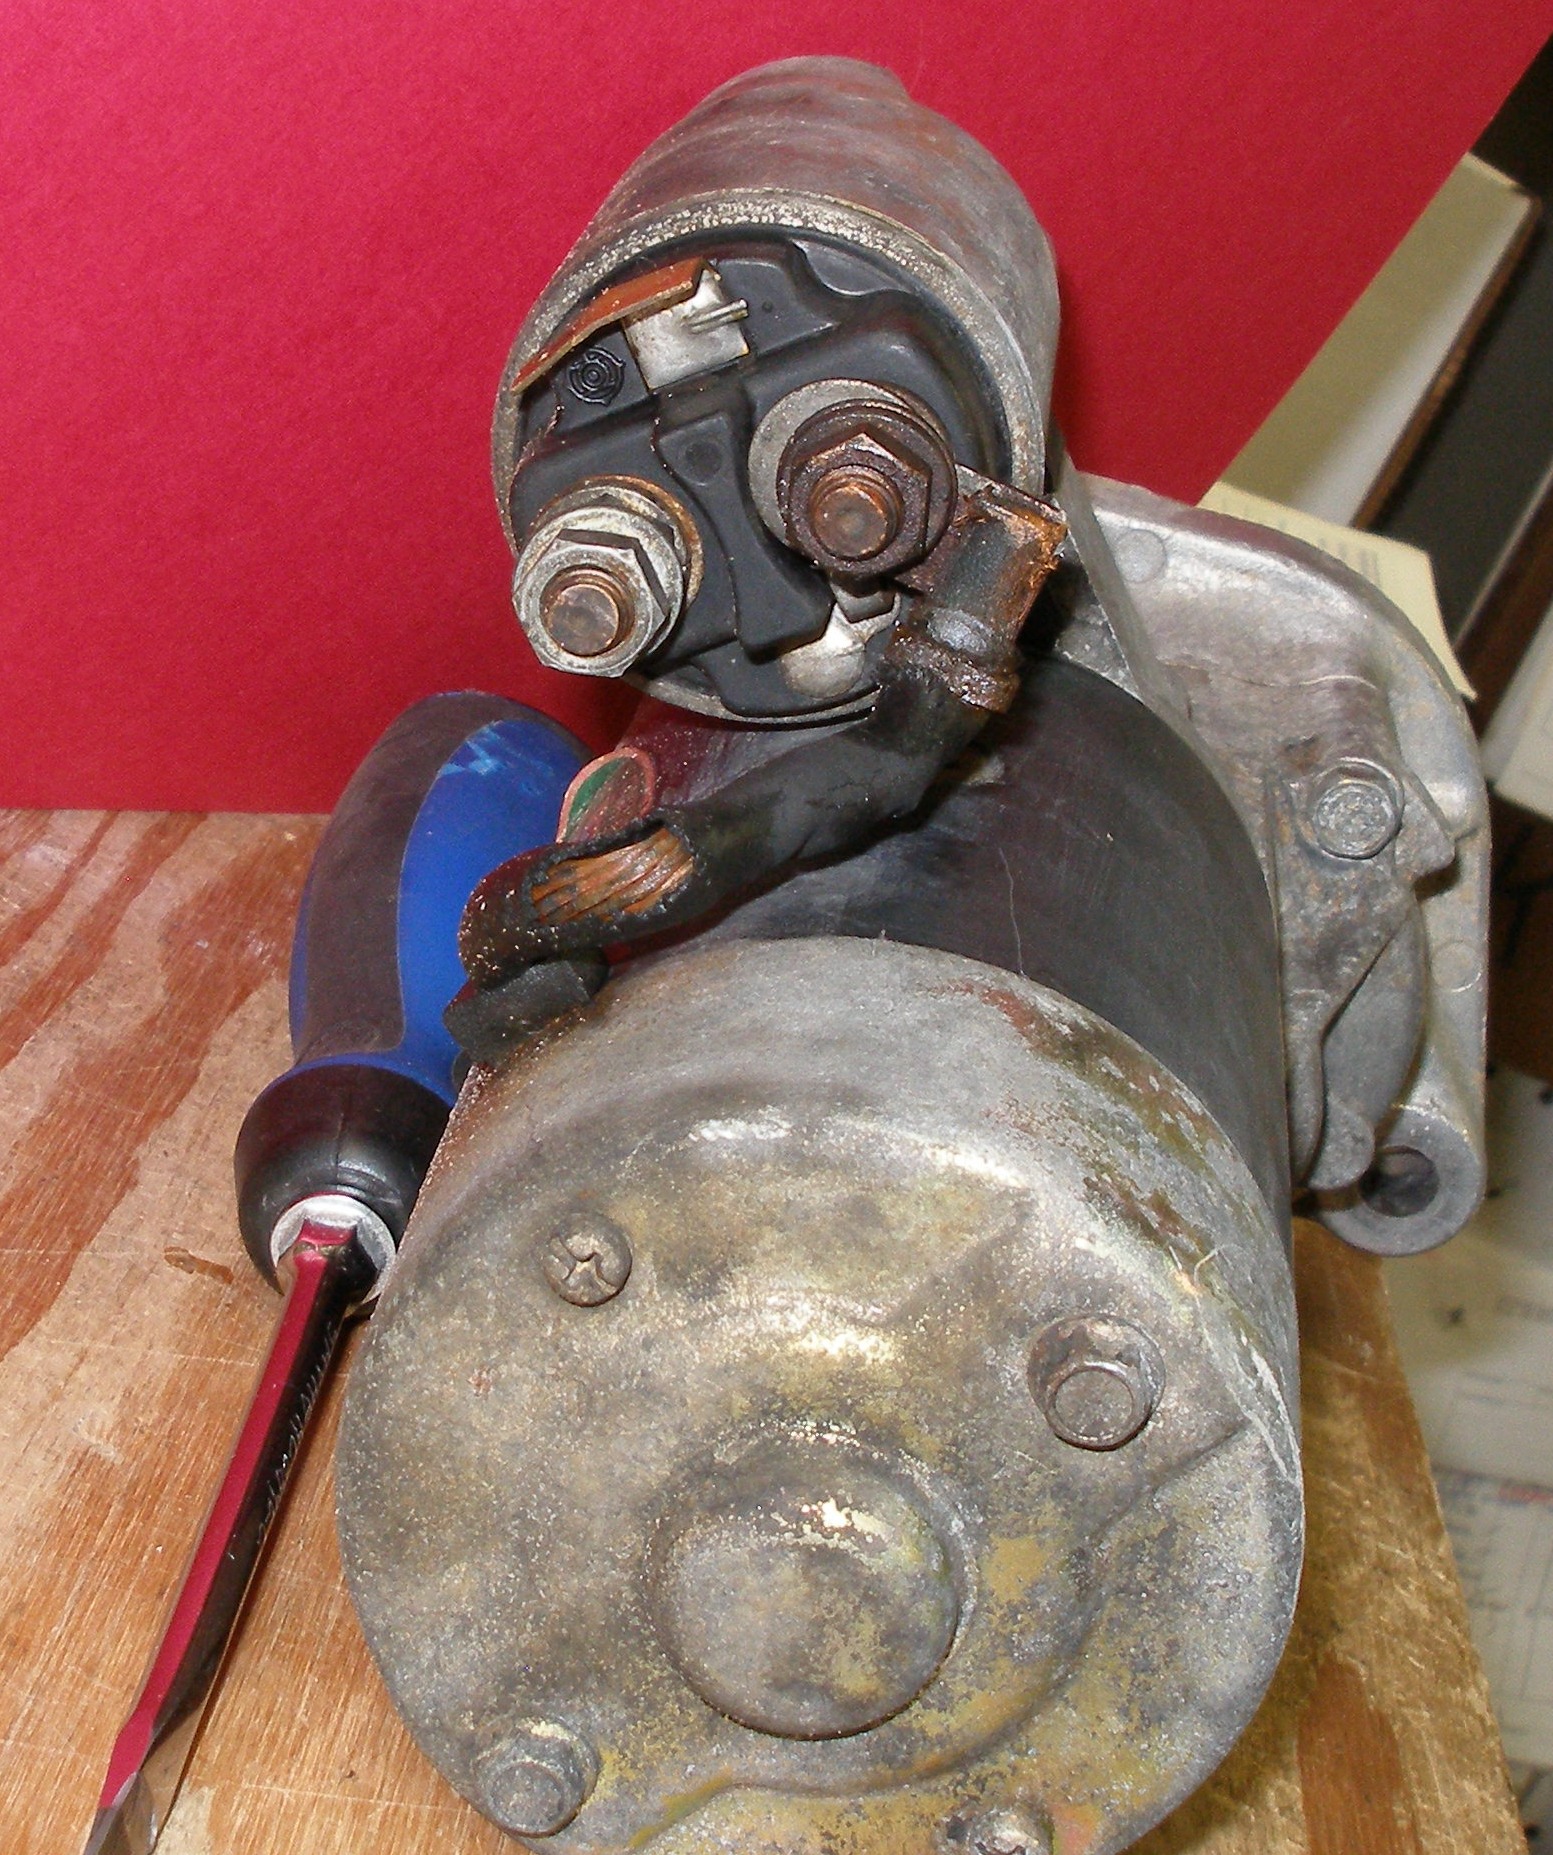
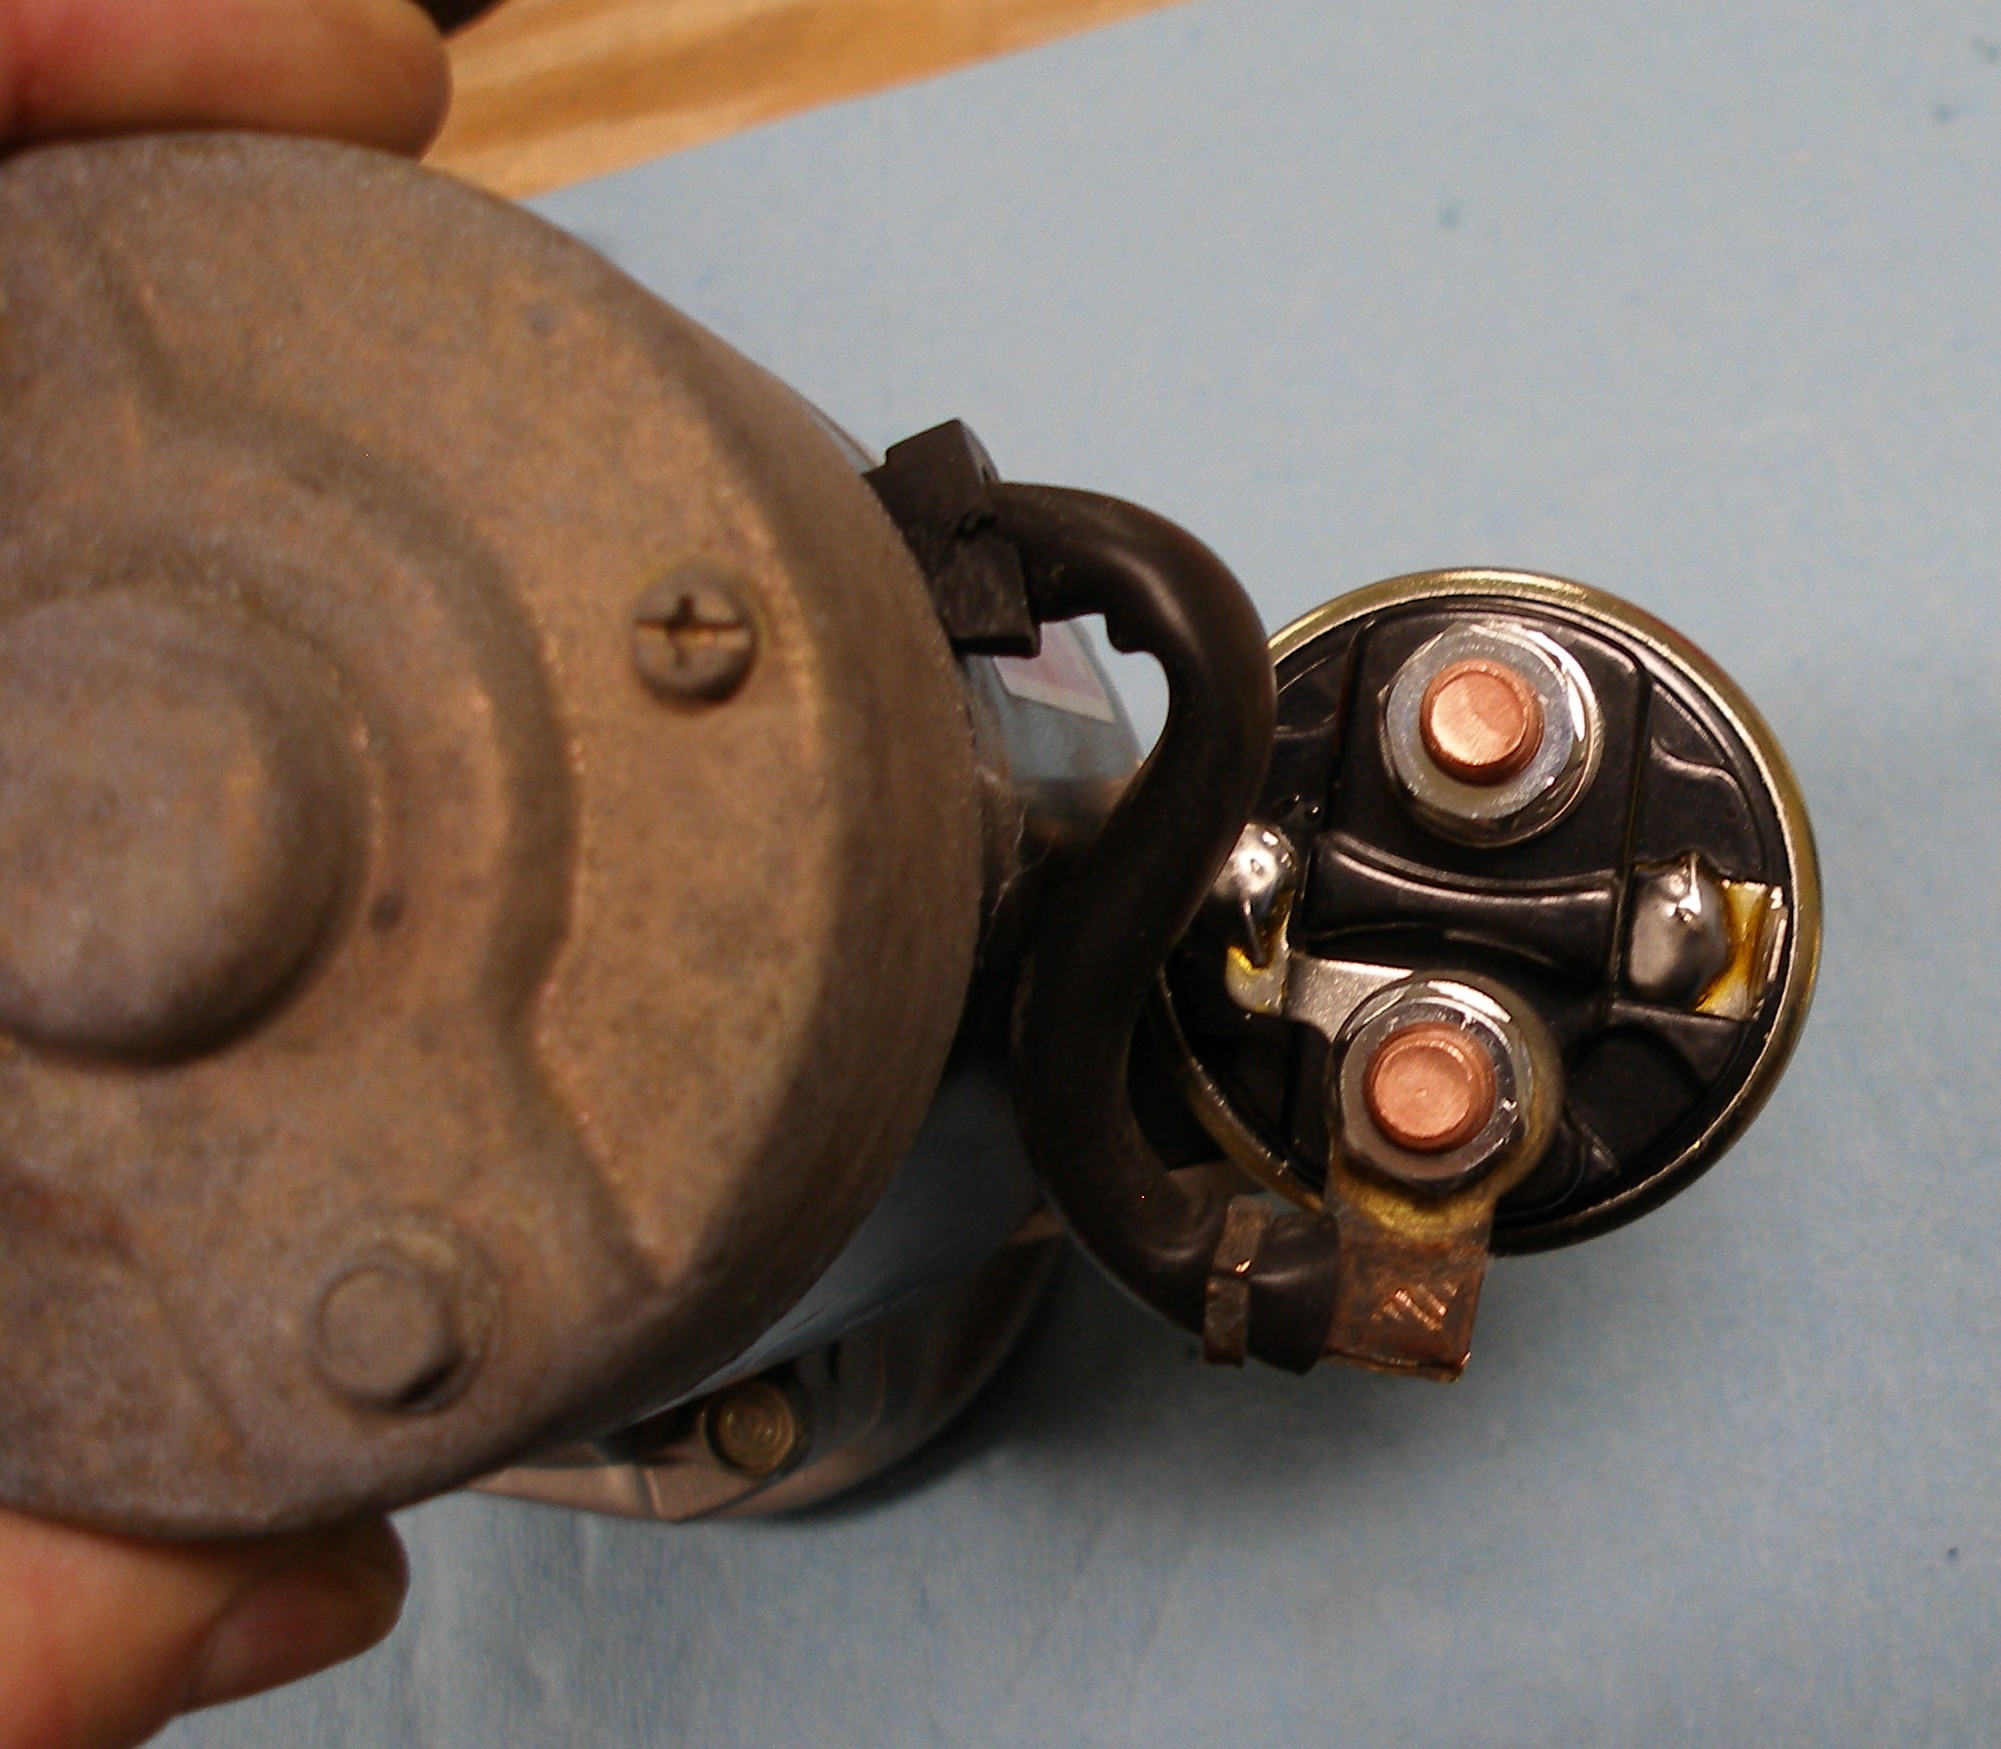
With the starter on the bench, removing the solenoid is straightforward: one 12mm-head nut to disconnect the starter motor's lead, and two 10mm-head bolts to unfasten the solenoid to the housing. Pull gently and wiggle, and the solenoid comes off the starter.
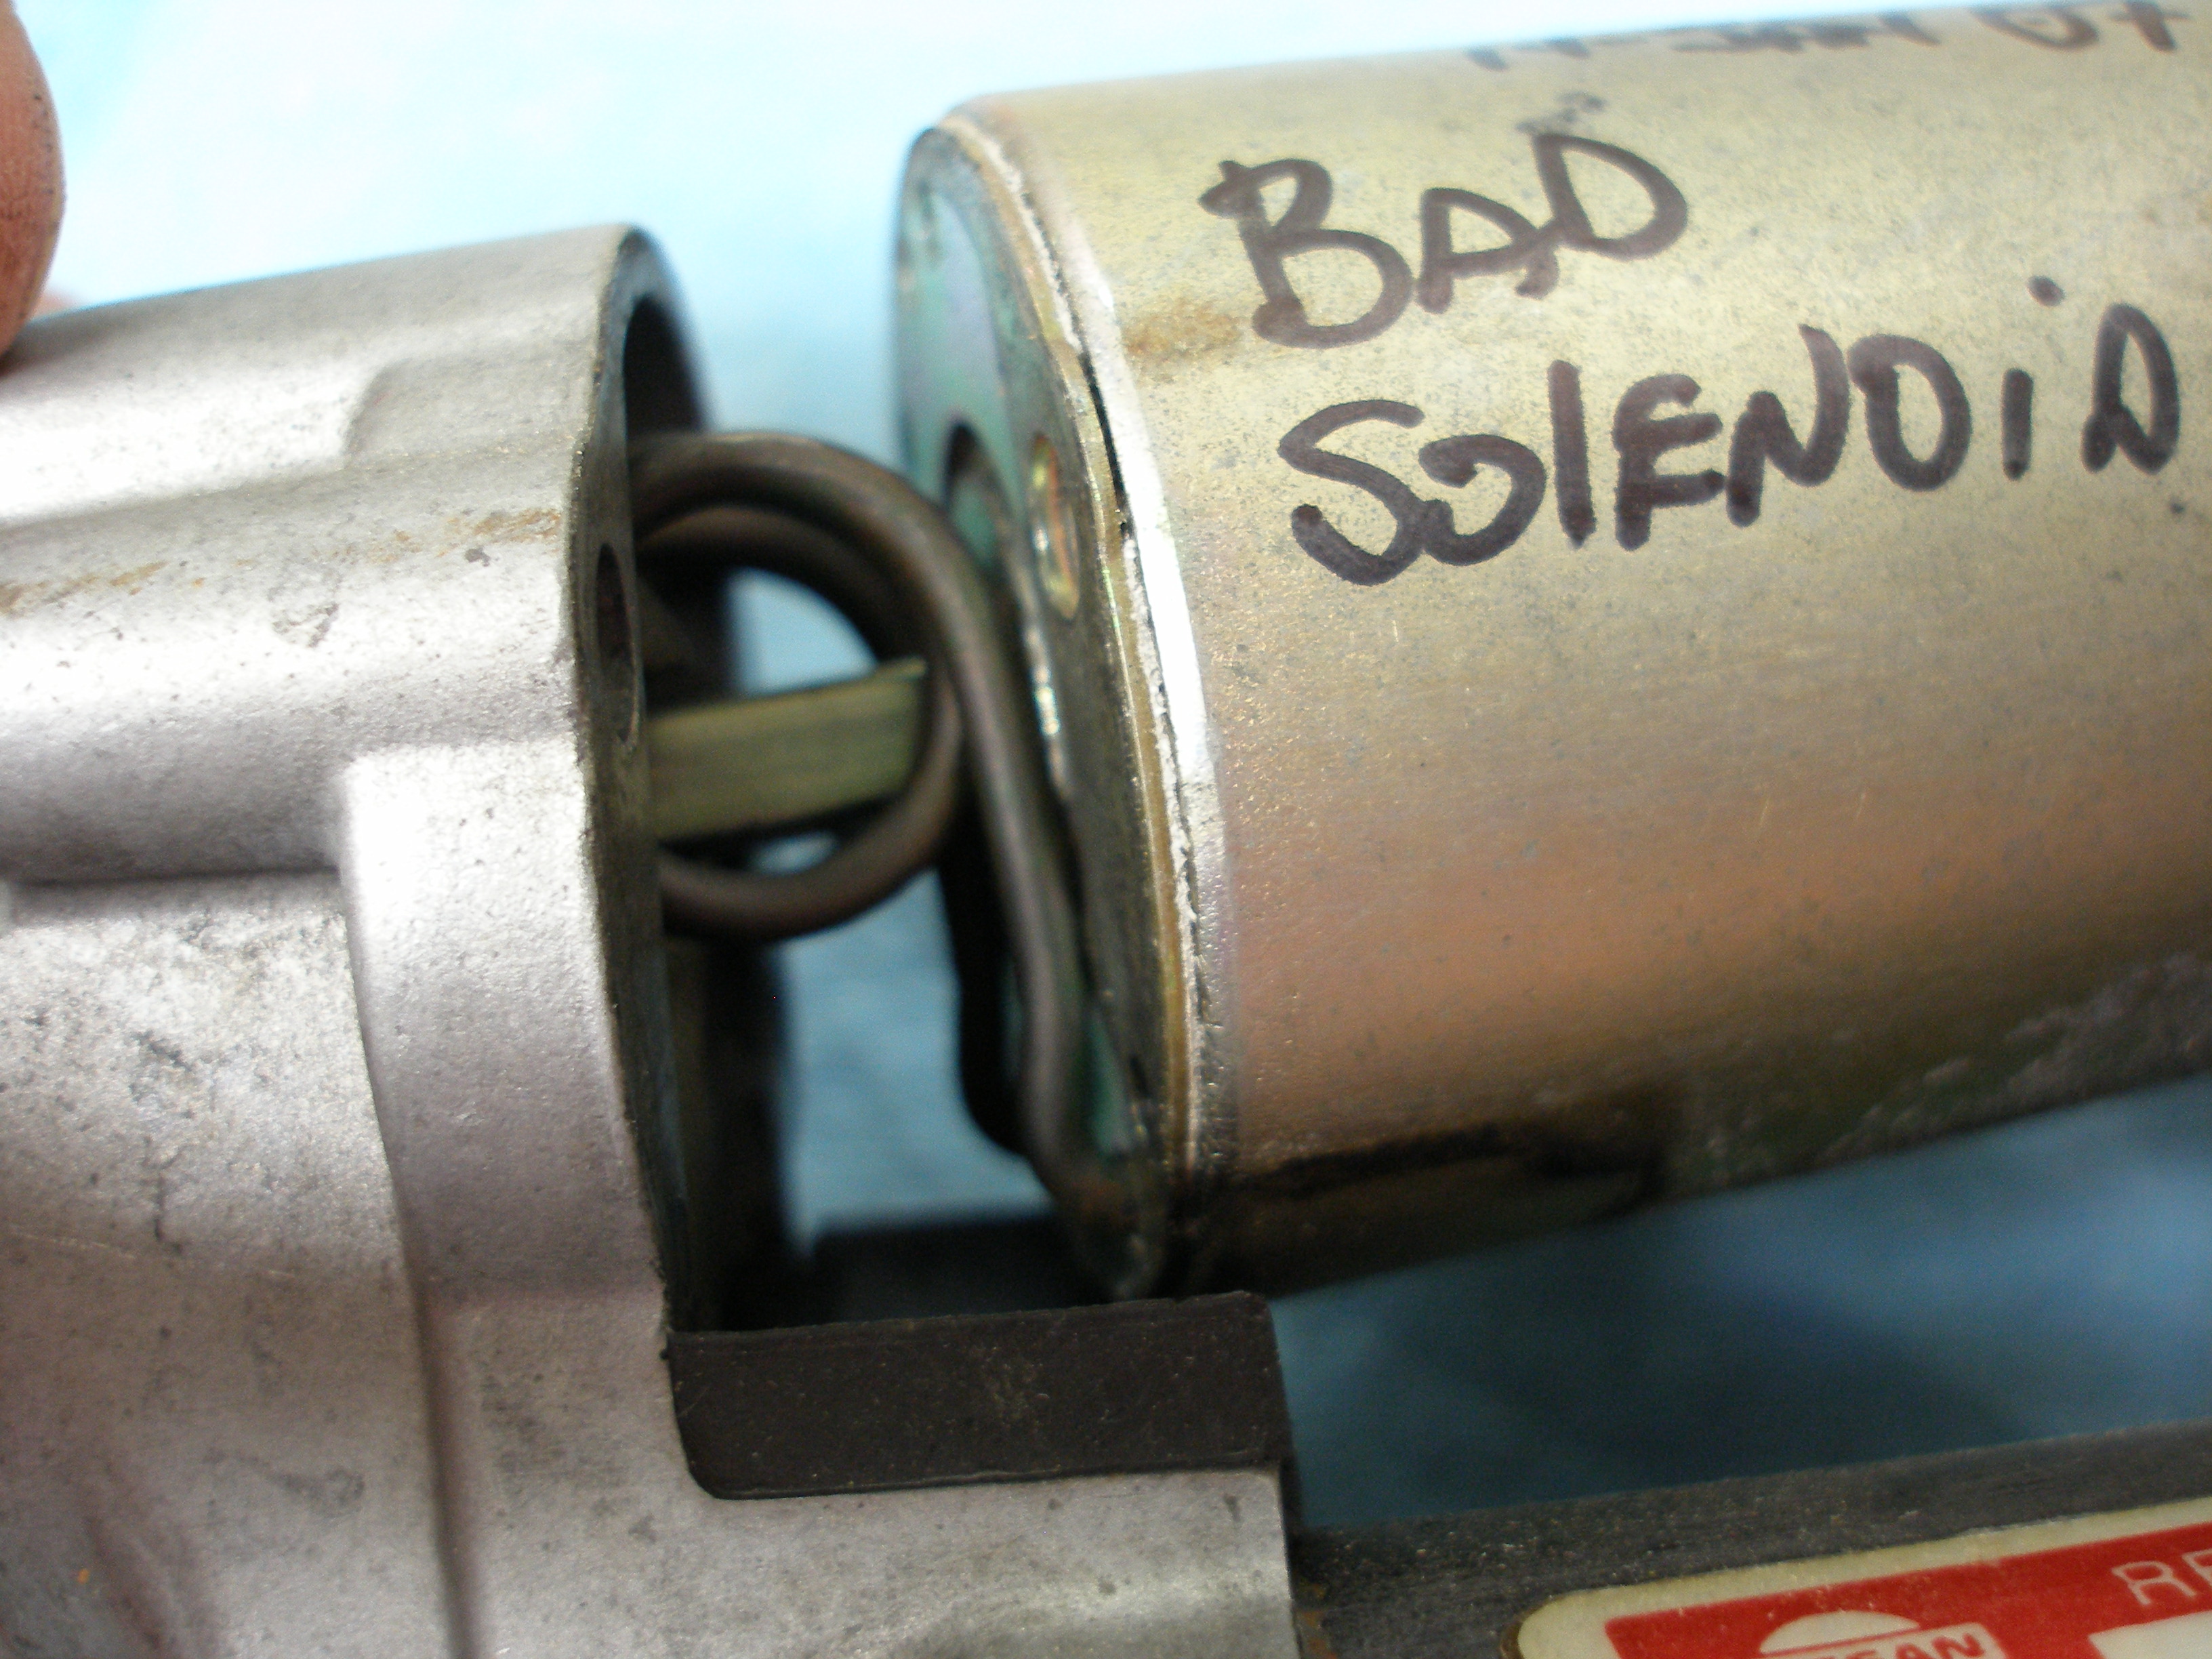

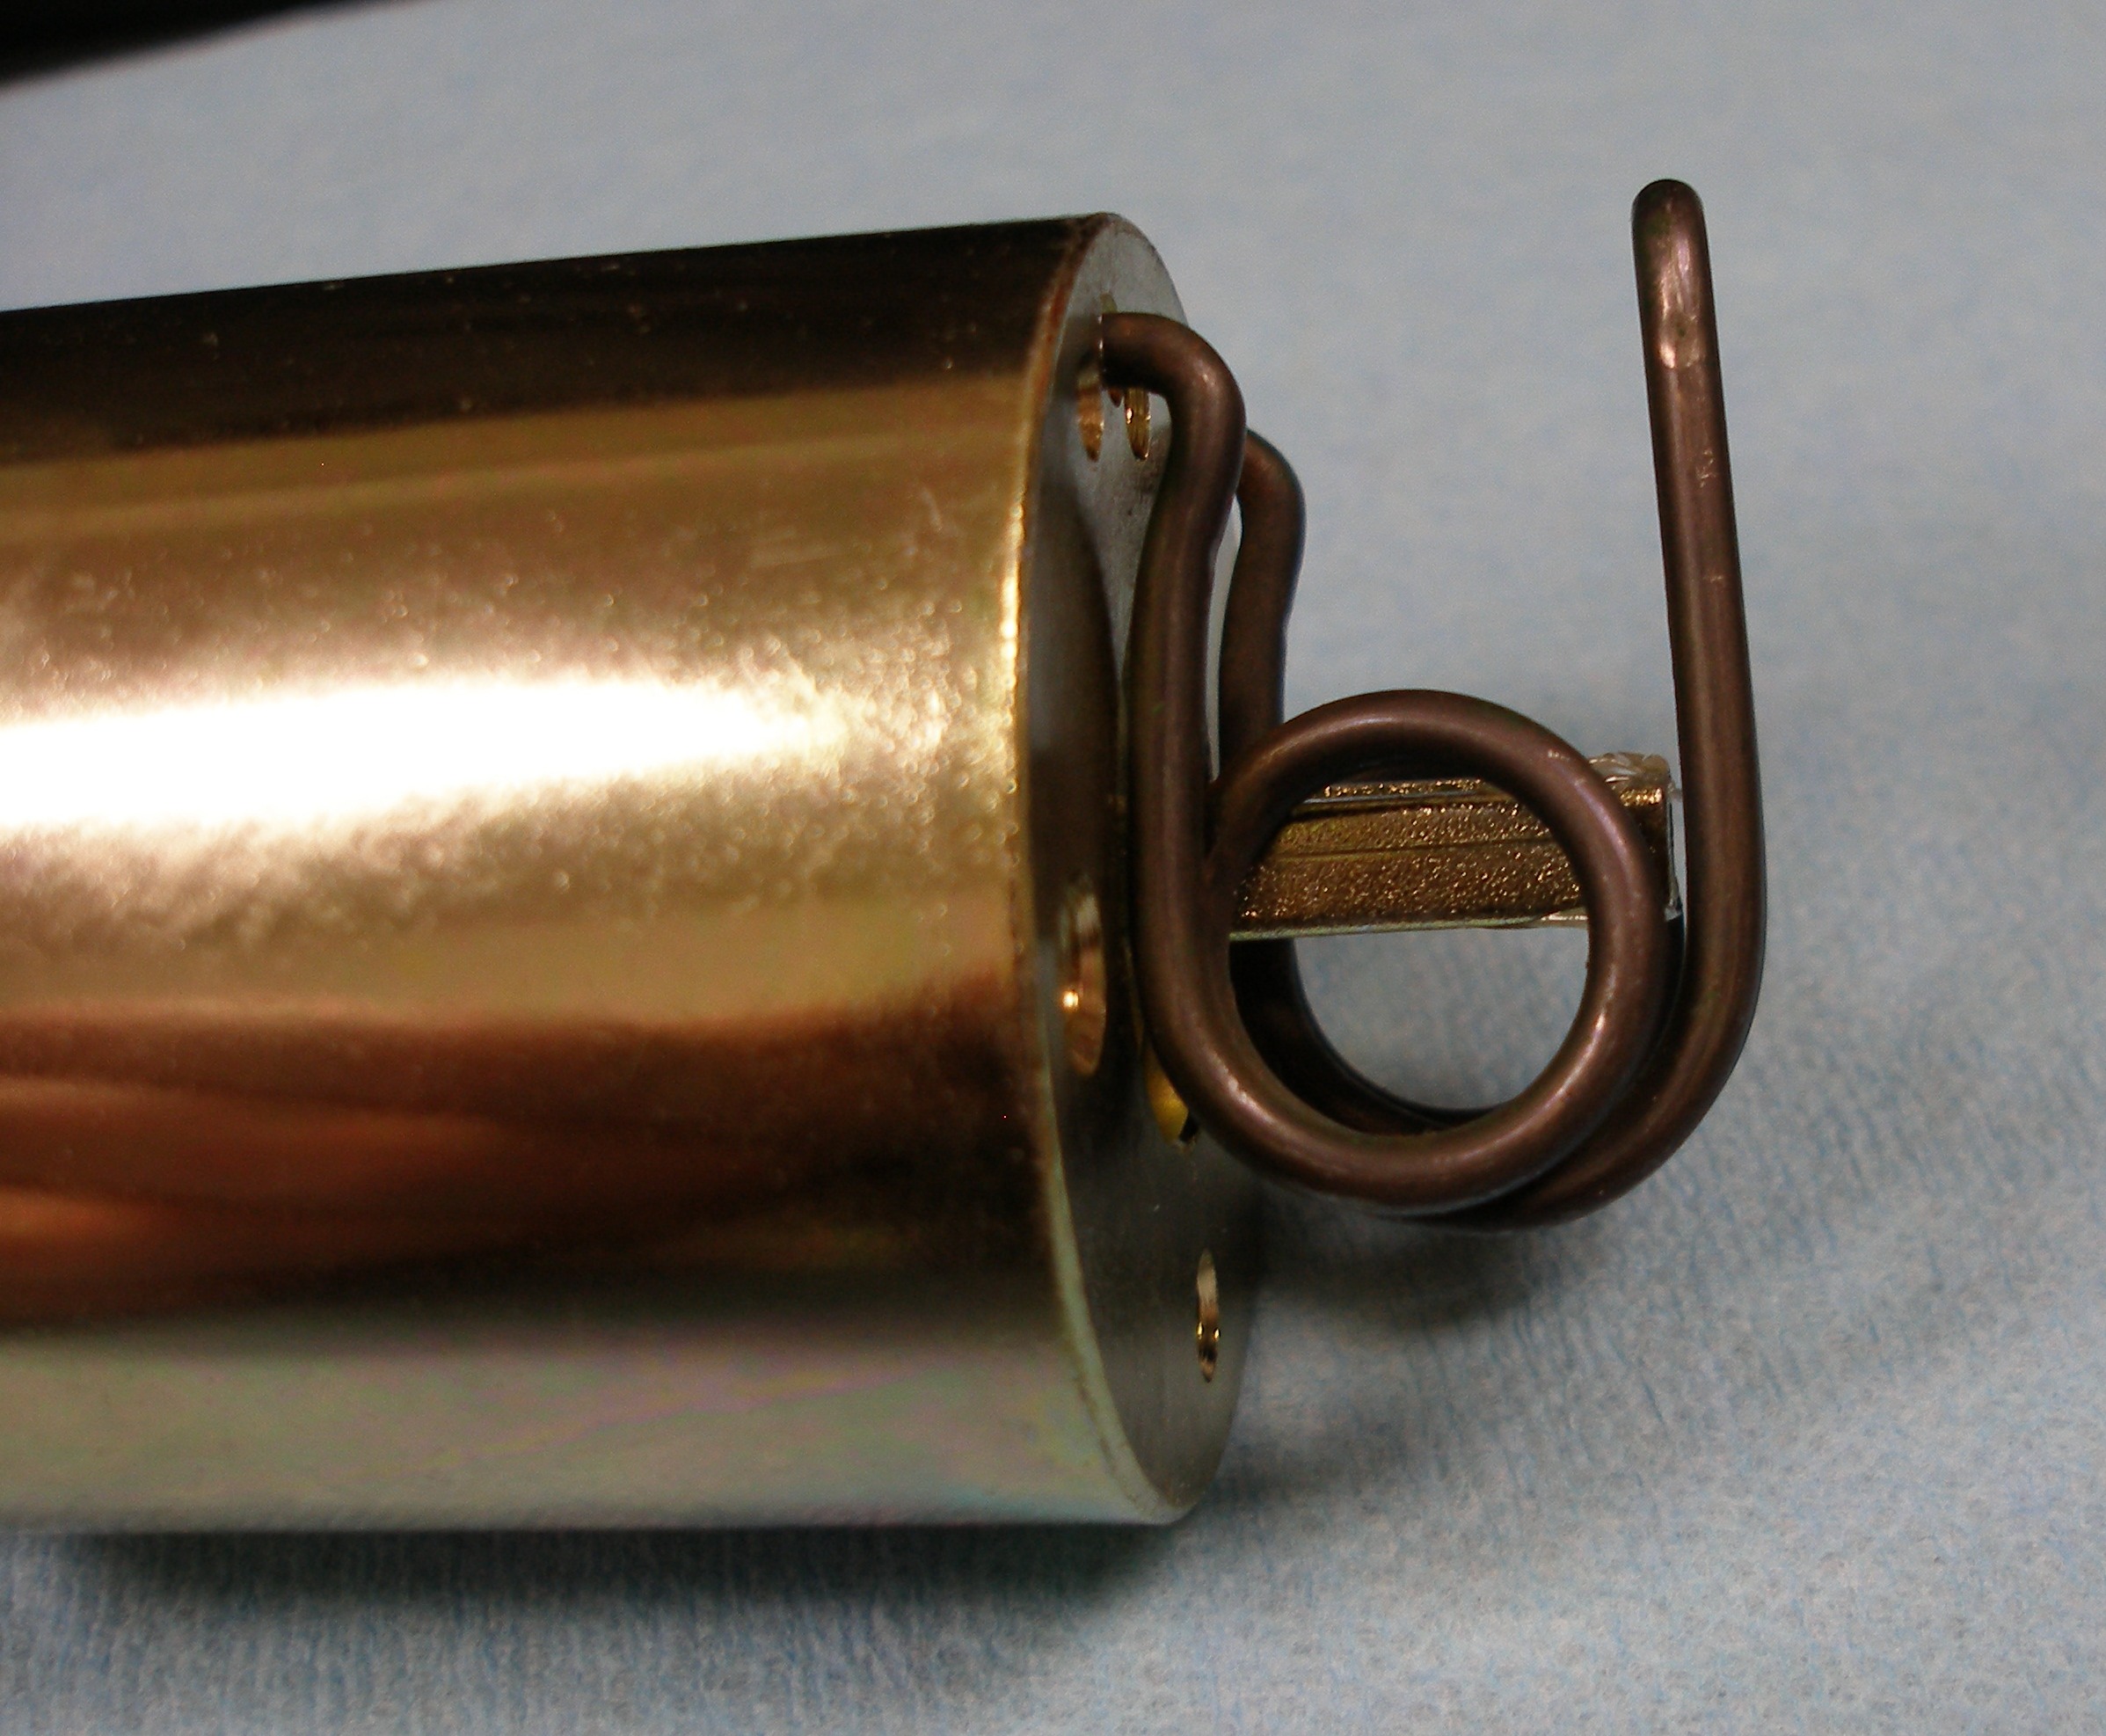
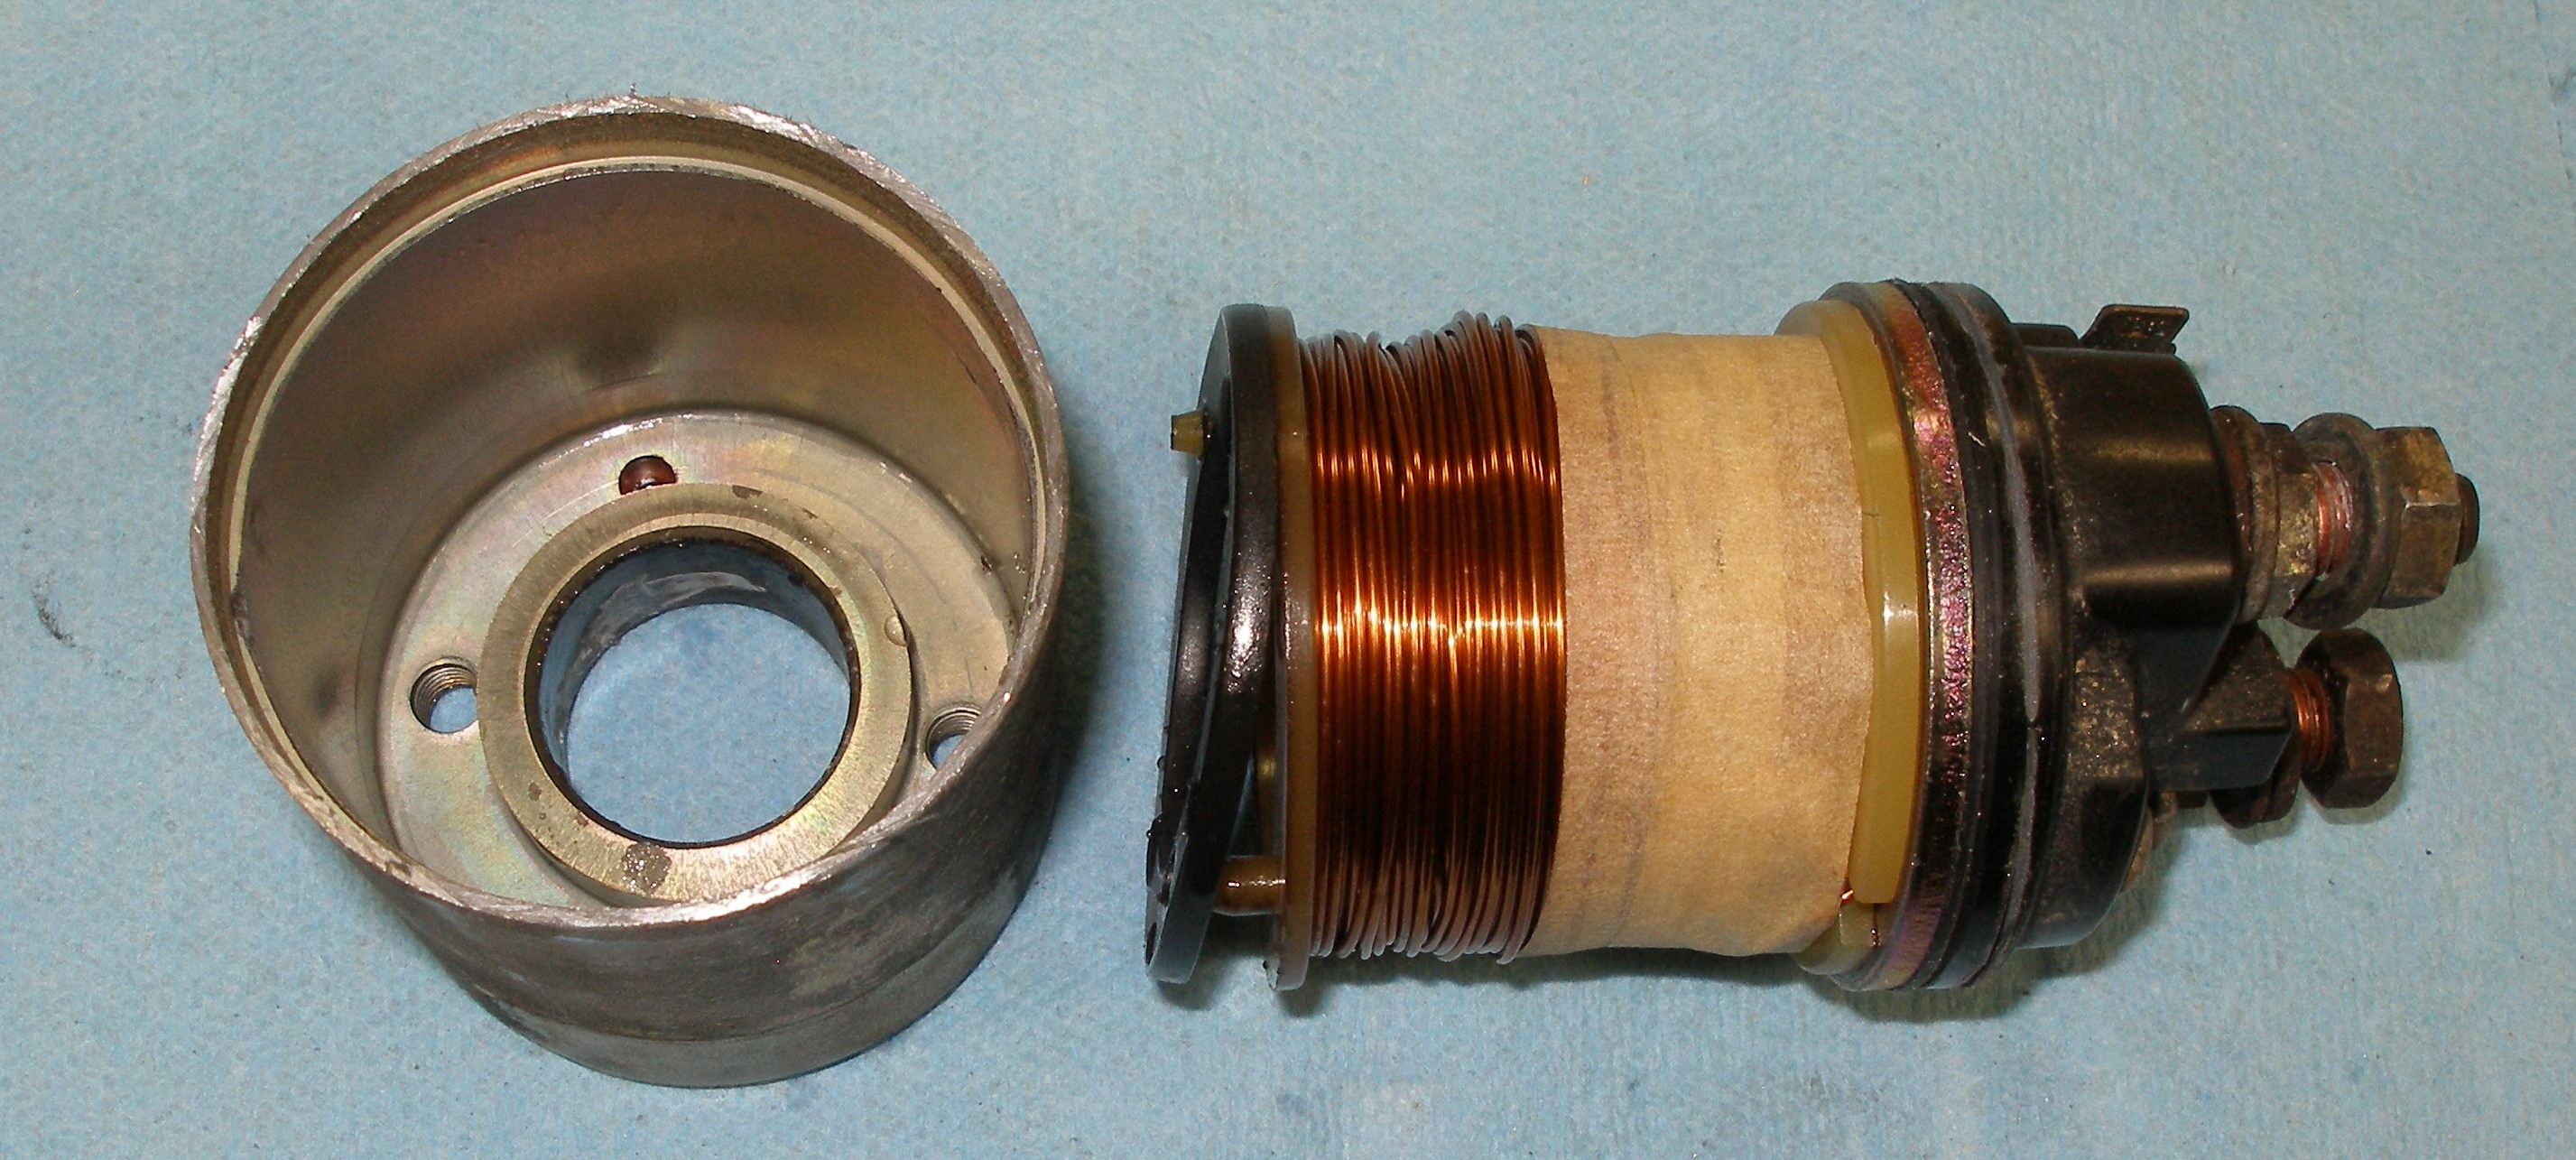
The spring pulls out of the solenoid with a bit of a tug. When putting the spring onto the new solenoid, note the bolt holes-to-spring holes orientation.
Use needle-nose pliers on the bendix gear, pull it out against spring pressure, and wedge it with a suitable tool. This gives you room to remove the bendix lever. If you don't do this first, later the lever can become jammed inconveniently around the rear of the pinion shaft. Ask me how I know.

Remove the rubber plug ("dust shield"). It takes a good tug to pull it out, at least it did in my case.
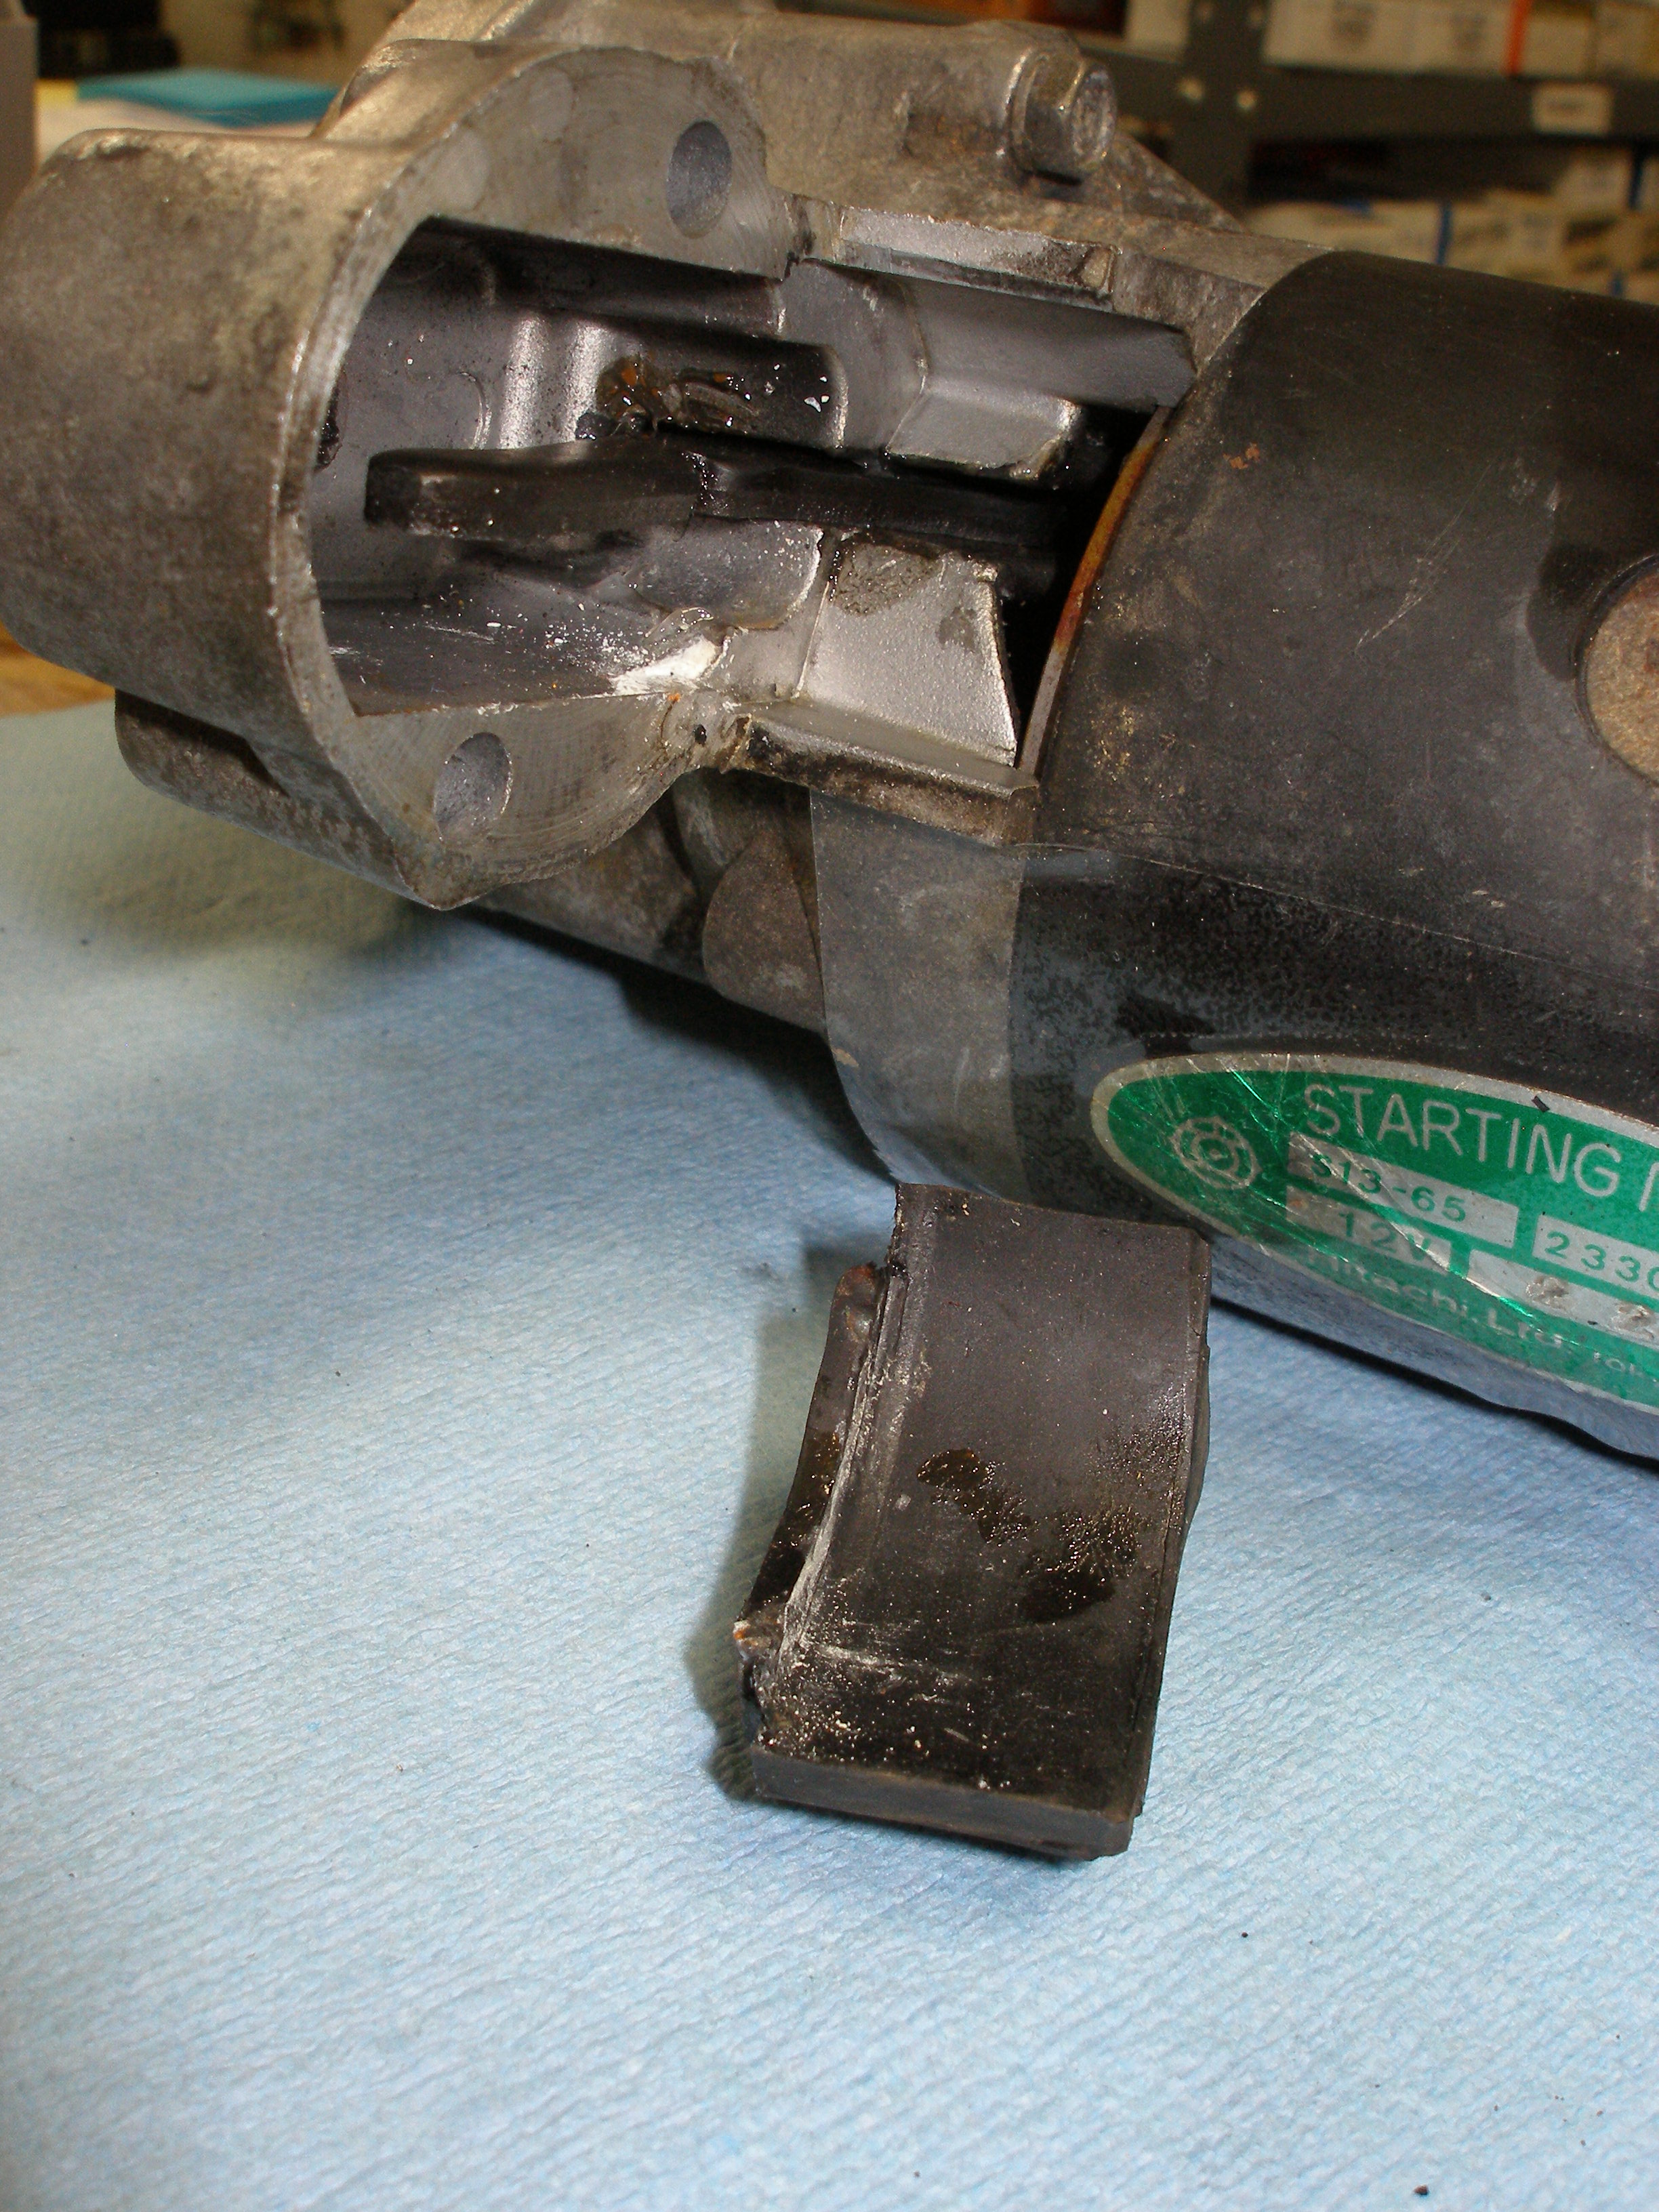
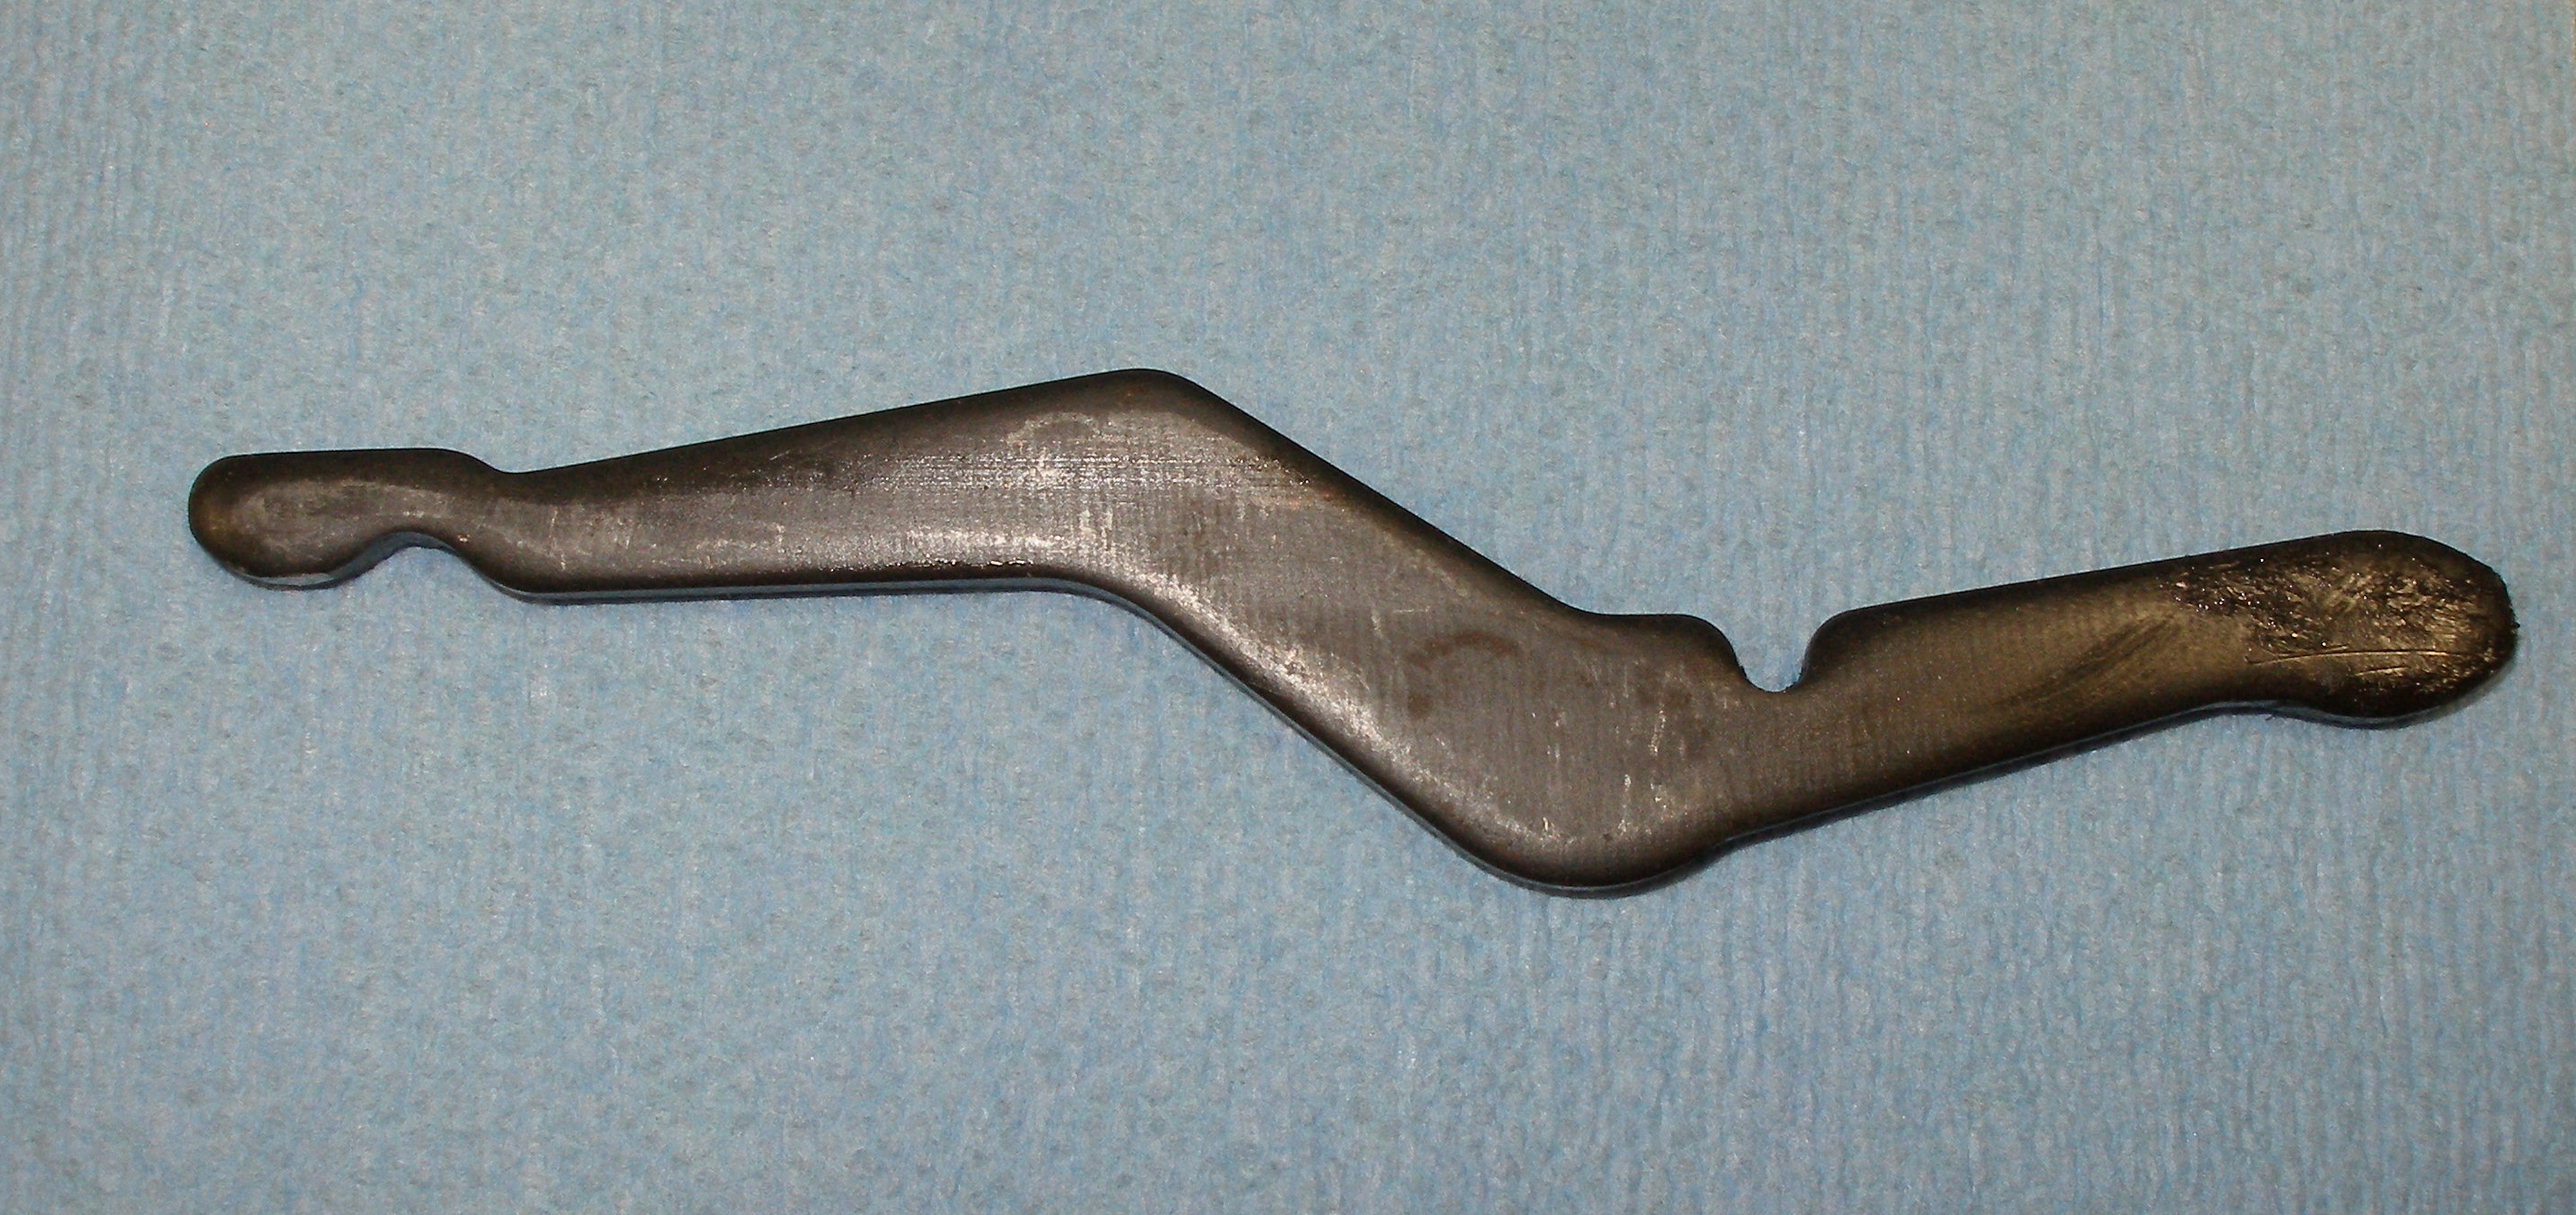
Using needle-nose pliers, pull up on the lever and remove it.
The FSM shows this:

But, it's closer to this. I would not use a grease on the solenoid's plunger, it's too easy to get a sticking plunger. Unless you use a light synthetic grease.
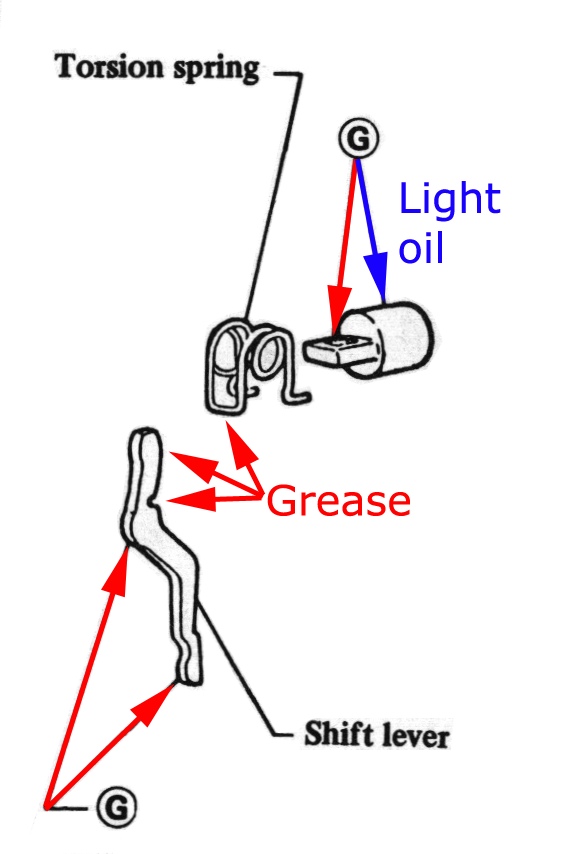
Grease up the pivot lever, then slide it back down into the normal position. Remember, the end is just pushing on the end of a shaft, there's pretty much no alignment you need to do. All the alignment is done by the solenoid plunger when you assemble it -- see the next step.
When assembling the solenoid to the housing, bear in mind that the spring's lower horizontal bit goes into the pivot lever's divot -- just like it came off, in case you didn't see. This takes a bit of planning to accomplish, but it can be done.

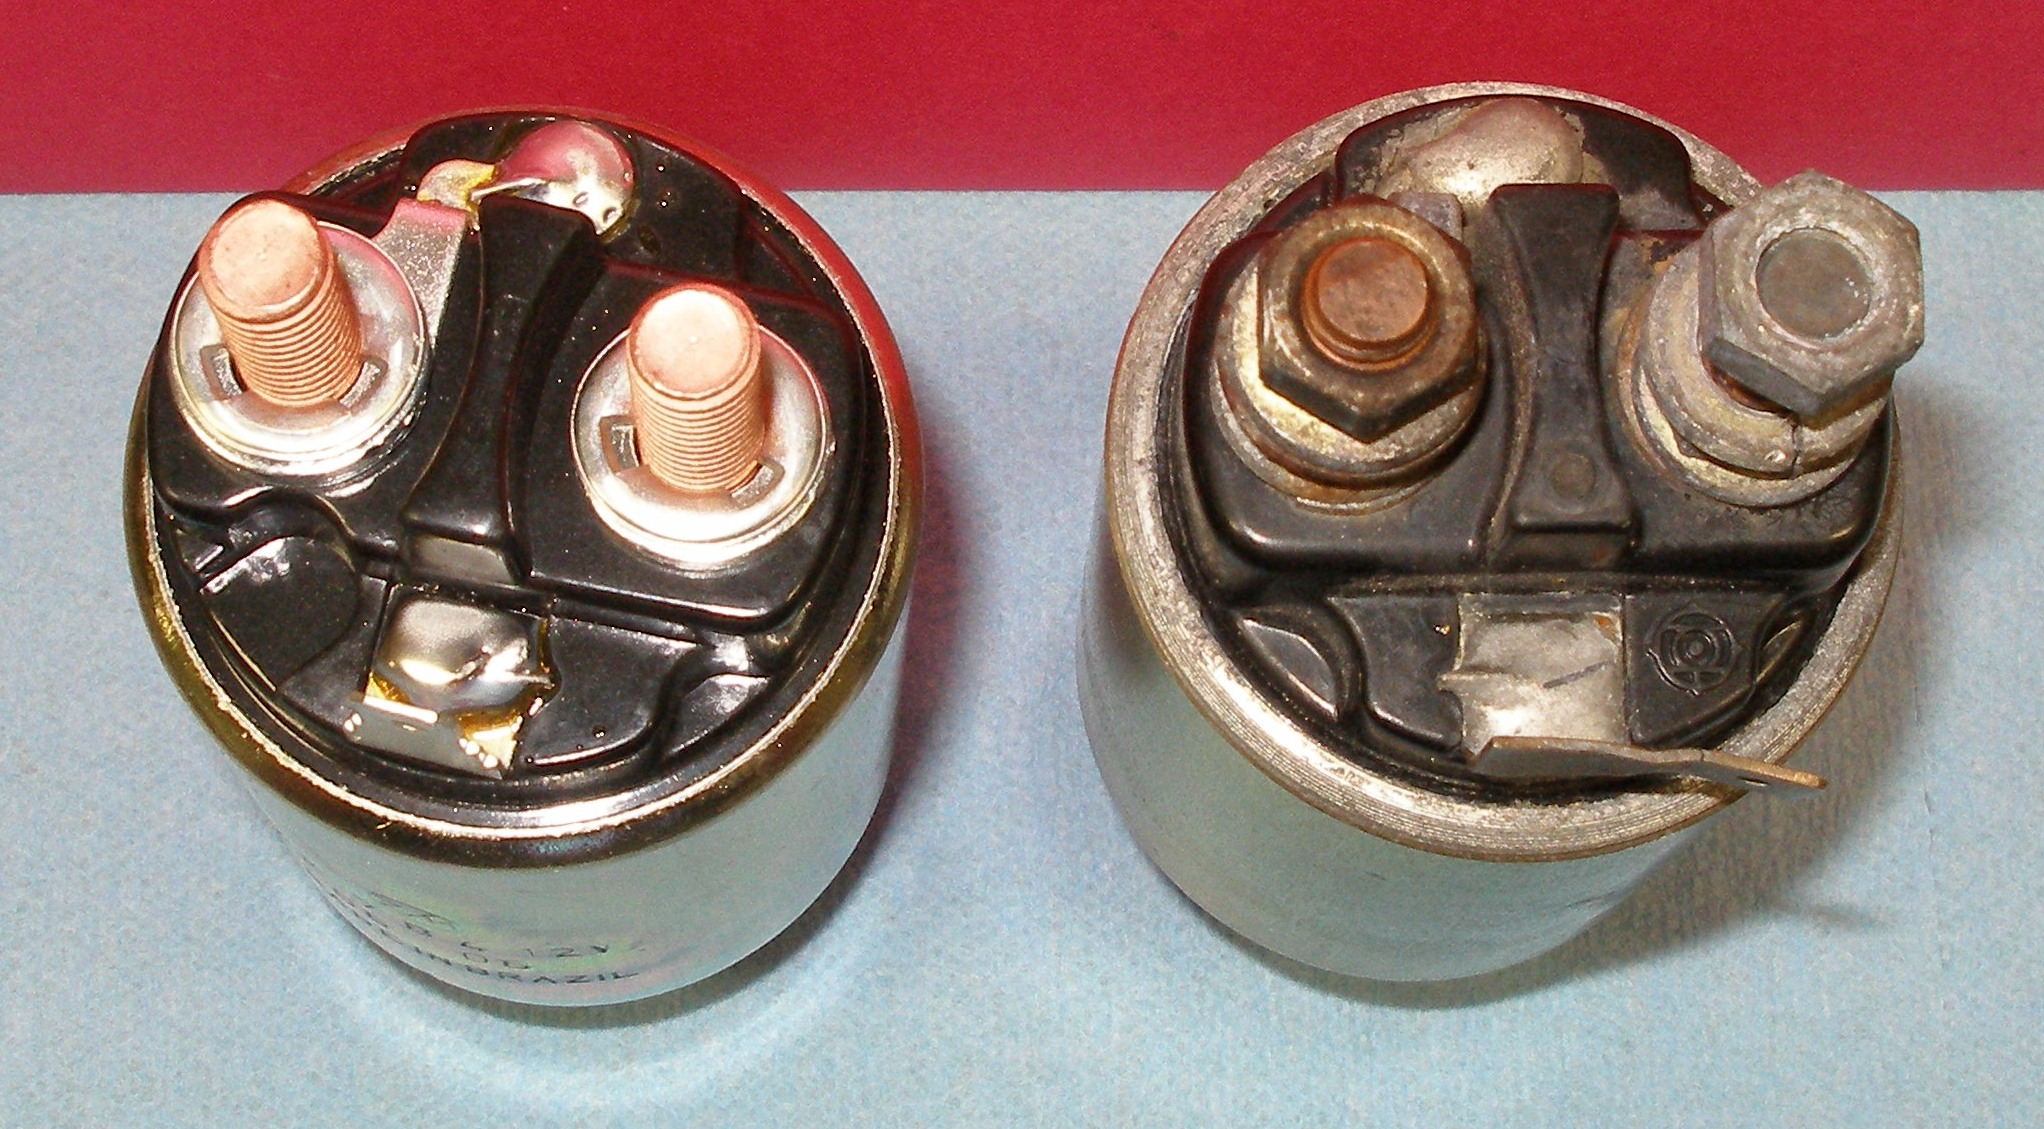
The new solenoid comes with a nut for the starter motor wire, which is 13mm across the flats, rather than 12mm.
Autopsy of a bad solenoid
First, I desoldered the coil's terminals (a solder-sucker is very helpful here).

Then I bandsawed off 1/4" of the steel housing, where it's crimped over the bakelite-like connections end. This let the guts come out of the solenoid housing with little effort.

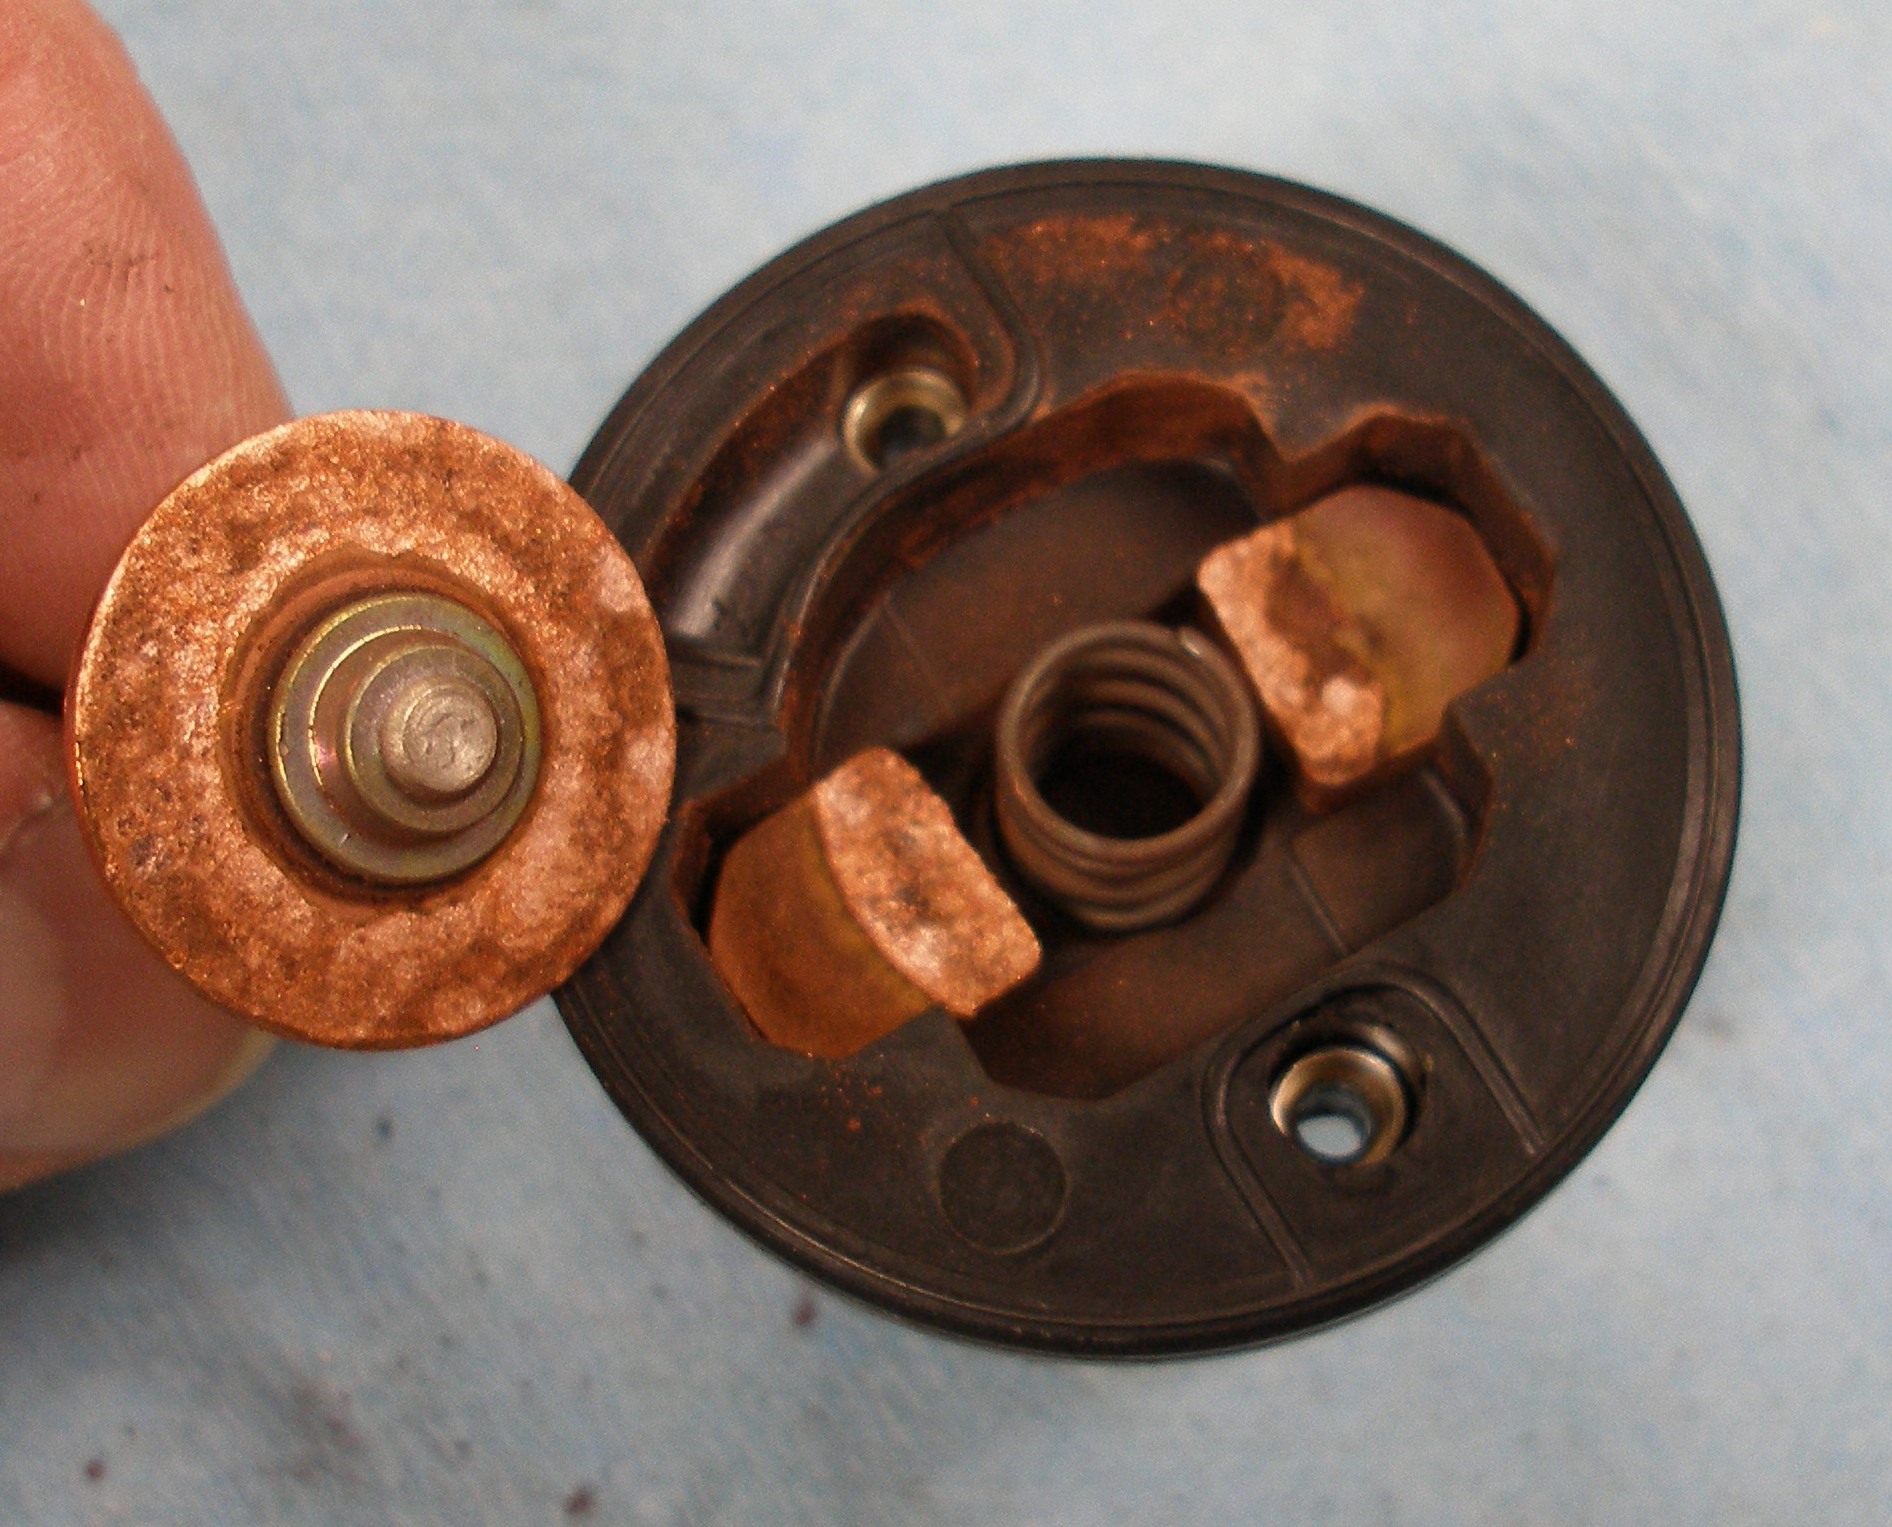
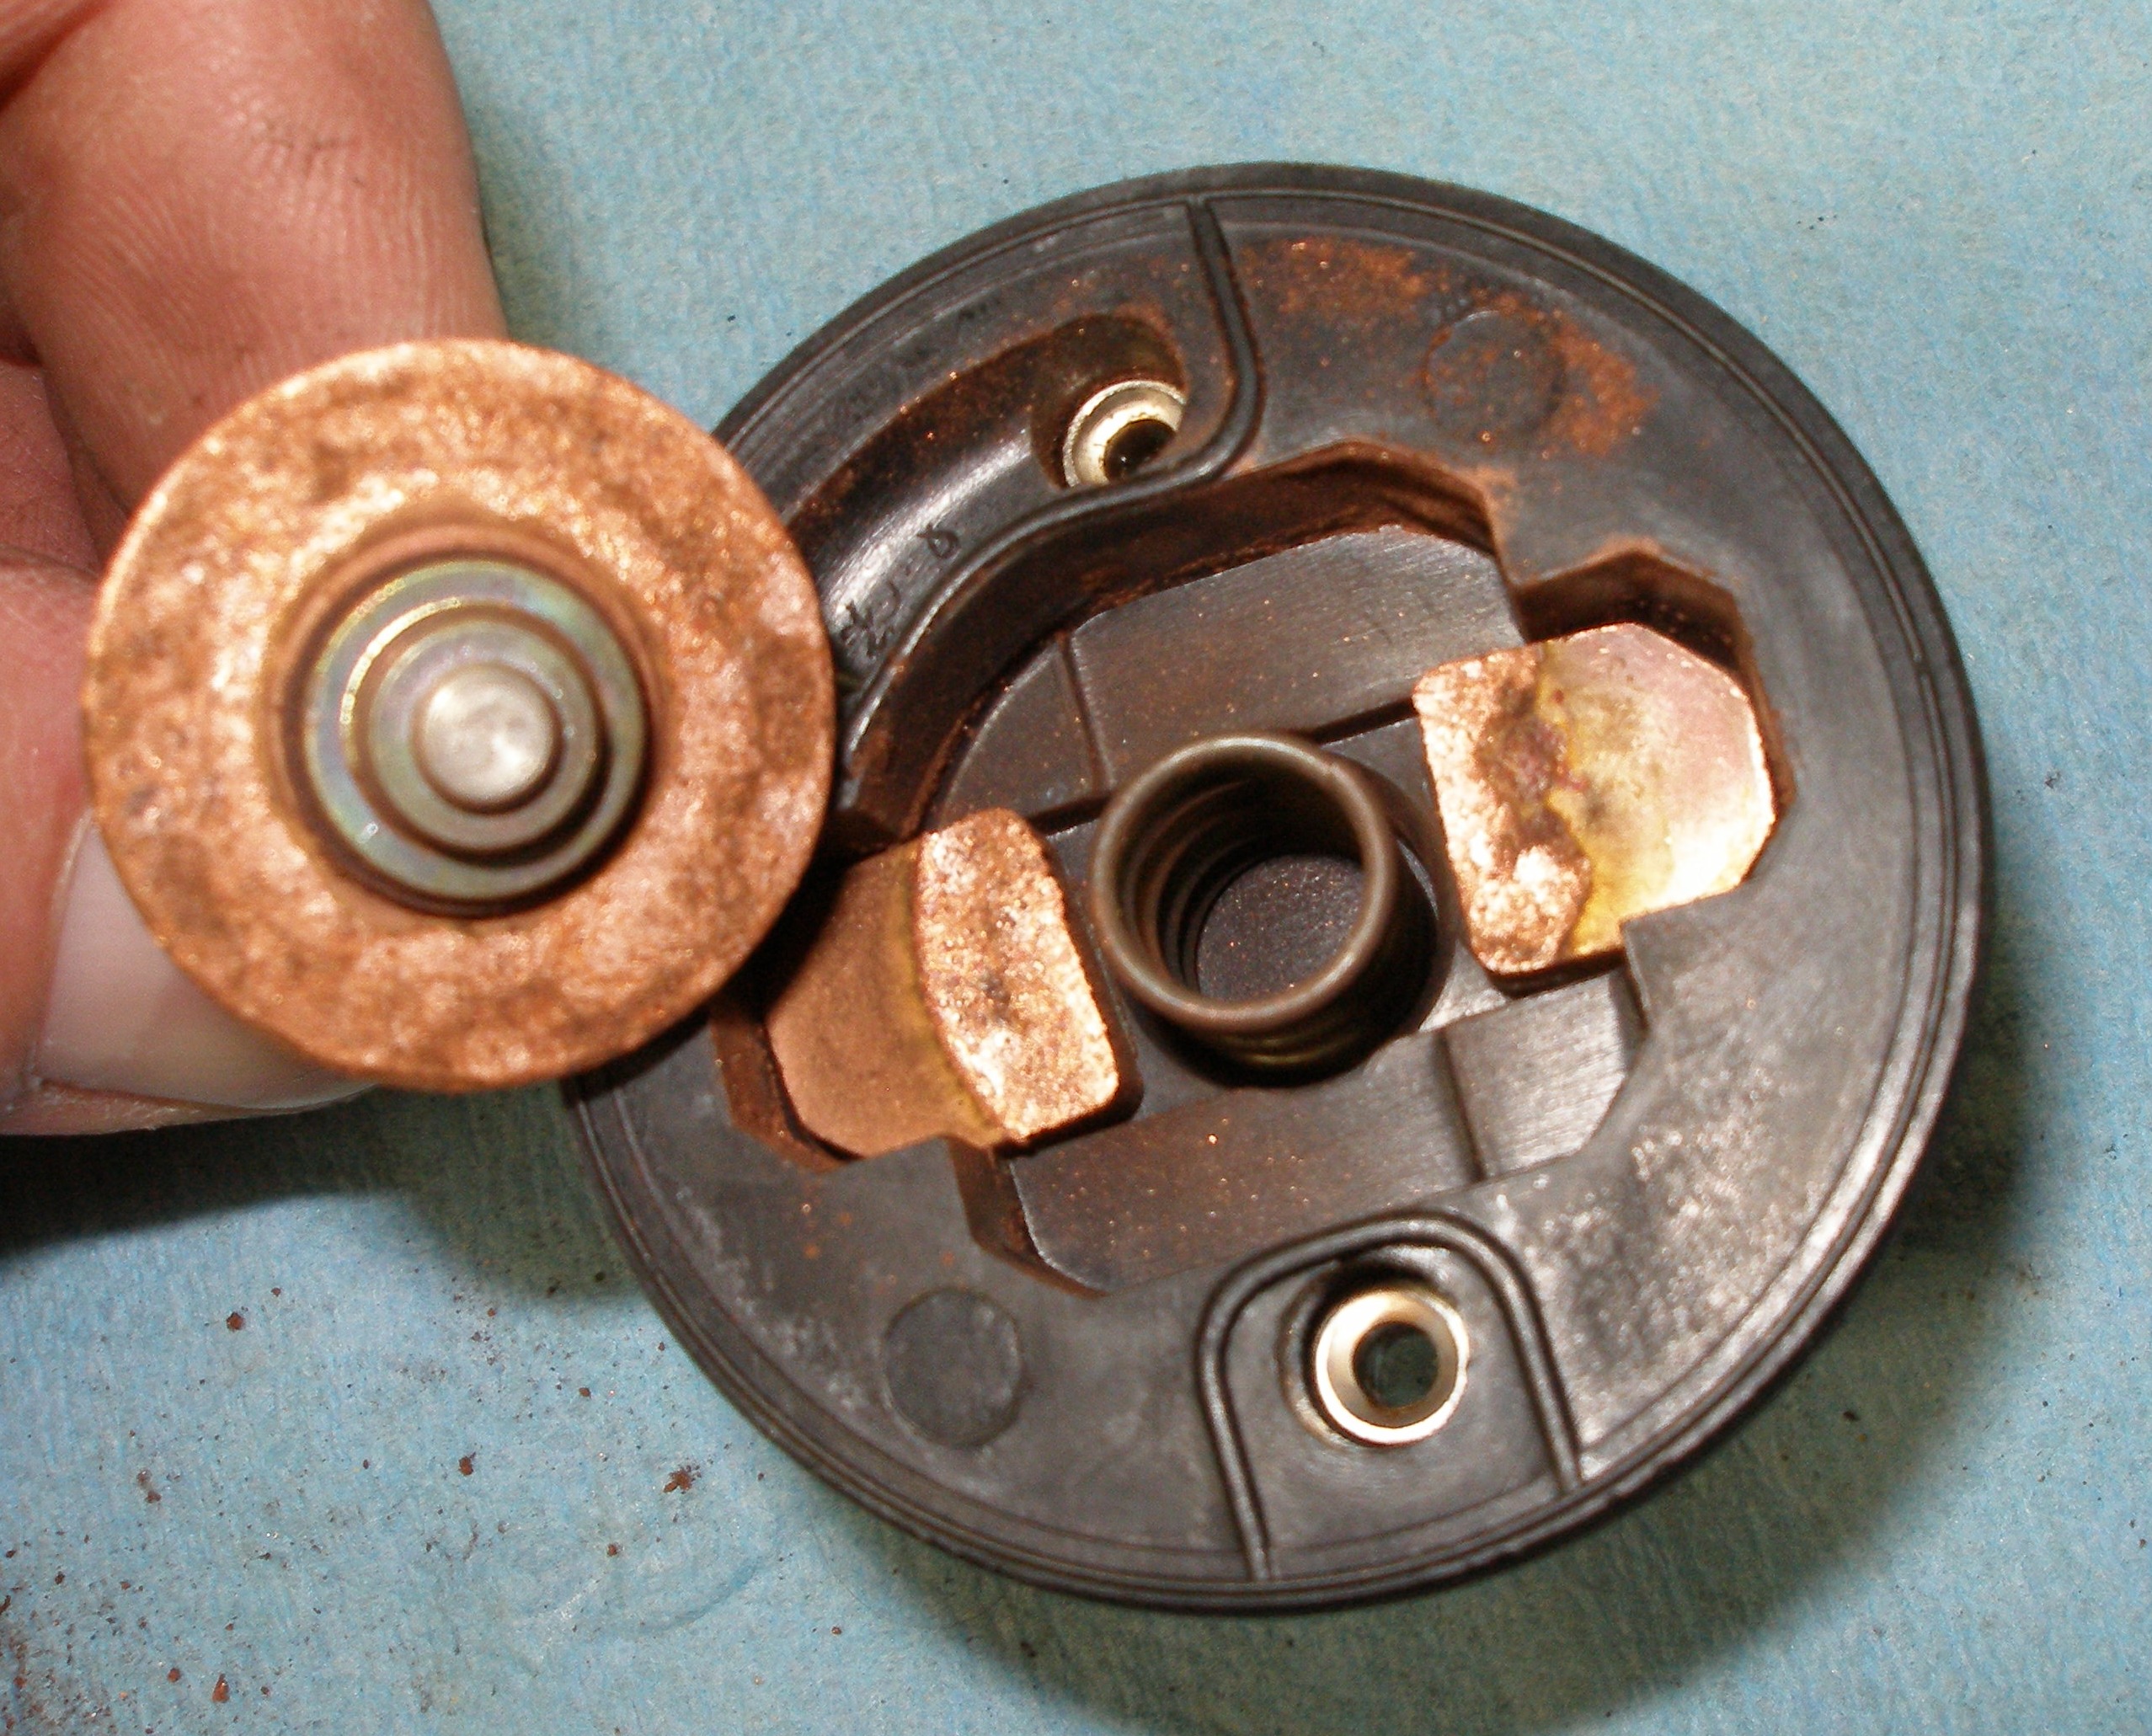
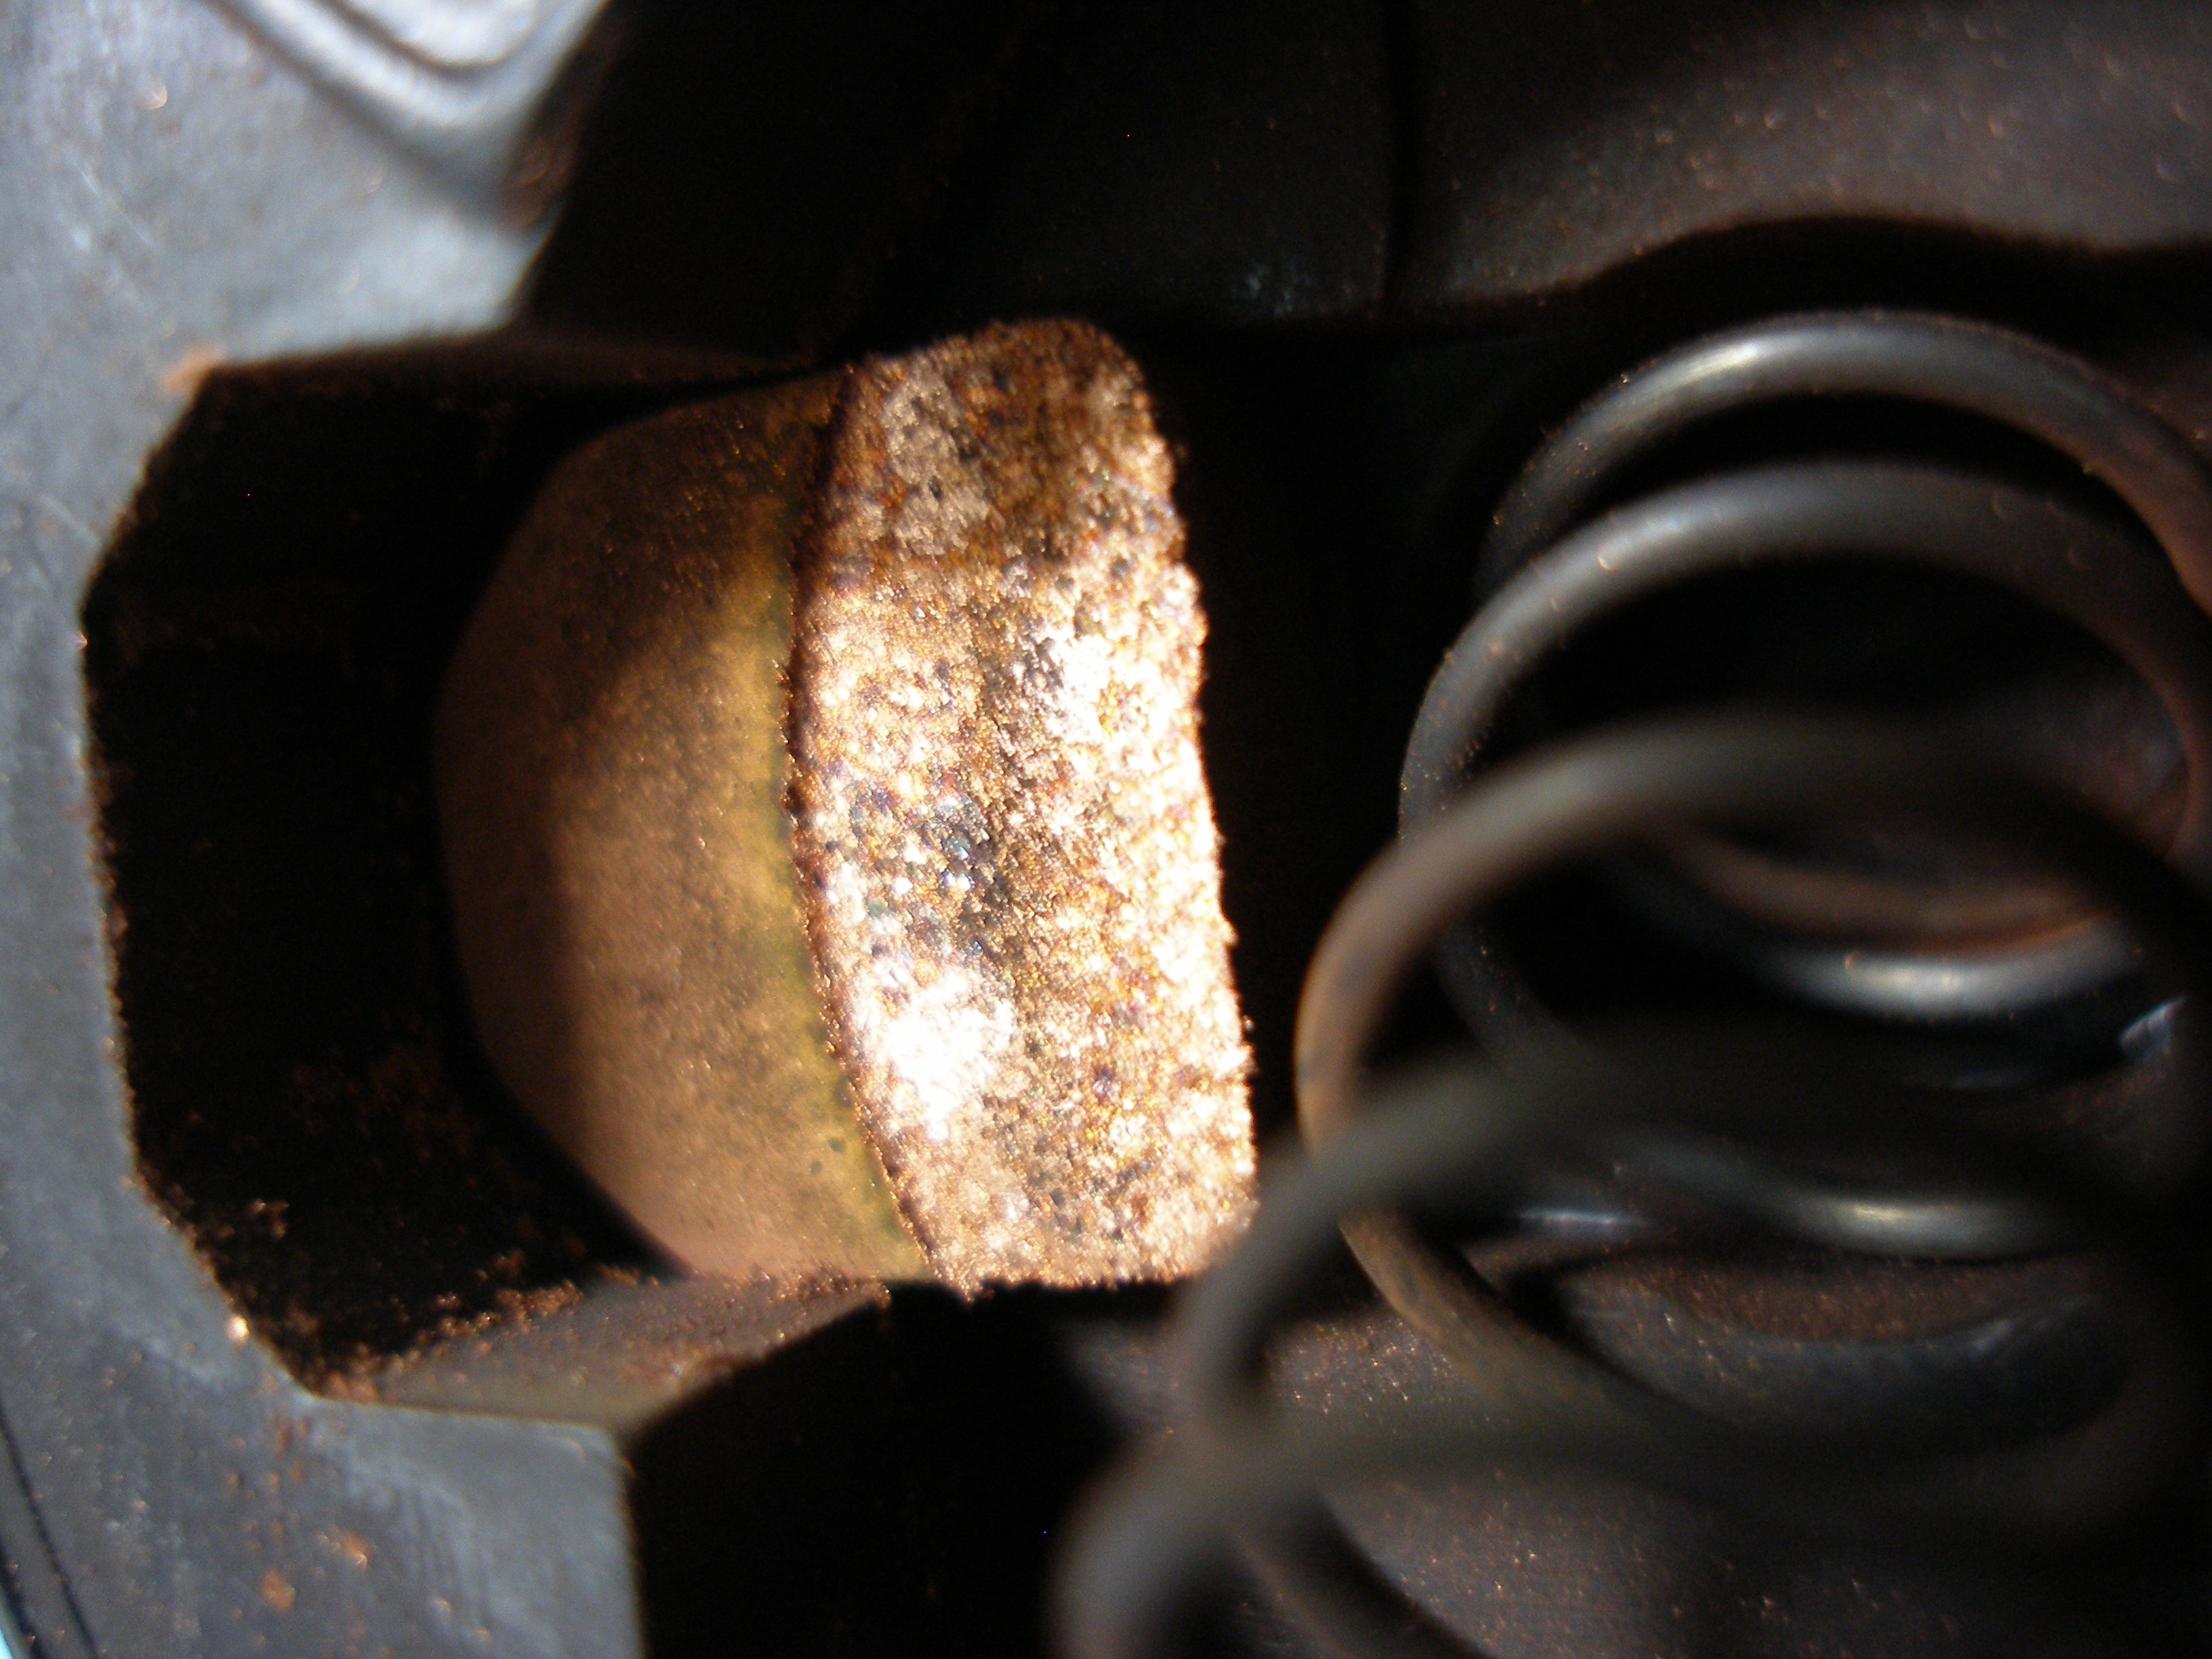
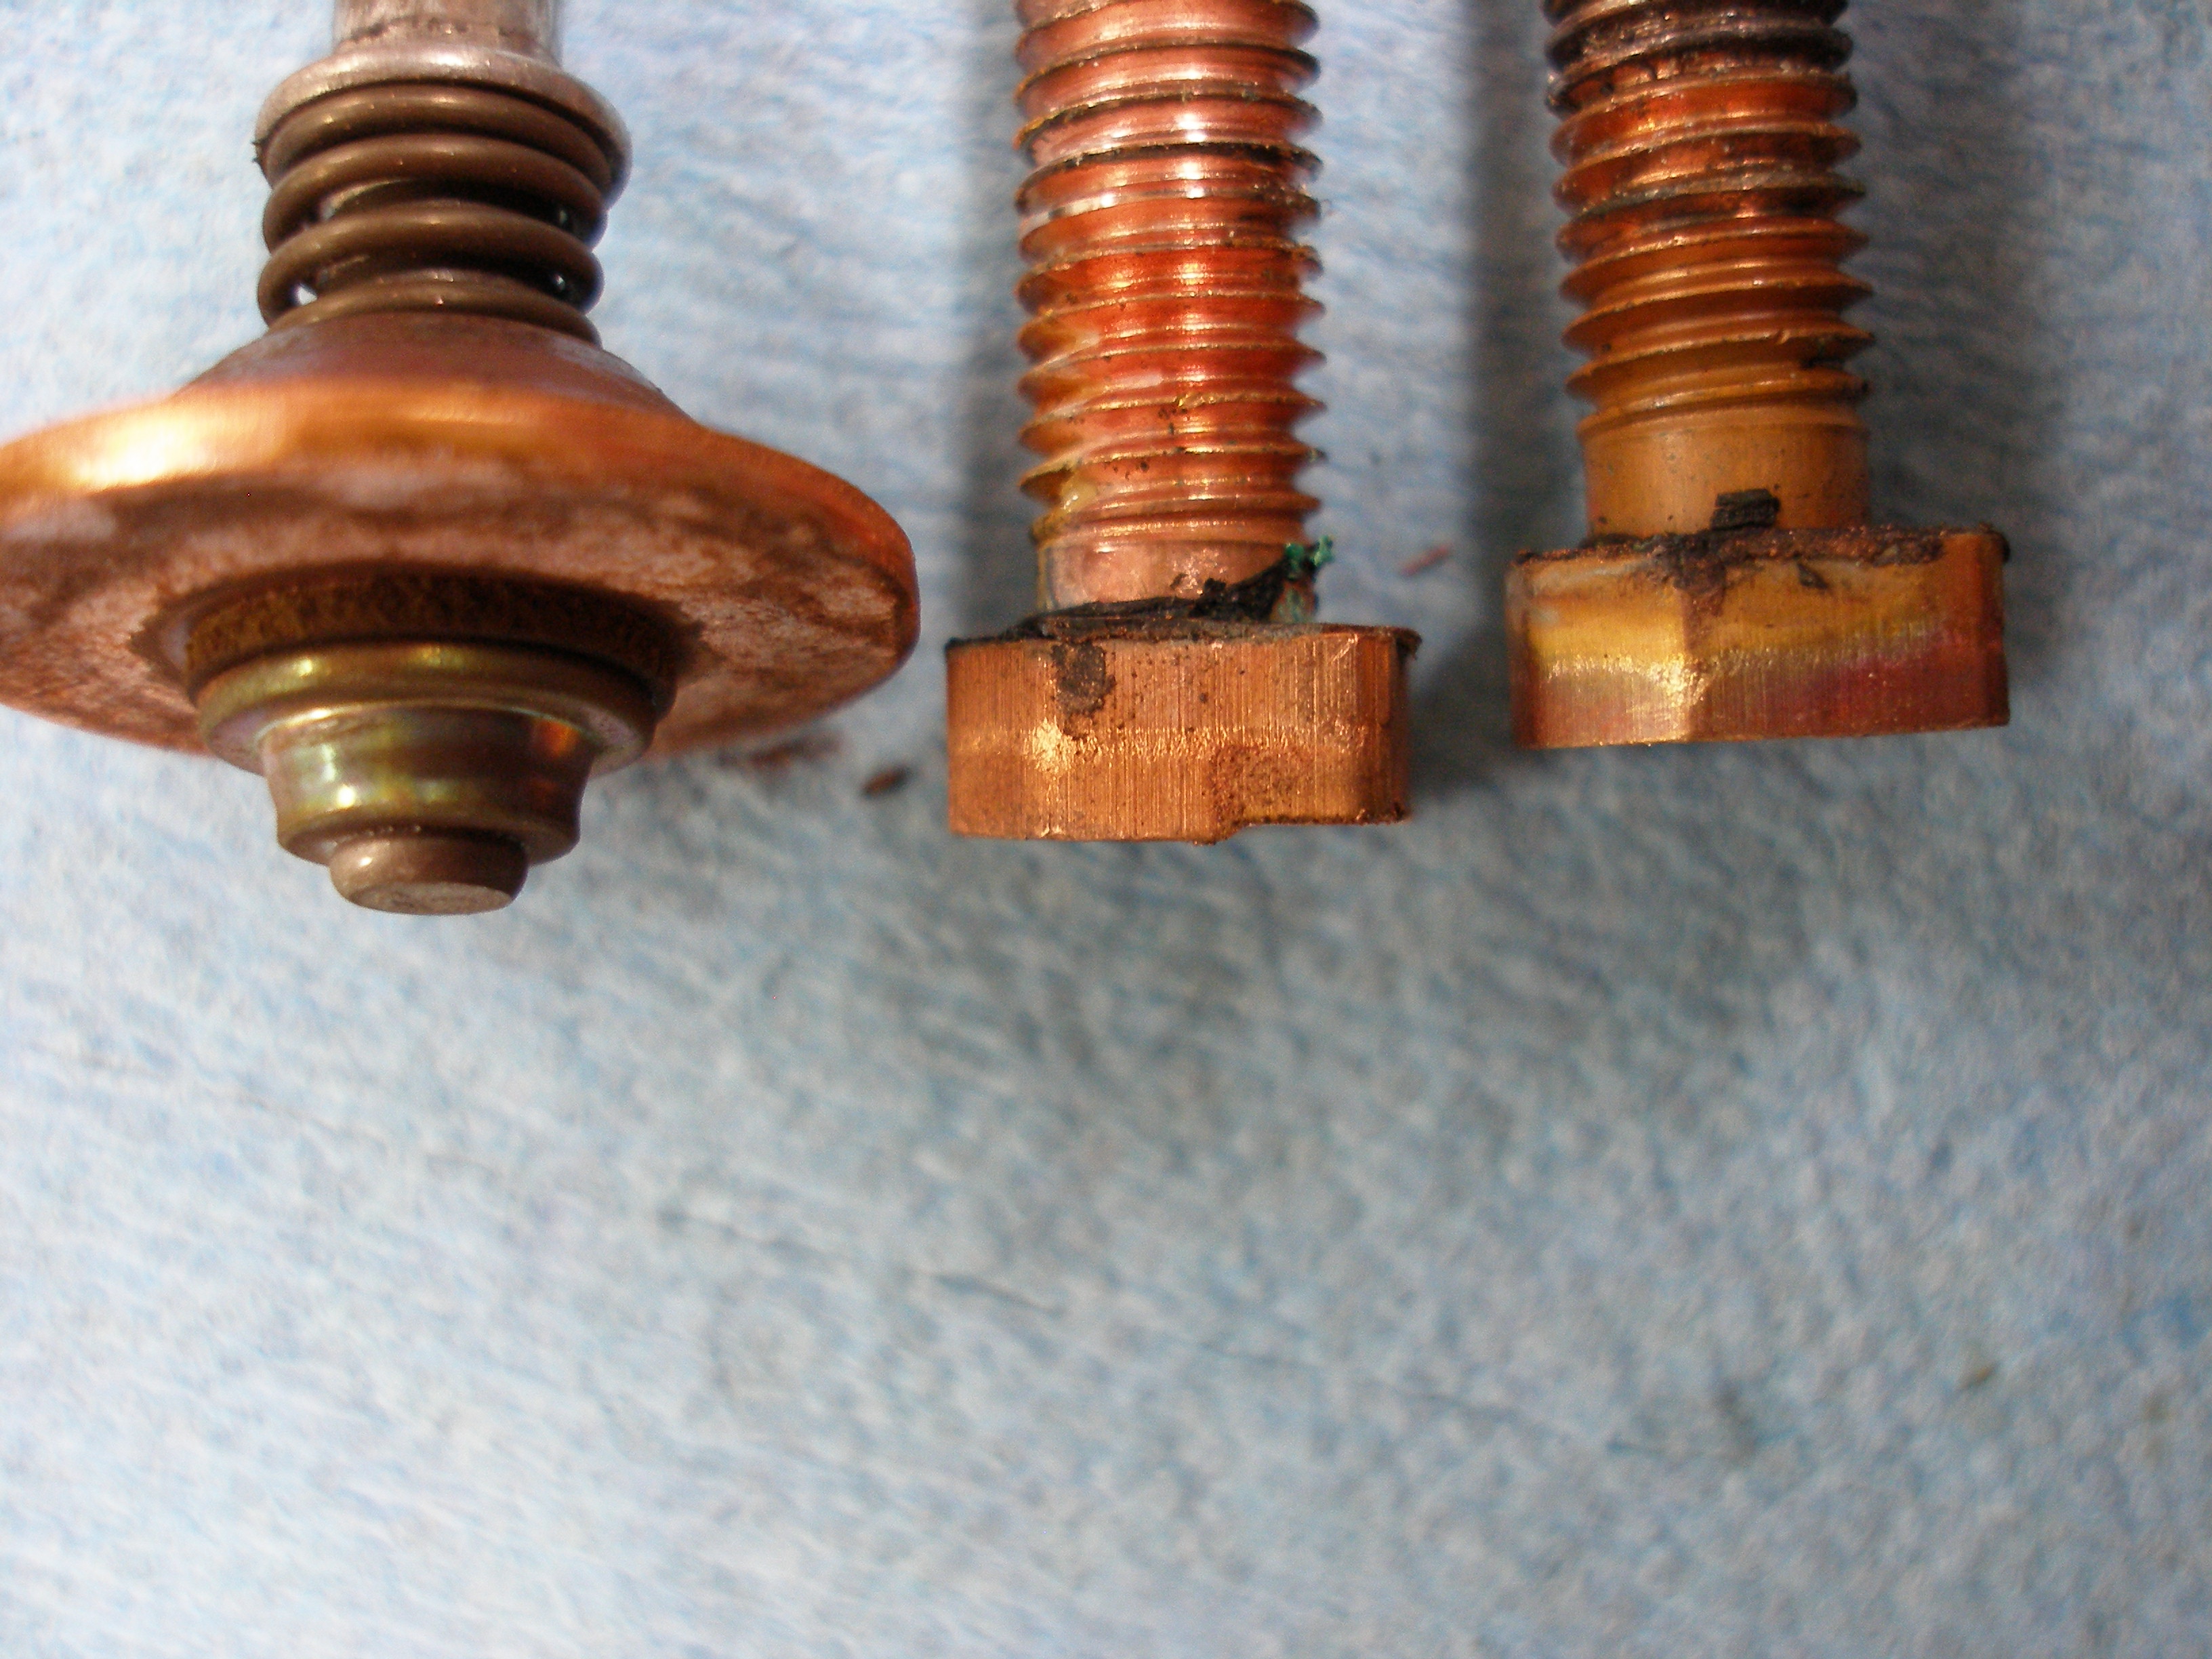
There is quite a bit of wear showing on that left contact, quite a "step".

